Introduction
In January, I relocated from Lisbon to London, which provided me with the opportunity to set up yet another needlessly complicated home network.
Since I have multiple IoT devices and home servers in the form of mini PCs and Raspberry Pis, I wanted to create a separate WiFi network dedicated to my guests.
This is usually really easy to do, so naturally I found ways to make it complicated.
In this post, I will briefly cover the basics of my home network, and then dive into how I built my guest WiFi experience, from streamlining the process of connecting to WiFi, to making sure that my guests (and my network) are appropriately protected from the perils of predatory ads and the murky depths of malicious content on the internet.
Table of Contents
Open Table of Contents
Why are you making a post about your Guest WiFi
Not that I need a justification to post whatever I want on my own blog, but even I am self-aware enough to conclude that you make a very good point.
As I mention in my homepage, I also use this blog as repository that I can look back on in the future if I need to replicate a specific configuration or process. If my documentation of said processes ends up being useful for someone else, even better.
The Network

Before diving into the cool stuff, let me briefly touch on what my network looks like.
Subnets and SSIDs
My ISP is a fairly common provider within the UK. There is nothing special about it. In fact, I am quite unsatisfied with the service, as I have experienced 7 outages since January at random times during the day. Thankfully, those seem to have become more sporadic after I kept calling support and claiming my compensation.
I do not use the provided Modem/Router combo - commonly referred to as ‘hub’ - because it has very limited controls in the way of configuring your own network. I set it to act solely as a modem.
My router is a UniFi Dream Router 7. It also acts as my main switch as it sits in my home office where I also have my home servers. I have a soft spot for Ubiquiti since it is what got me into networking in the first place. Furthermore, my home network in Lisbon is also UniFi, so I have experience with the ecosystem.
The rest of my network is comprised of a few gigabit switches, MoCa adapters, and a UniFi U7 Lite access point.
Network Segregation
I have 3 separate VLANs:

- Default - my main network
- Guest Network - the network for my Guest WiFi
- IoT Lumon - the network I connect my IoT devices to, to keep them isolated from my main network
Naturally, I also have 3 corresponding WiFi SSIDs for each network:
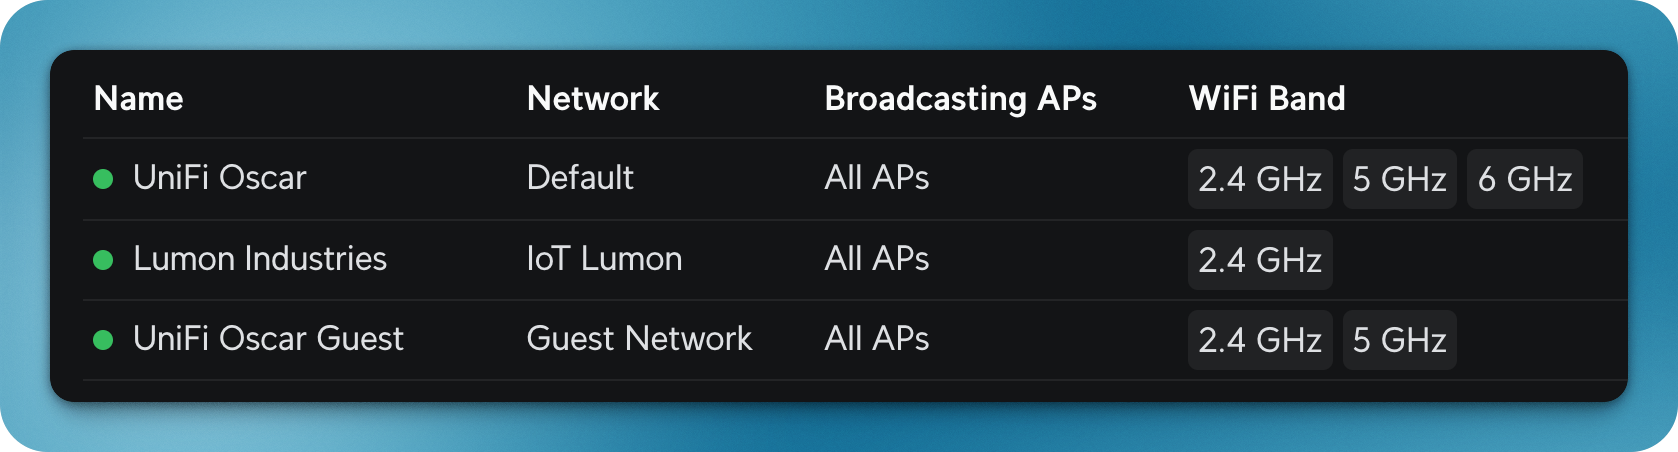
I have firewall rules in place to keep connections adequately segregated.
The Guest Experience
OK, so how do your guests connect to your WiFi?
If you have a normal network you probably just share your WiFI SSID and Password with them, right?
Maybe you have it printed on a piece of paper stuck onto the hub provided by your ISP?
Being a fan of versatility, I sought the easiest way for my guests to connect to my Guest WiFi.
We’re going to explore 3 different methods I experimented with:
- NFC
- QR Code
- Landing Page
In the following sections I will dive deeper into how I implemented each method.
NFC
NFC (Near Field Communication) is omni-present. We use it everyday for contactless payments, opening doors, and more.
Well, given that most smartphones are equipped with NFC antennas, I aimed to let my guests connect to the Guest WiFi by a simple tap, much like making a contactless payment.
I found out about NFC tags, these very inexpensive sticky plastic circles with NFC circuitry inside that can store small bits of information in memory.
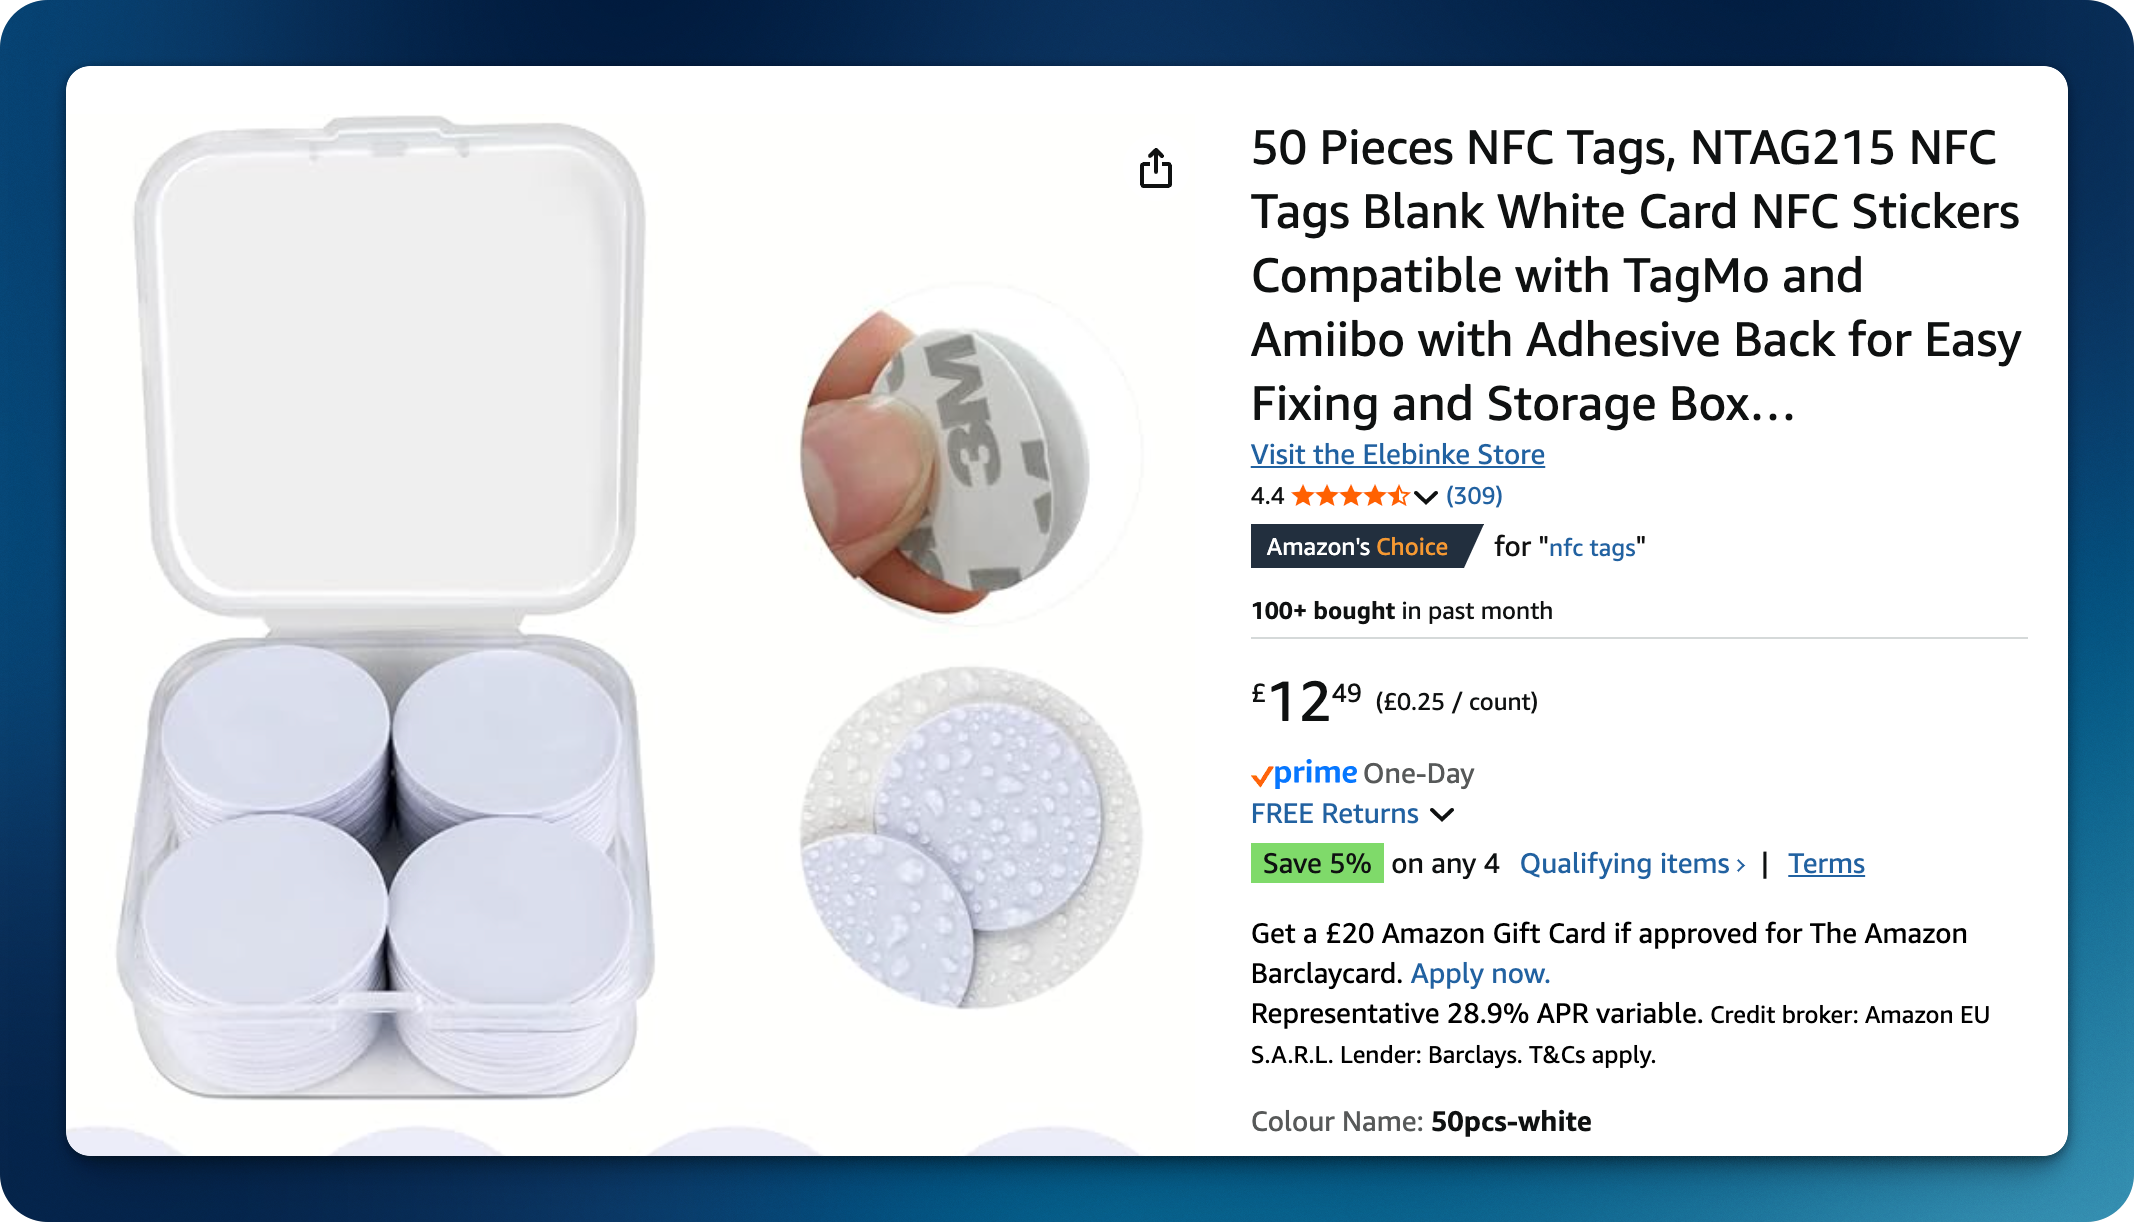
These tags are passive, meaning that they rely on the energy from the NFC reader to work. Once data is written to them, it remains there permanently, unless overwritten.
Once I got my pack delivered to me by Amazon, I got to work.
Writing to NFC tags
Naturally, you will need to write data to the NFC tag in order to configure it to respond to an NFC reader, such as a phone.
However, you can also use a phone to write data to an NFC tag, which I found to be not only the most convenient but also the only practical method I had access to.
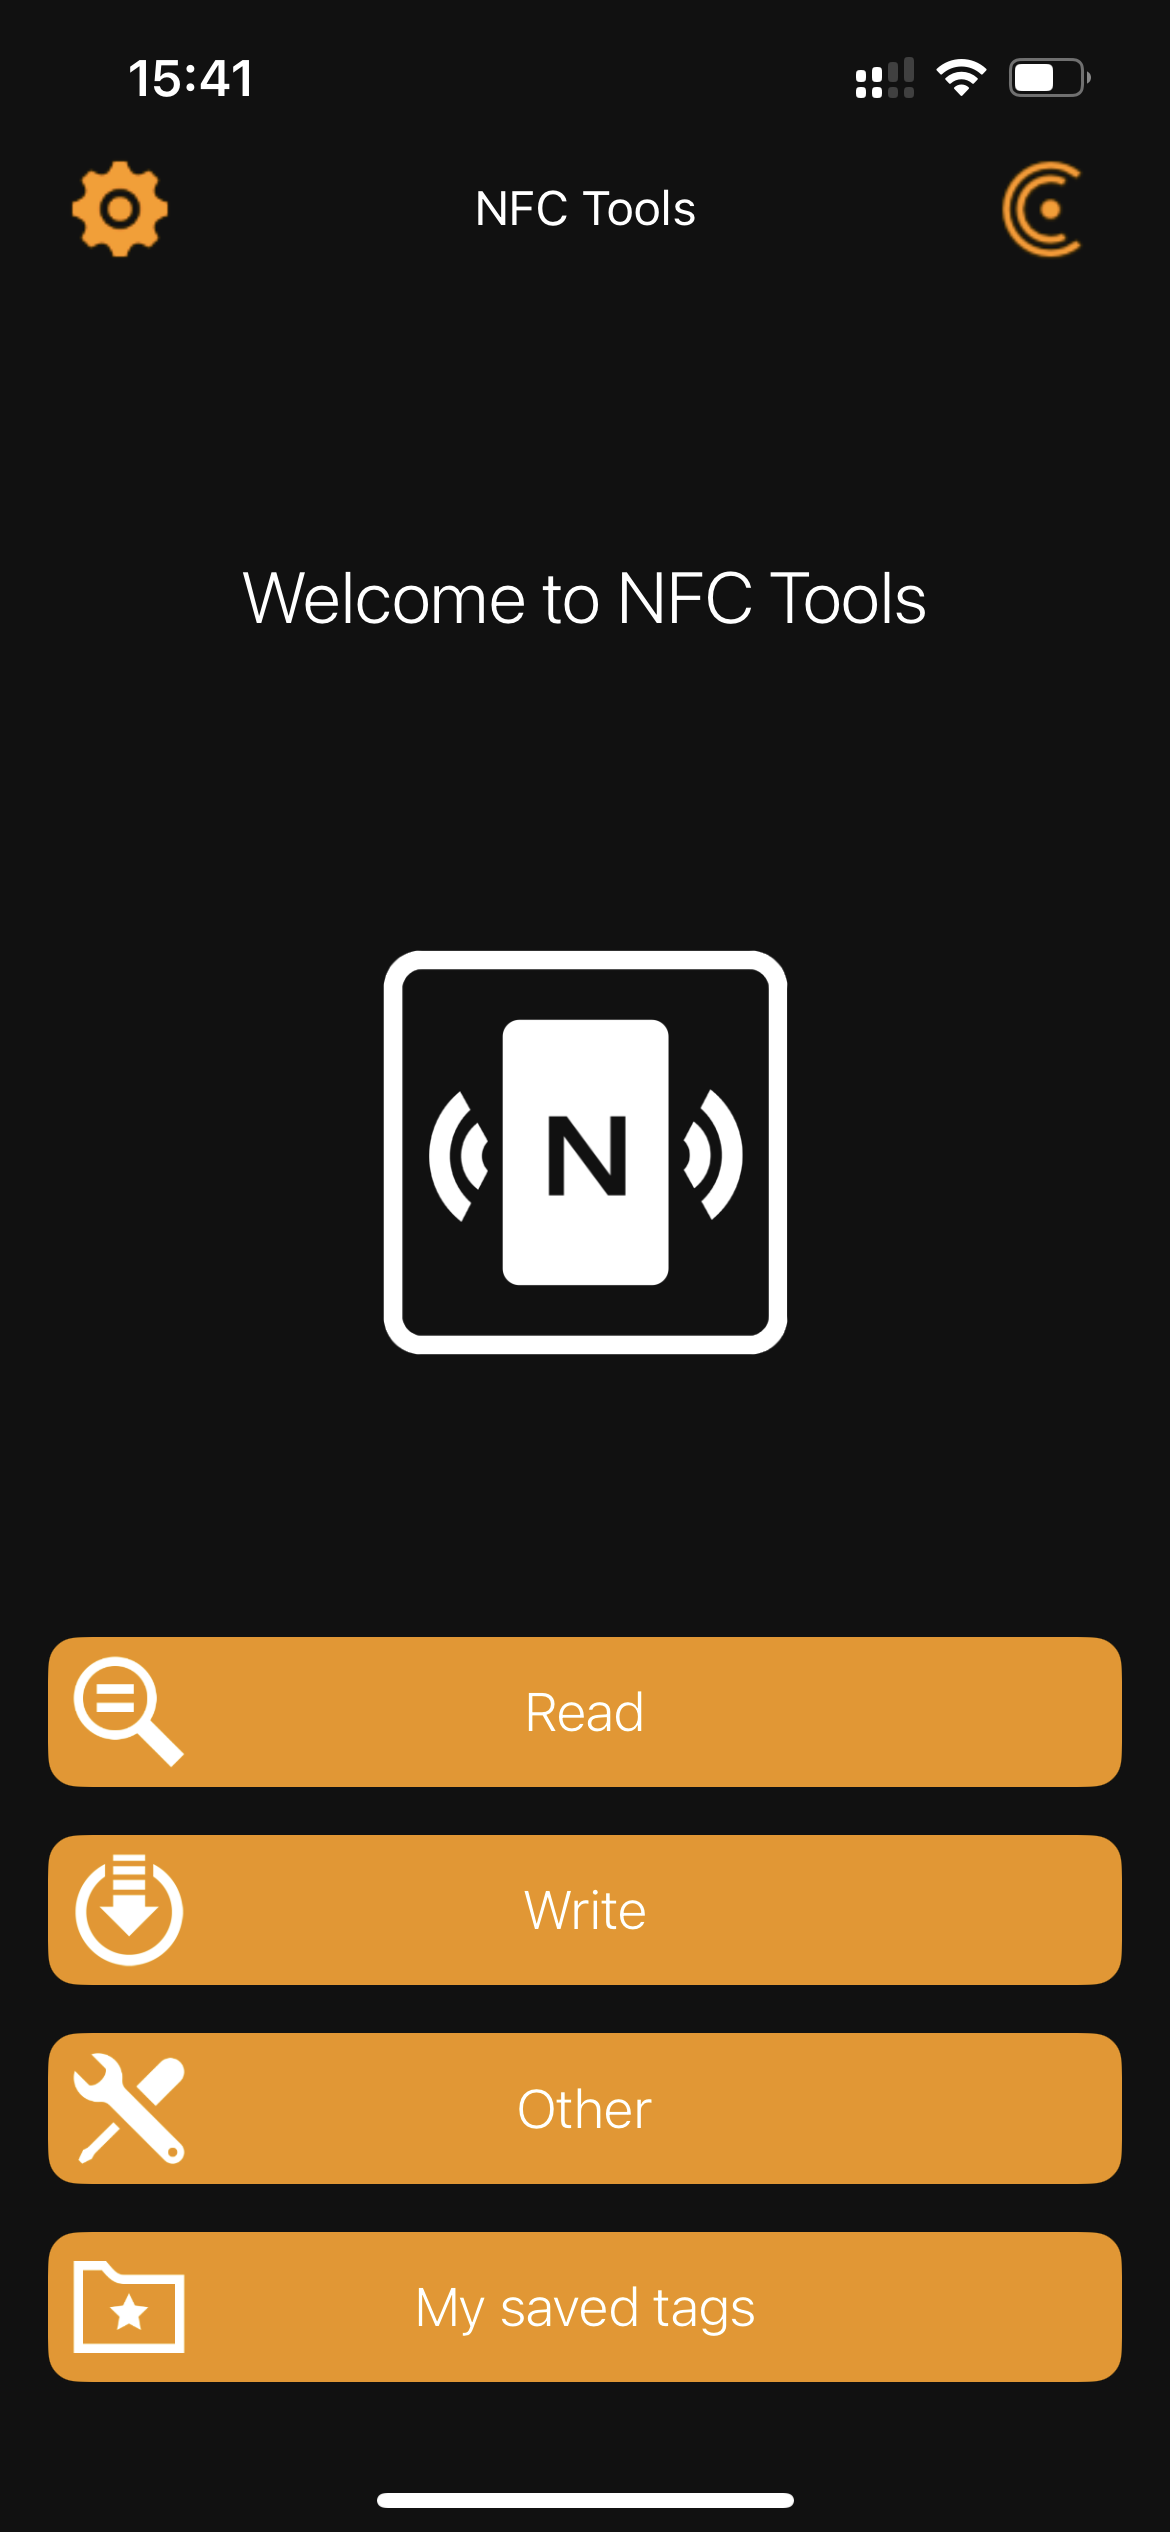
I used an iOS app called NFC Tools. There’s also an Android version of this app on Google Play.
This app allows you read, but most importantly, write to an NFC tag using your phone.
Before using the app you need take note of your Guest WiFi’s SSID, Password and Security Type (WPA, WPA2, etc). Once that’s done, you will just need to enter that data into the app.
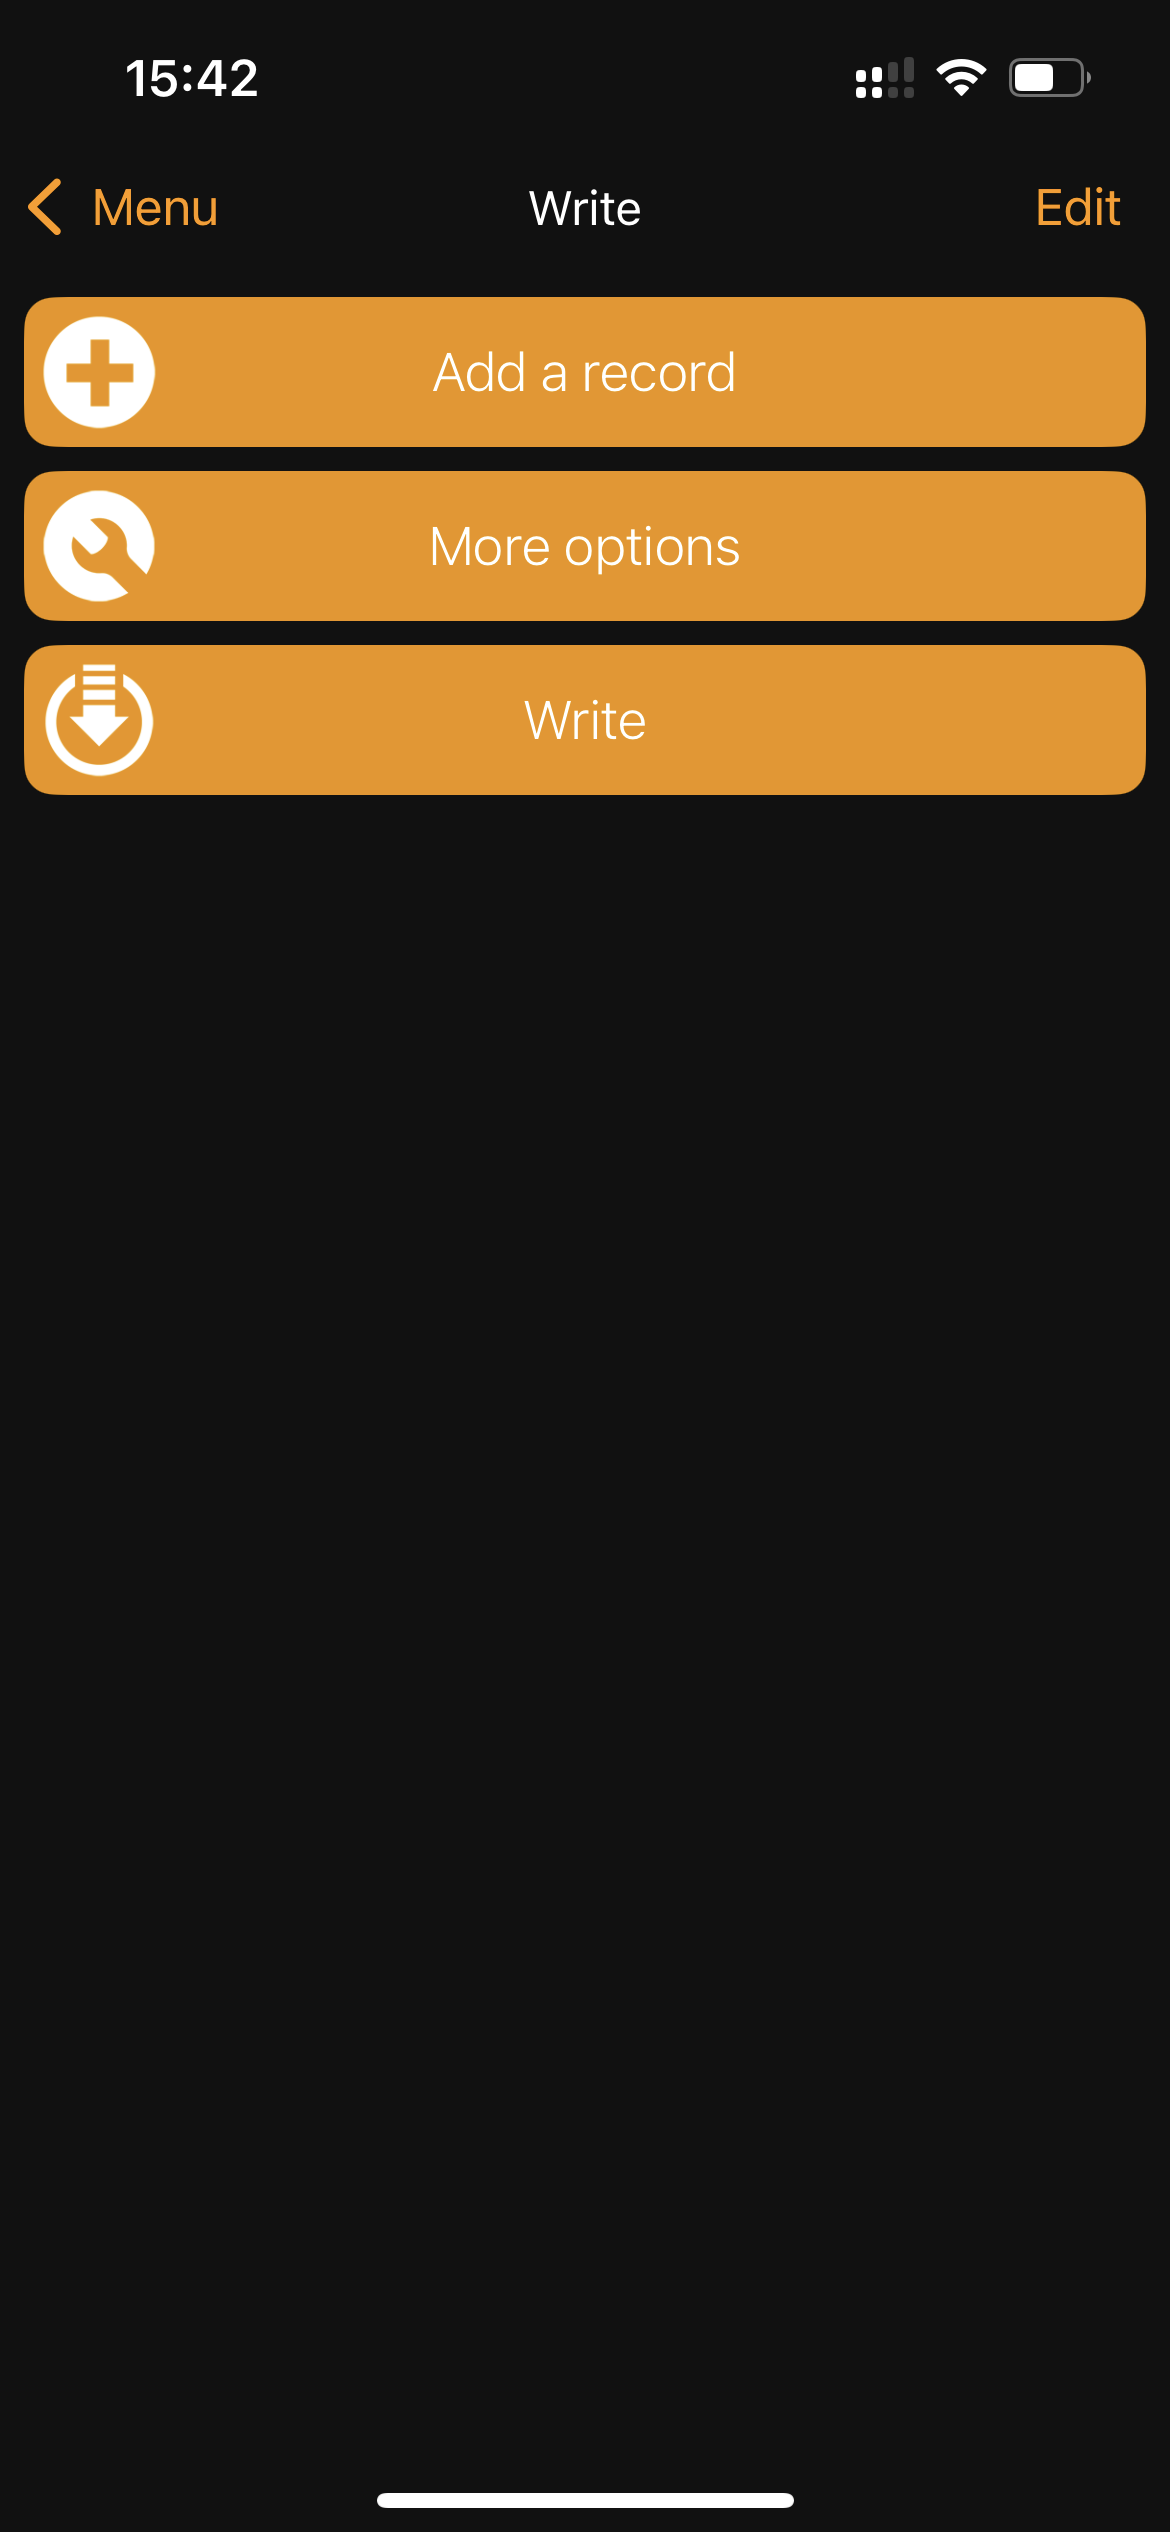
It’s as easy as opening the app, pressing ‘Write’:
Then, press ‘Add a record’:
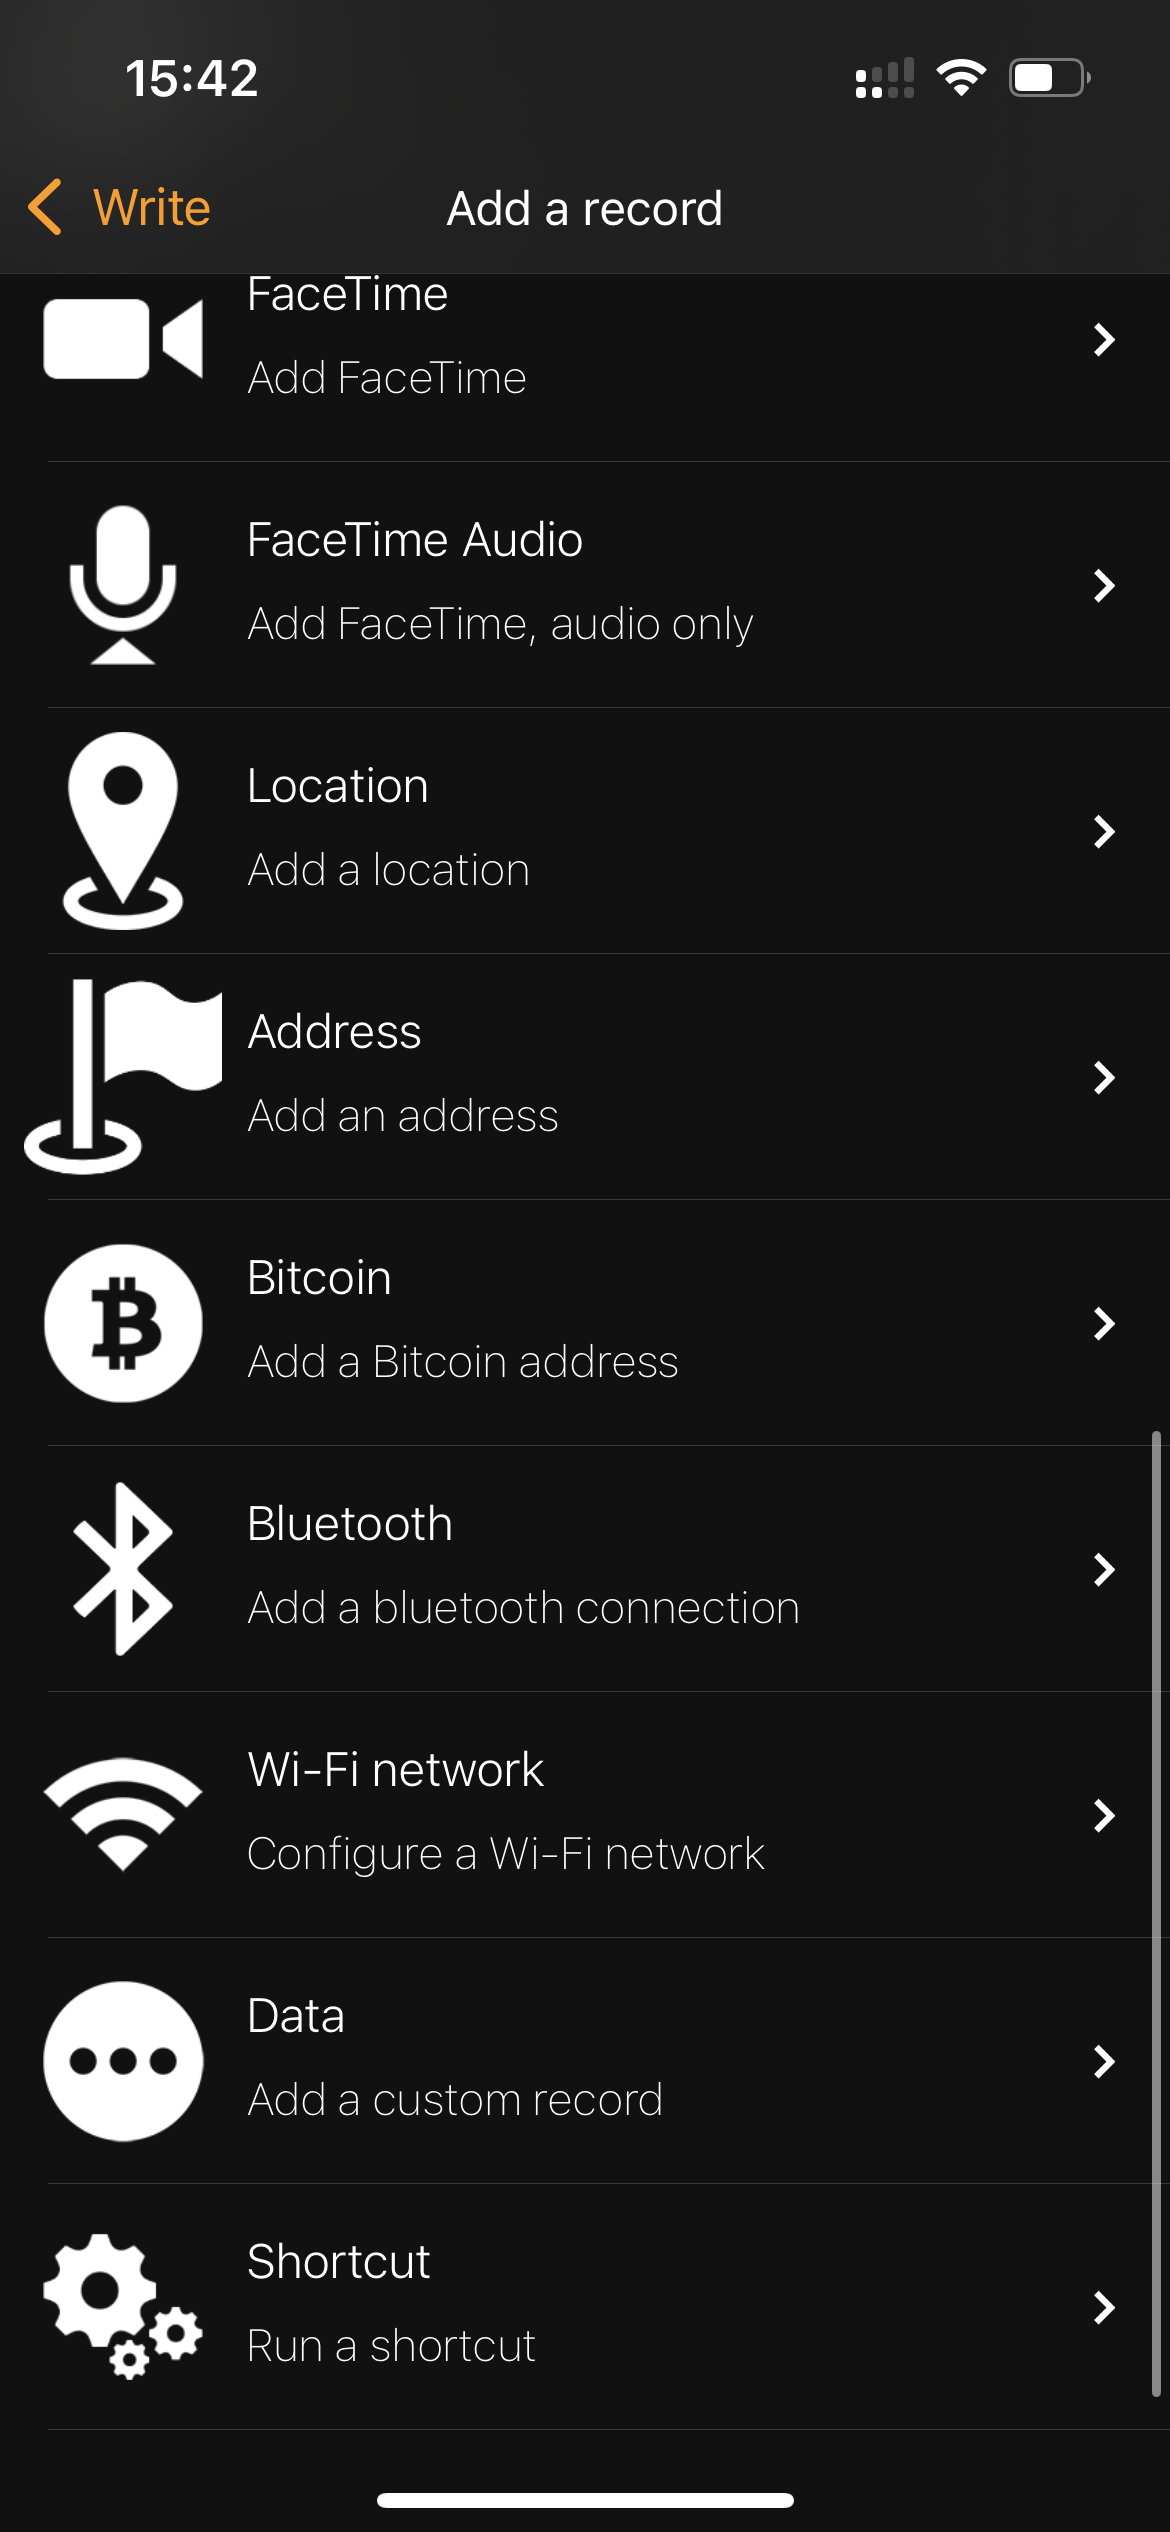
Select ‘Wi-Fi network’:
and enter your Guest WiFi settings:
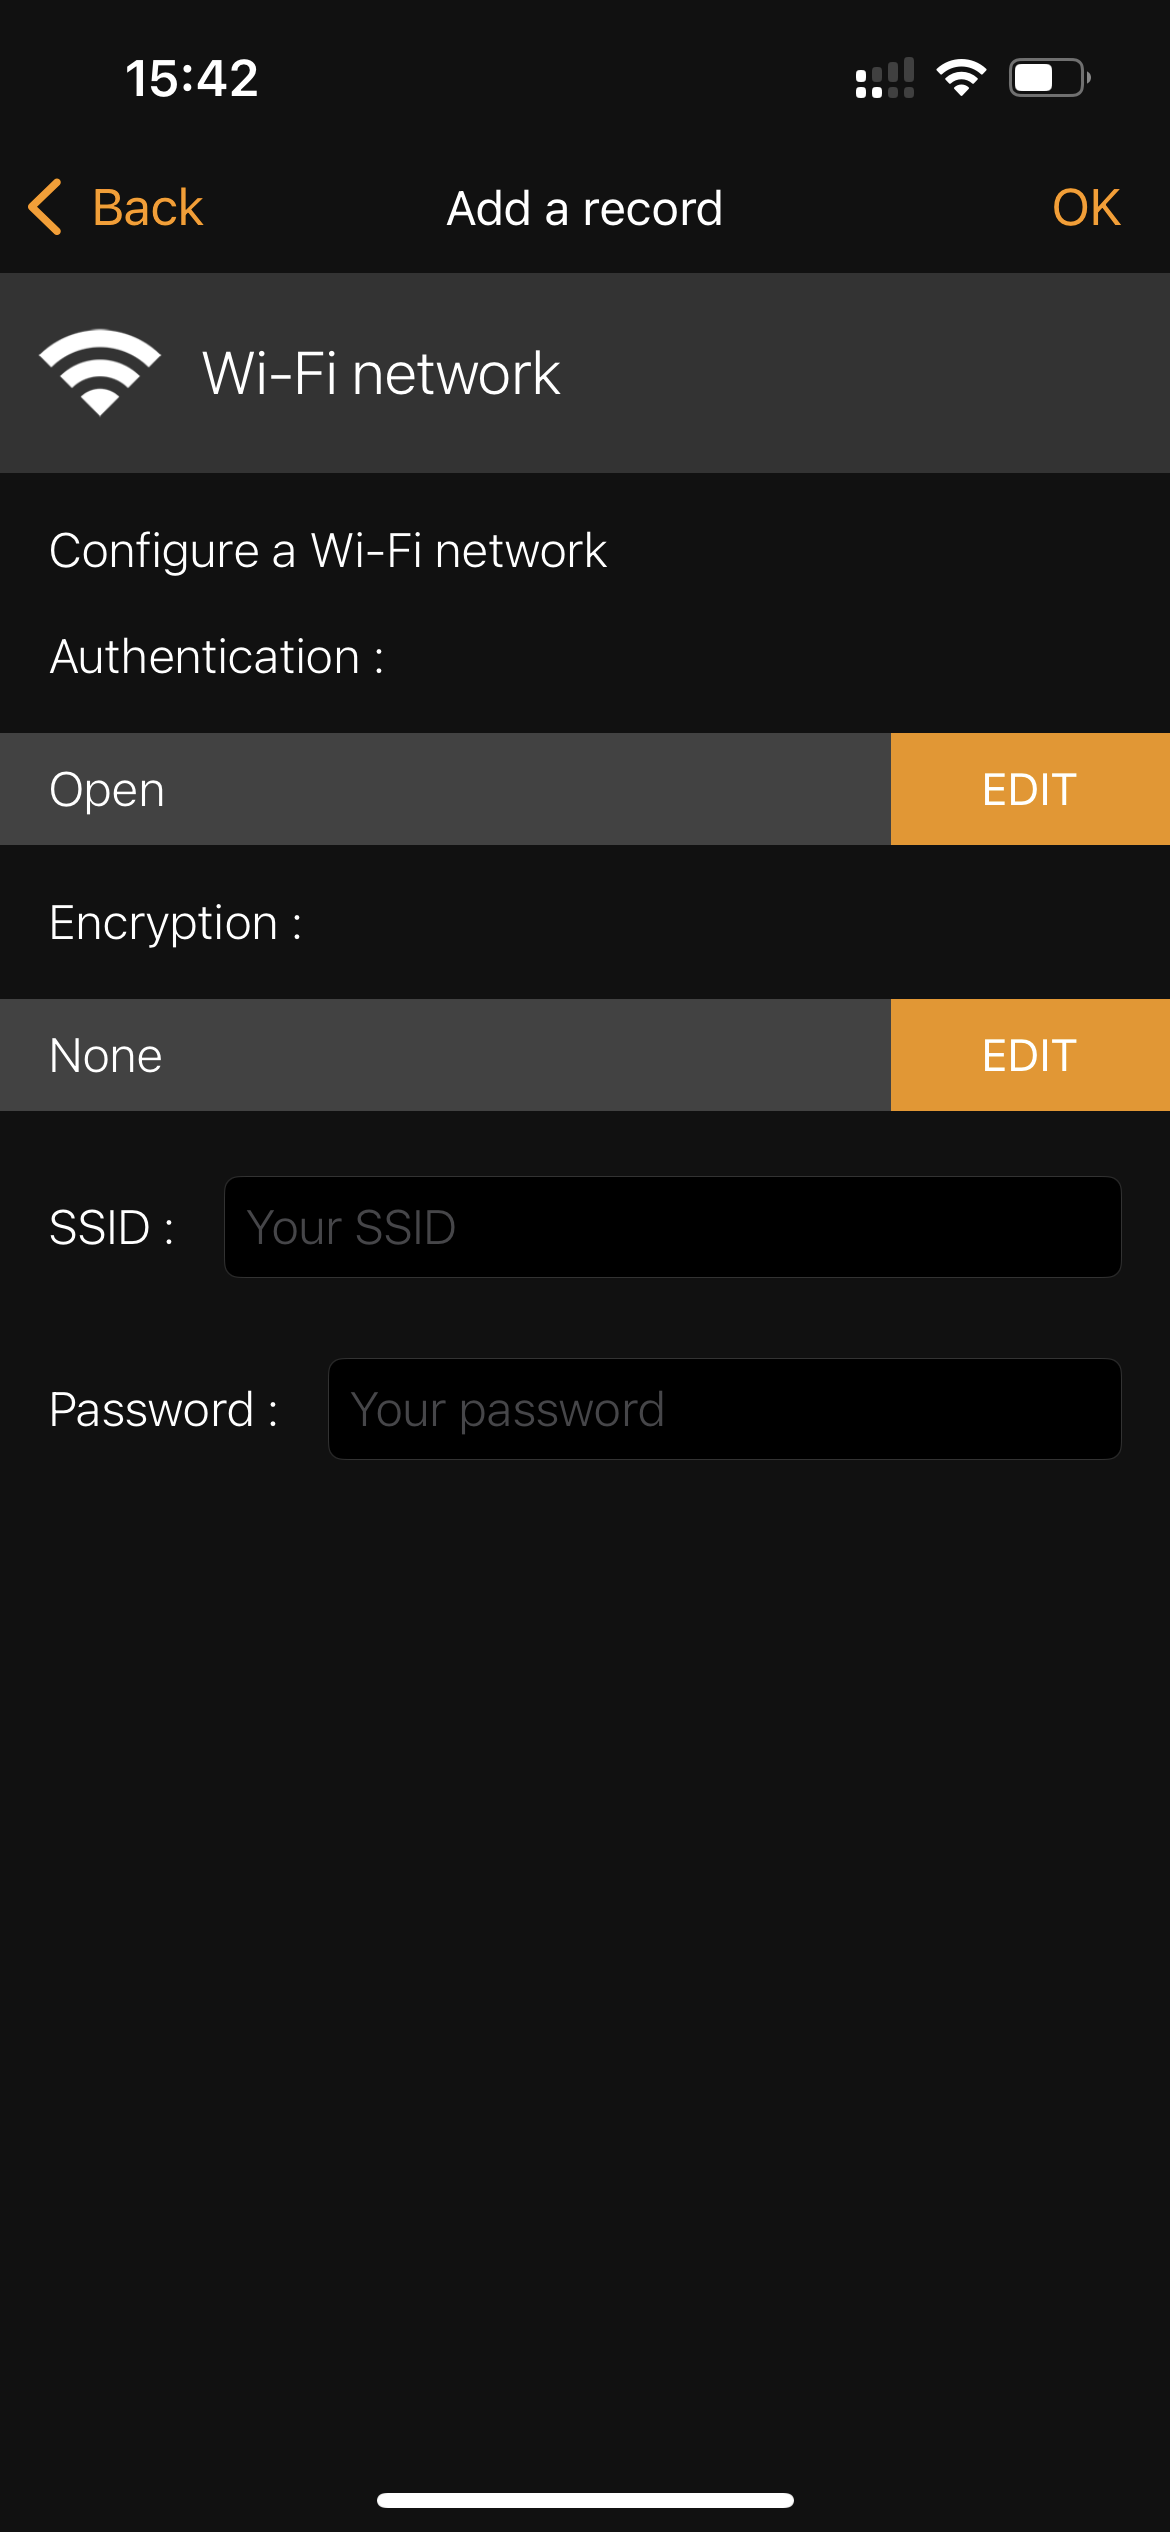
Once that’s done, take one of your blank NFC tags, press it next to the NFC chip of your smartphone (on iPhones it sits next to the cameras), and tap on ‘Write’.
That’s it!
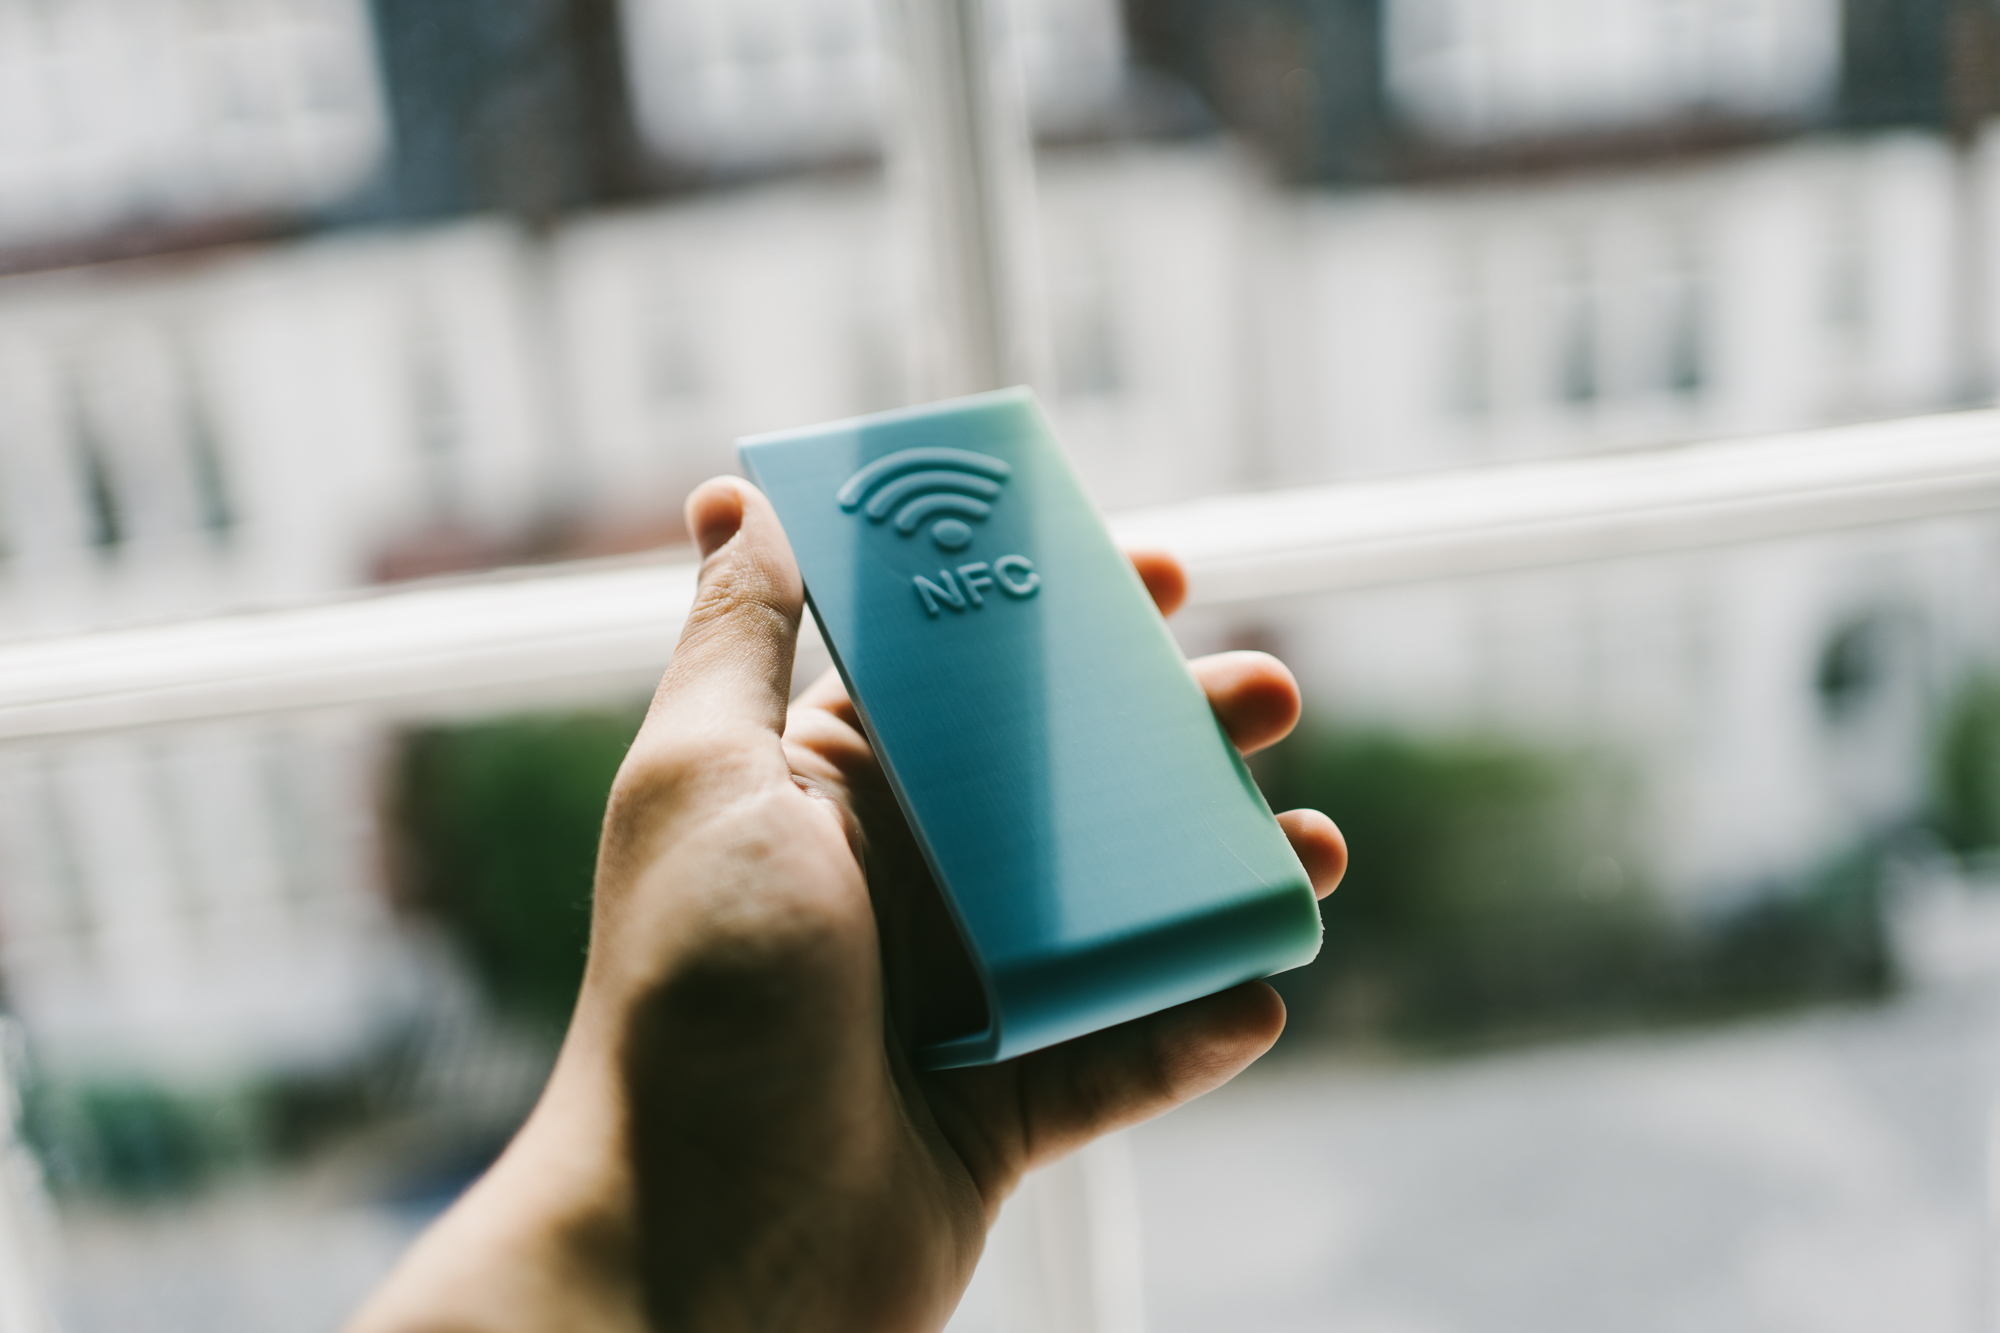
Deploying the NFC tag
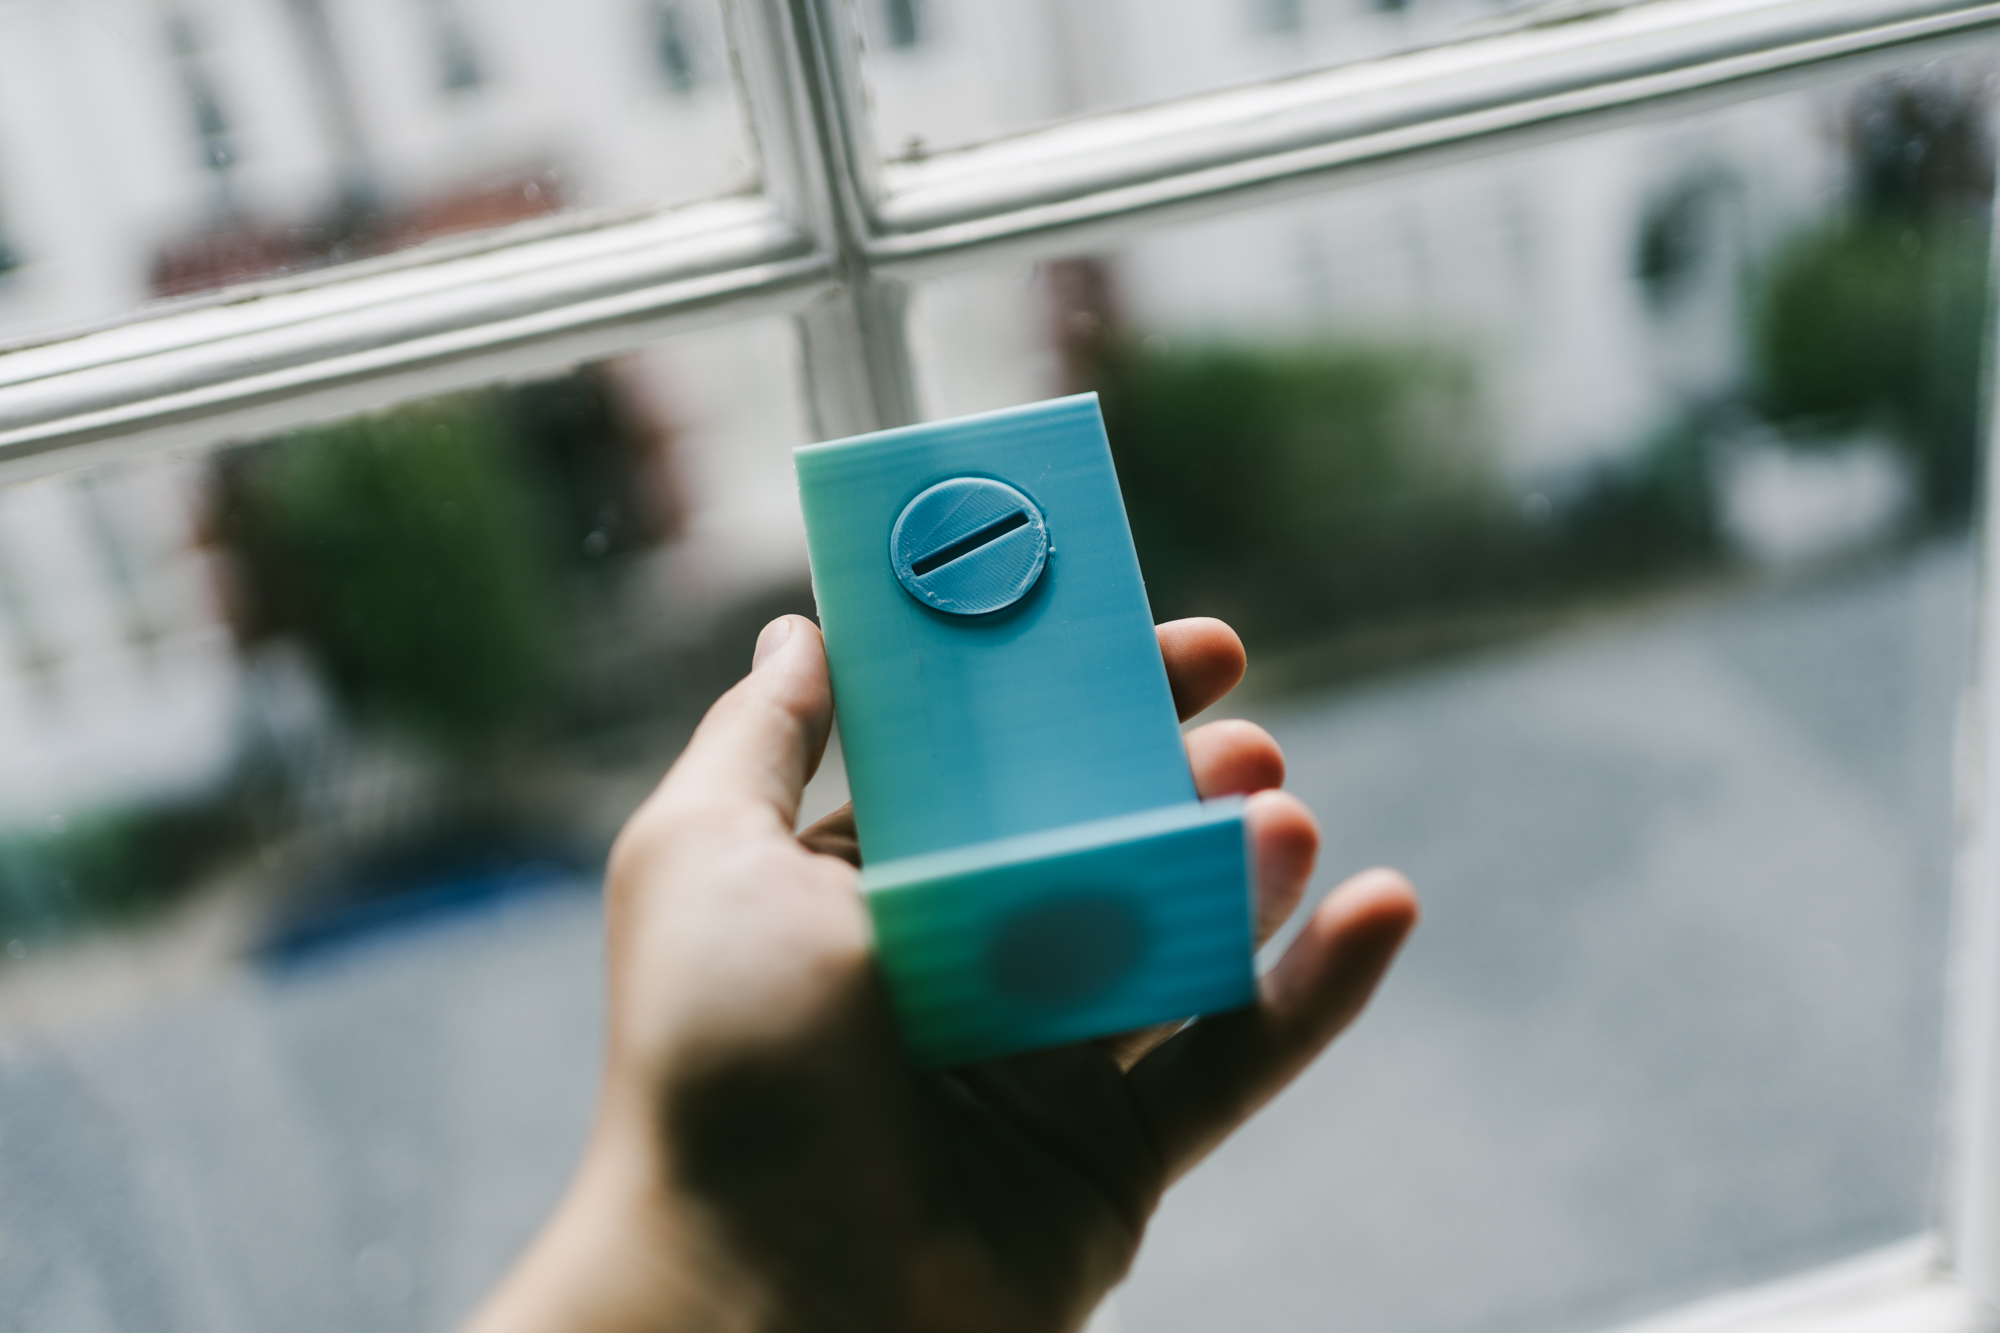
Now you just need to find a suitable surface to stick your NFC tag onto. In my case, I 3D printed this plastic stand, pictured at the beginning of this section. It has a small circular cavity where I inserted my NFC tag.
And it works extremely well… unless you are an iPhone user.
Ah yes.
As it turns out, this functionality only works with Android phones. iPhones can’t read NFC tags that prompt a device to join a WiFi network. Ironic, isn’t it? I can use an iPhone to configure an NFC tag that only works with Android phones.
This led me on a path to finding an alternative - equally as convenient - method for my guests to join my Guest WiFi.
QR Code
QR codes are a very good candidate for a convenient way to join a WiFi network. They are extremely simple to generate, can be read by any modern day smartphone (yes, including iPhones) and, much like NFC tags, you can physically place them wherever you like.
Generating the QR Code
This was simple. There are multiple online QR code generators that you can use. I used https://qifi.org/. It’s open source and simple to use.
If you prefer to generate a QR Code locally, you can use tools like Qrencode which you can interact with using the terminal.
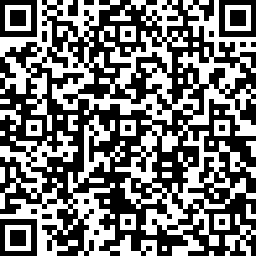
As before, you will just need your SSID, Password and Security Type. Feed them into your generator and get a QR code:
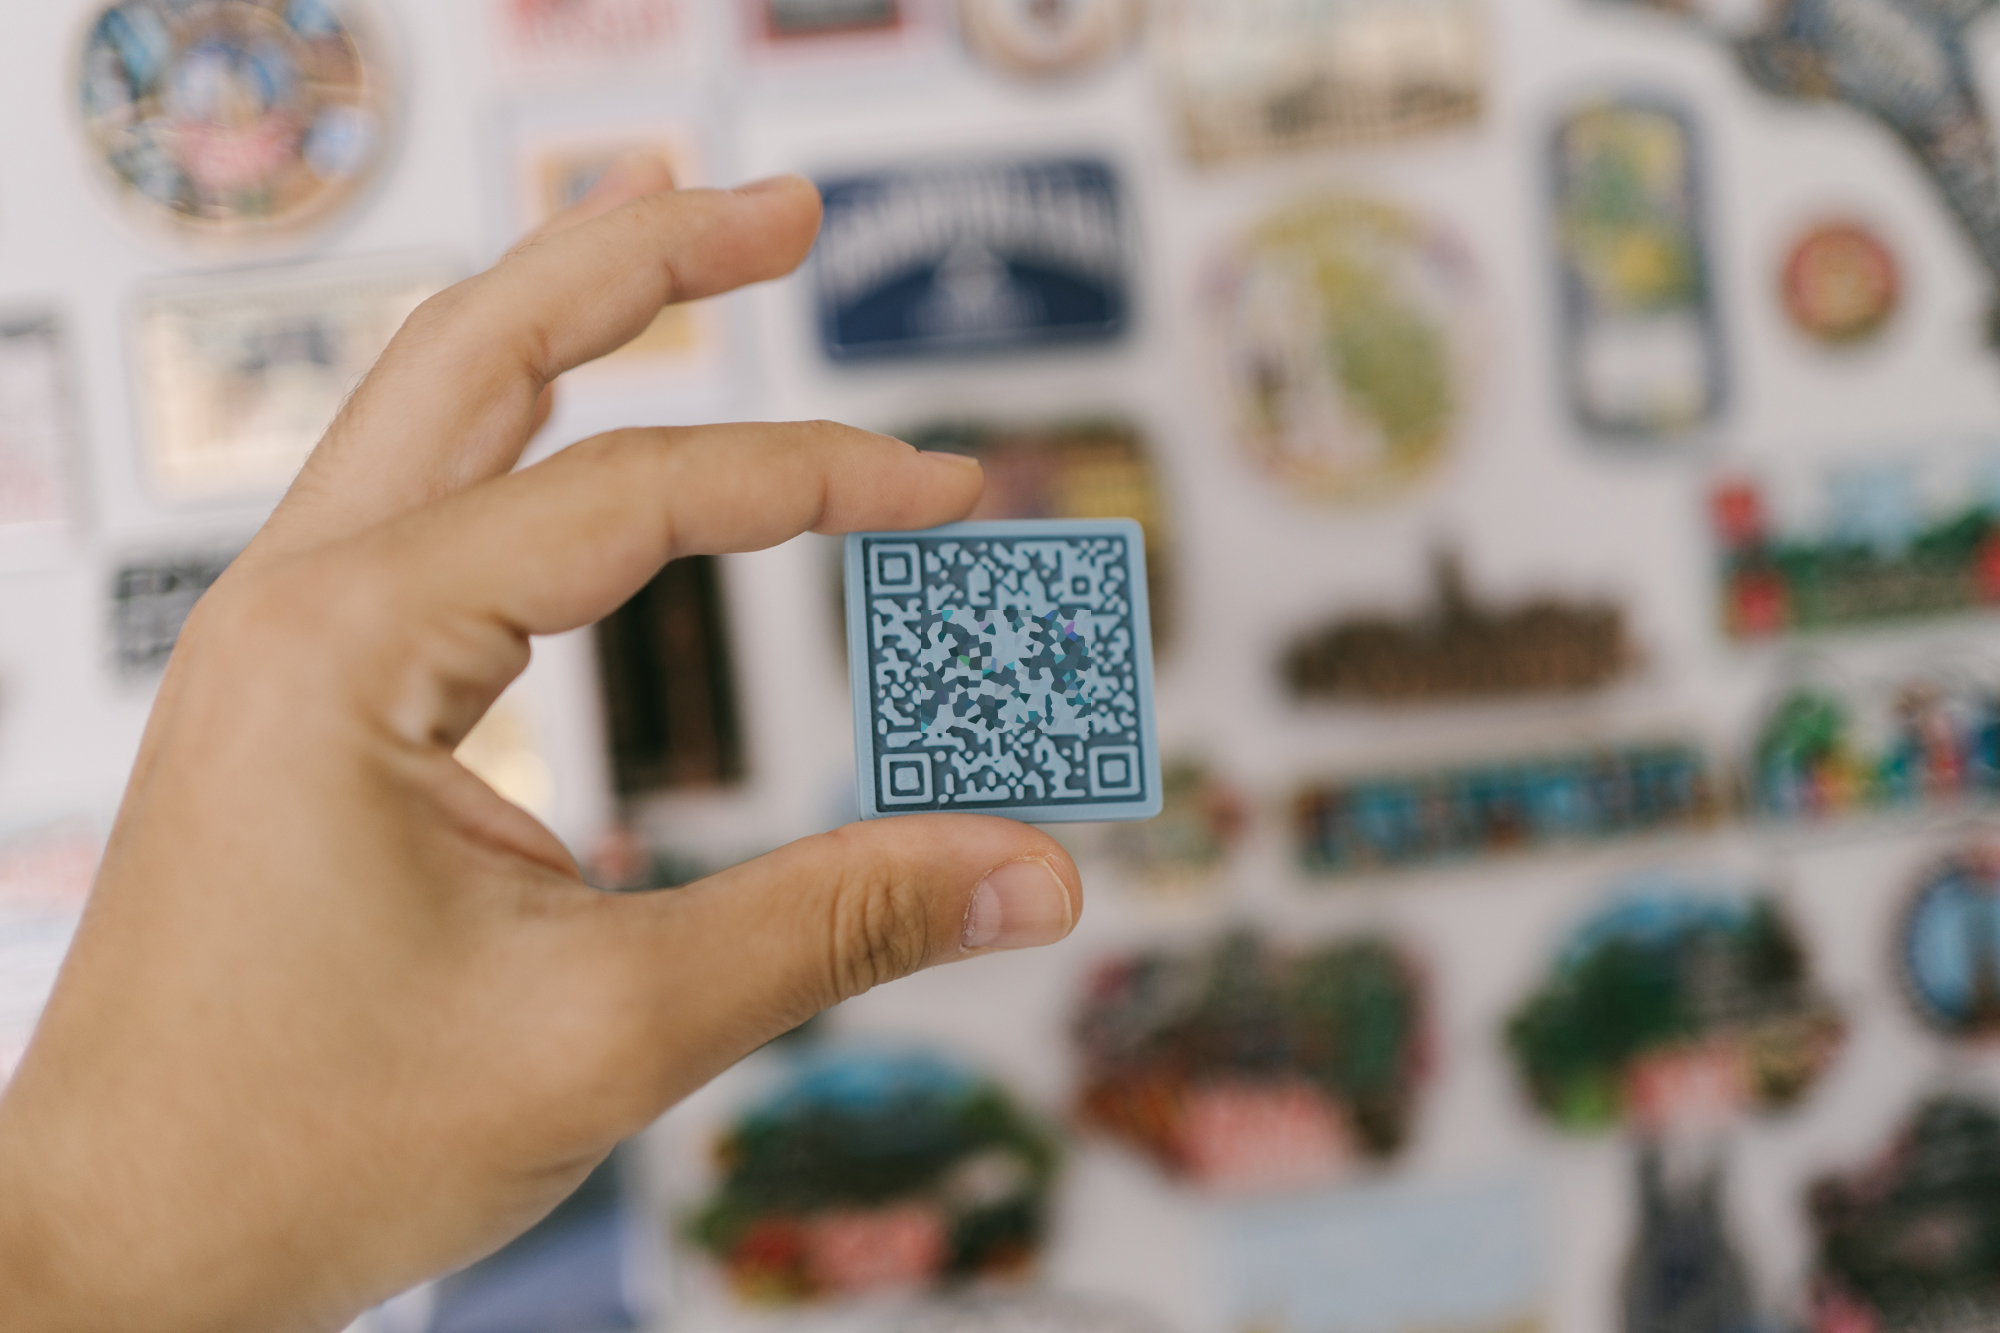
Once you generate your QR code, you can print it out to paper and place it somewhere your guests can easily access, like the door of your fridge, stuck on it with a magnet.
Or you go the geeky way, and 3D print an actual magnet. Which is exactly what I did.
3D printing the QR Code
I used https://printer.tools/qrcode2stl/ for this. It makes it simple to generate an .stl file that I can send straight to my printer.
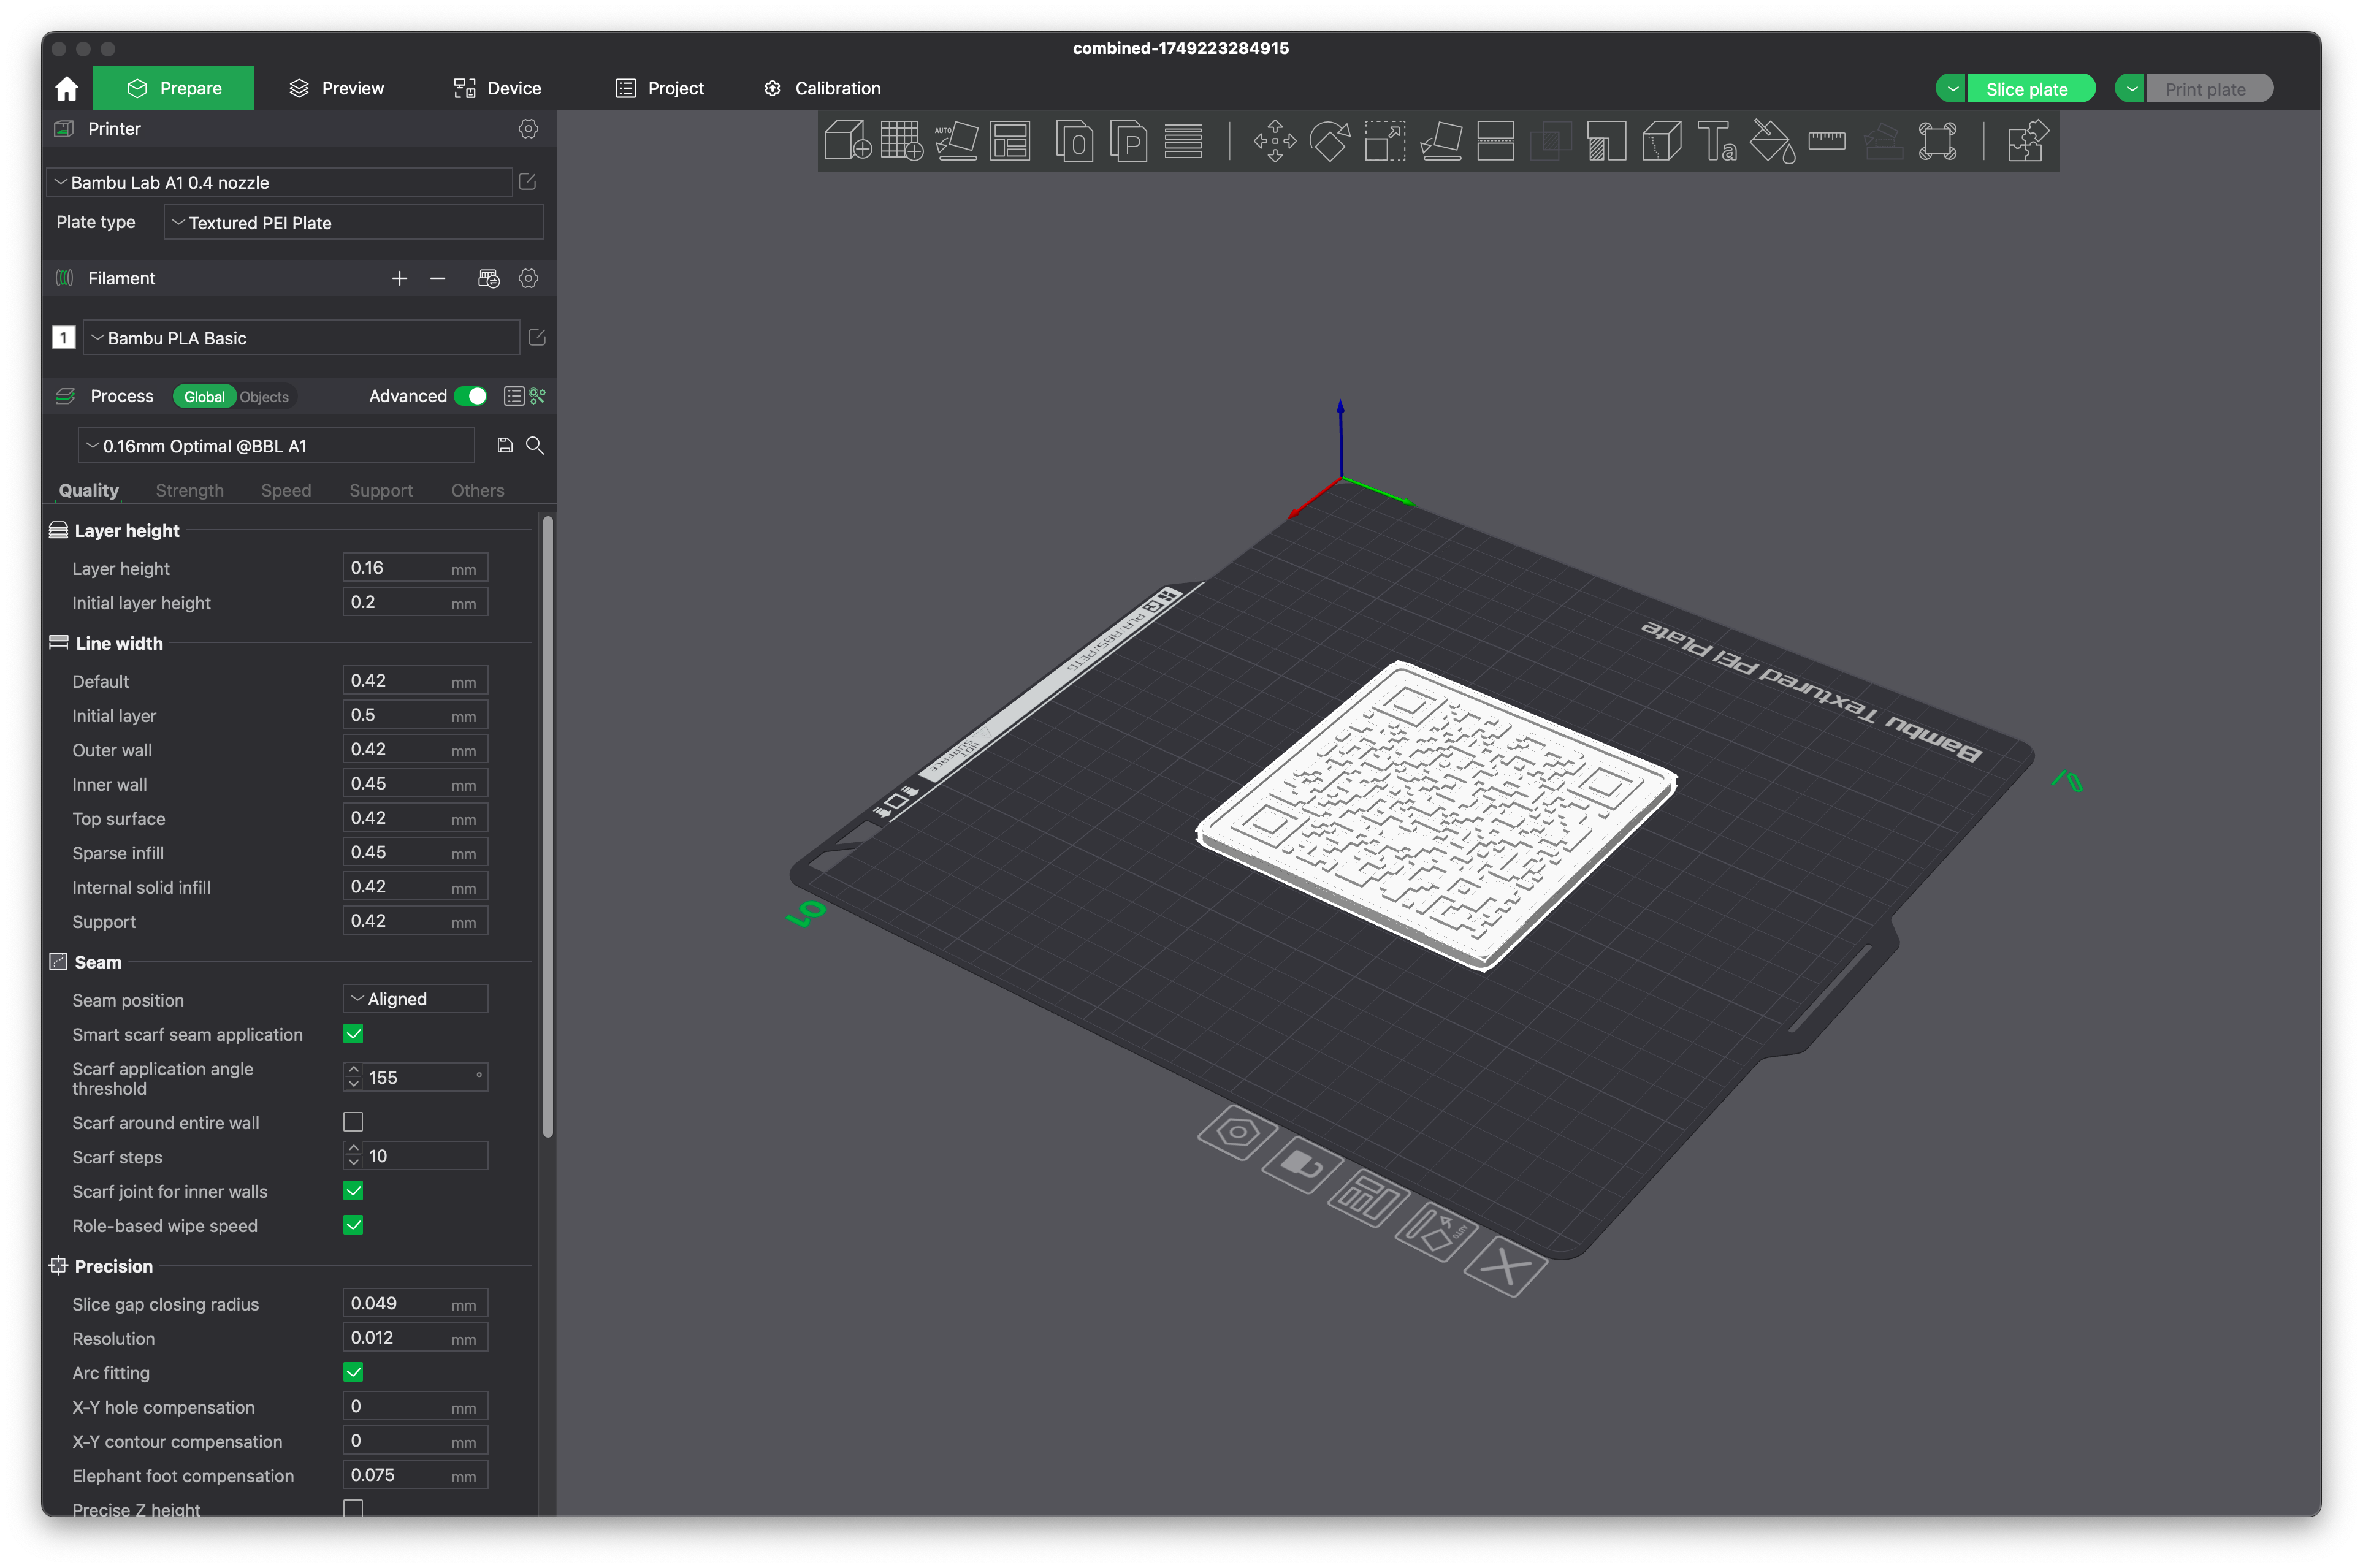
I used two different filaments of two different colors to print it since you need to have contrast between the white and black parts of the QR code for it to be easily readable.
Since I wanted to have it on my fridge door for easy access, I hot-glued a small magnet onto the back of it.
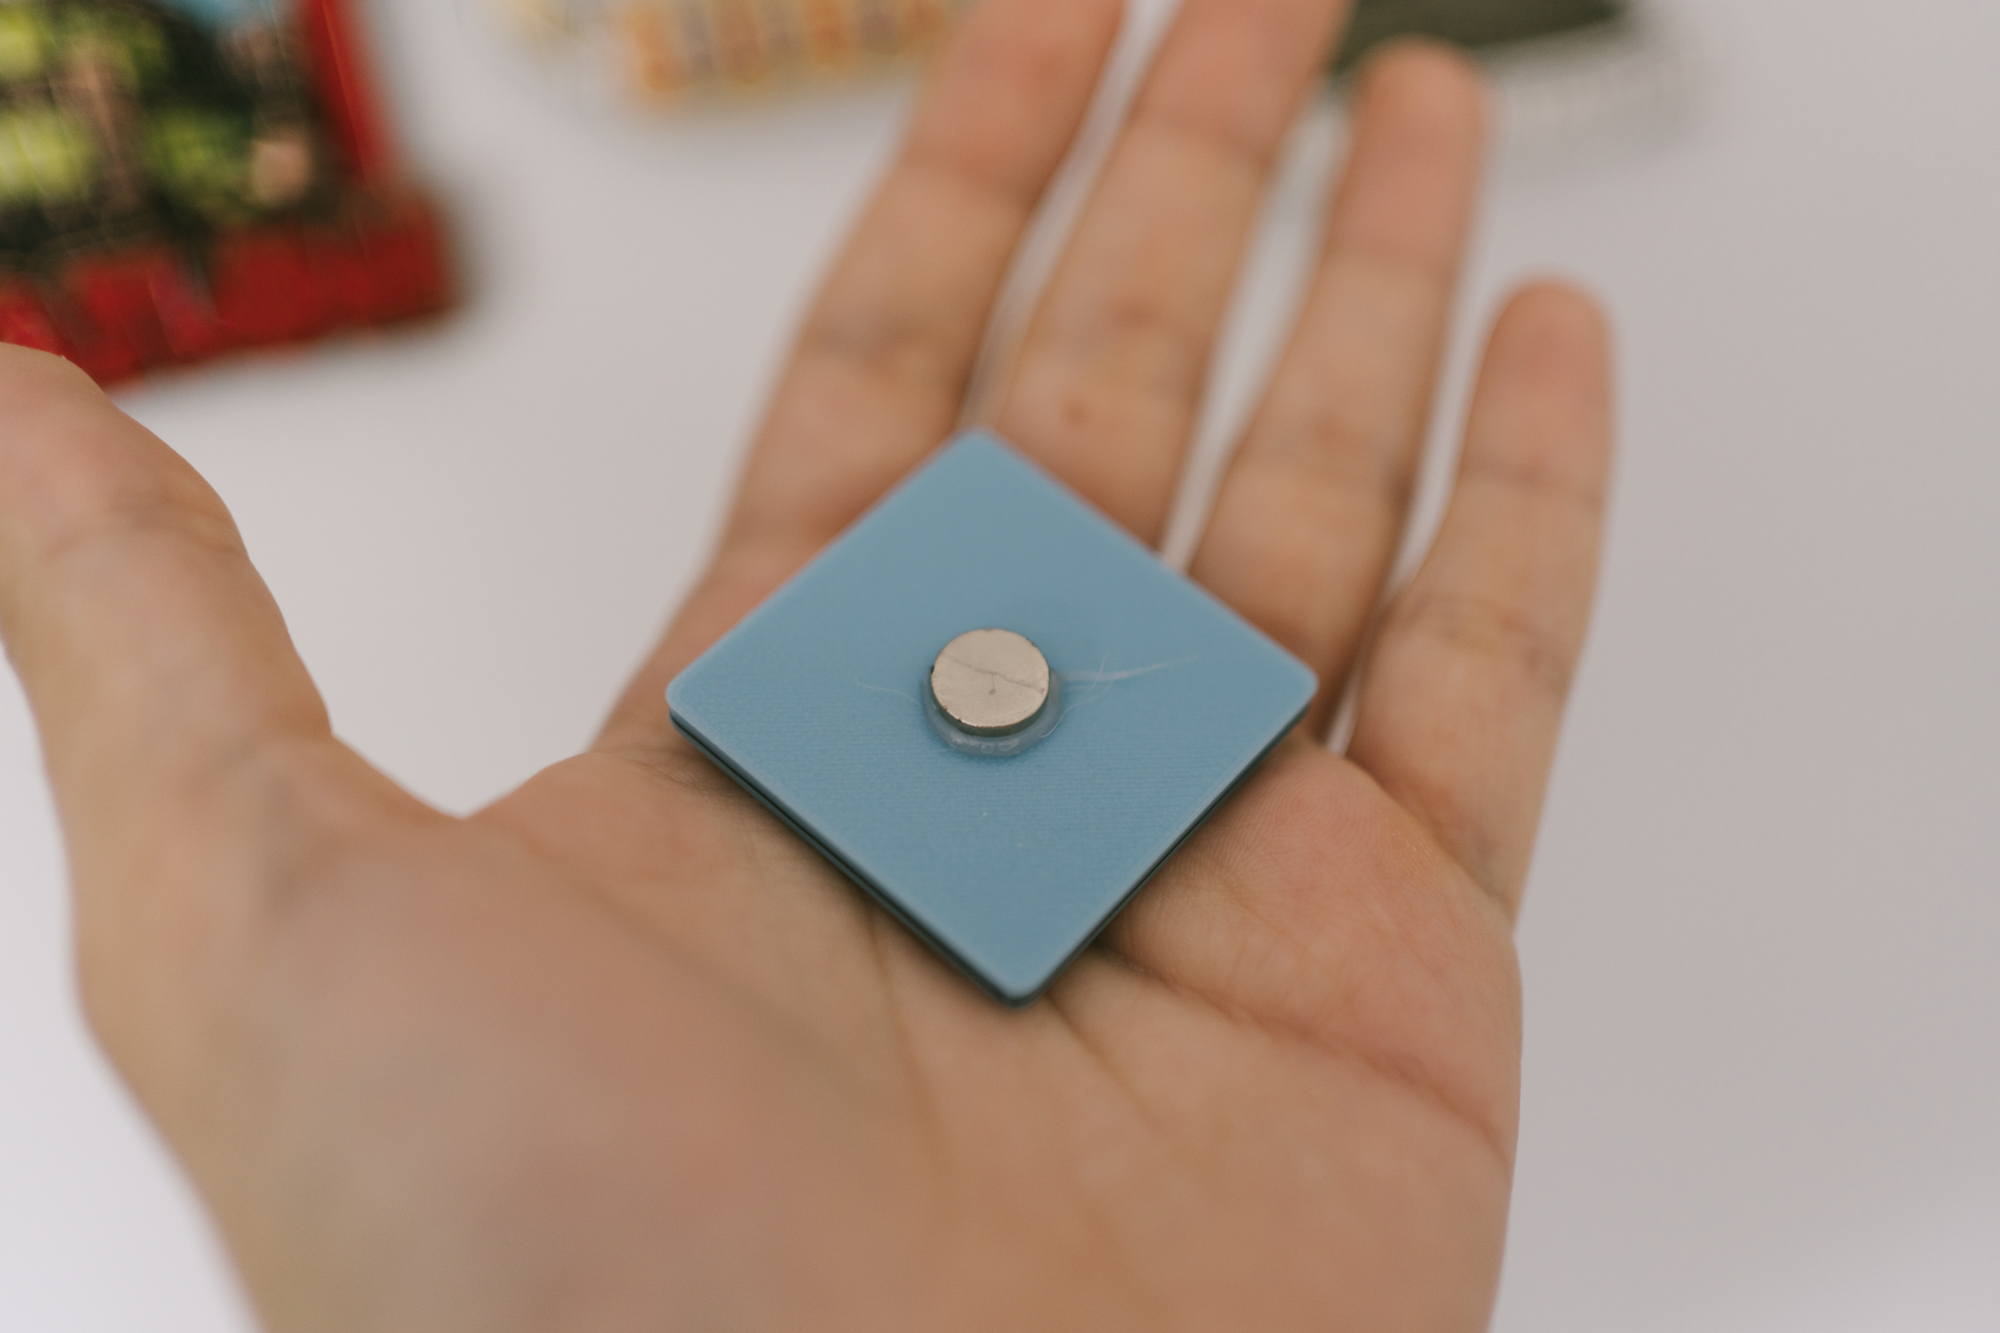
I am happy to say that it works flawlessly!
Landing Page
So now I had reached an optimal solution. I have a medium that can be read by any smartphone. What else could I need?
Nothing. Nothing at all.
But I am a nerd.
I didn’t like that my NFC tag was unusable by iPhones. It seemed like such an elegant solution at first. I had to find a decent alternative. If for nothing else, just to satisfy my own curiosity. I wanted to find something that iPhones could read with their NFC chip that led to a WiFi connection.
The solution? Cloudflare Workers.
Let me explain.
iPhones can’t natively interact with an NFC tag that is configured to prompt a connection to a WiFi network, but they can definitely interact with one that links to a web page.
So I set up a Cloudflare Worker that serves a landing page containing both the QR Code for my Guest WiFi network (so that iPhone/Android users can connect to it), and a button that lets Android users directly connect to the WiFi.
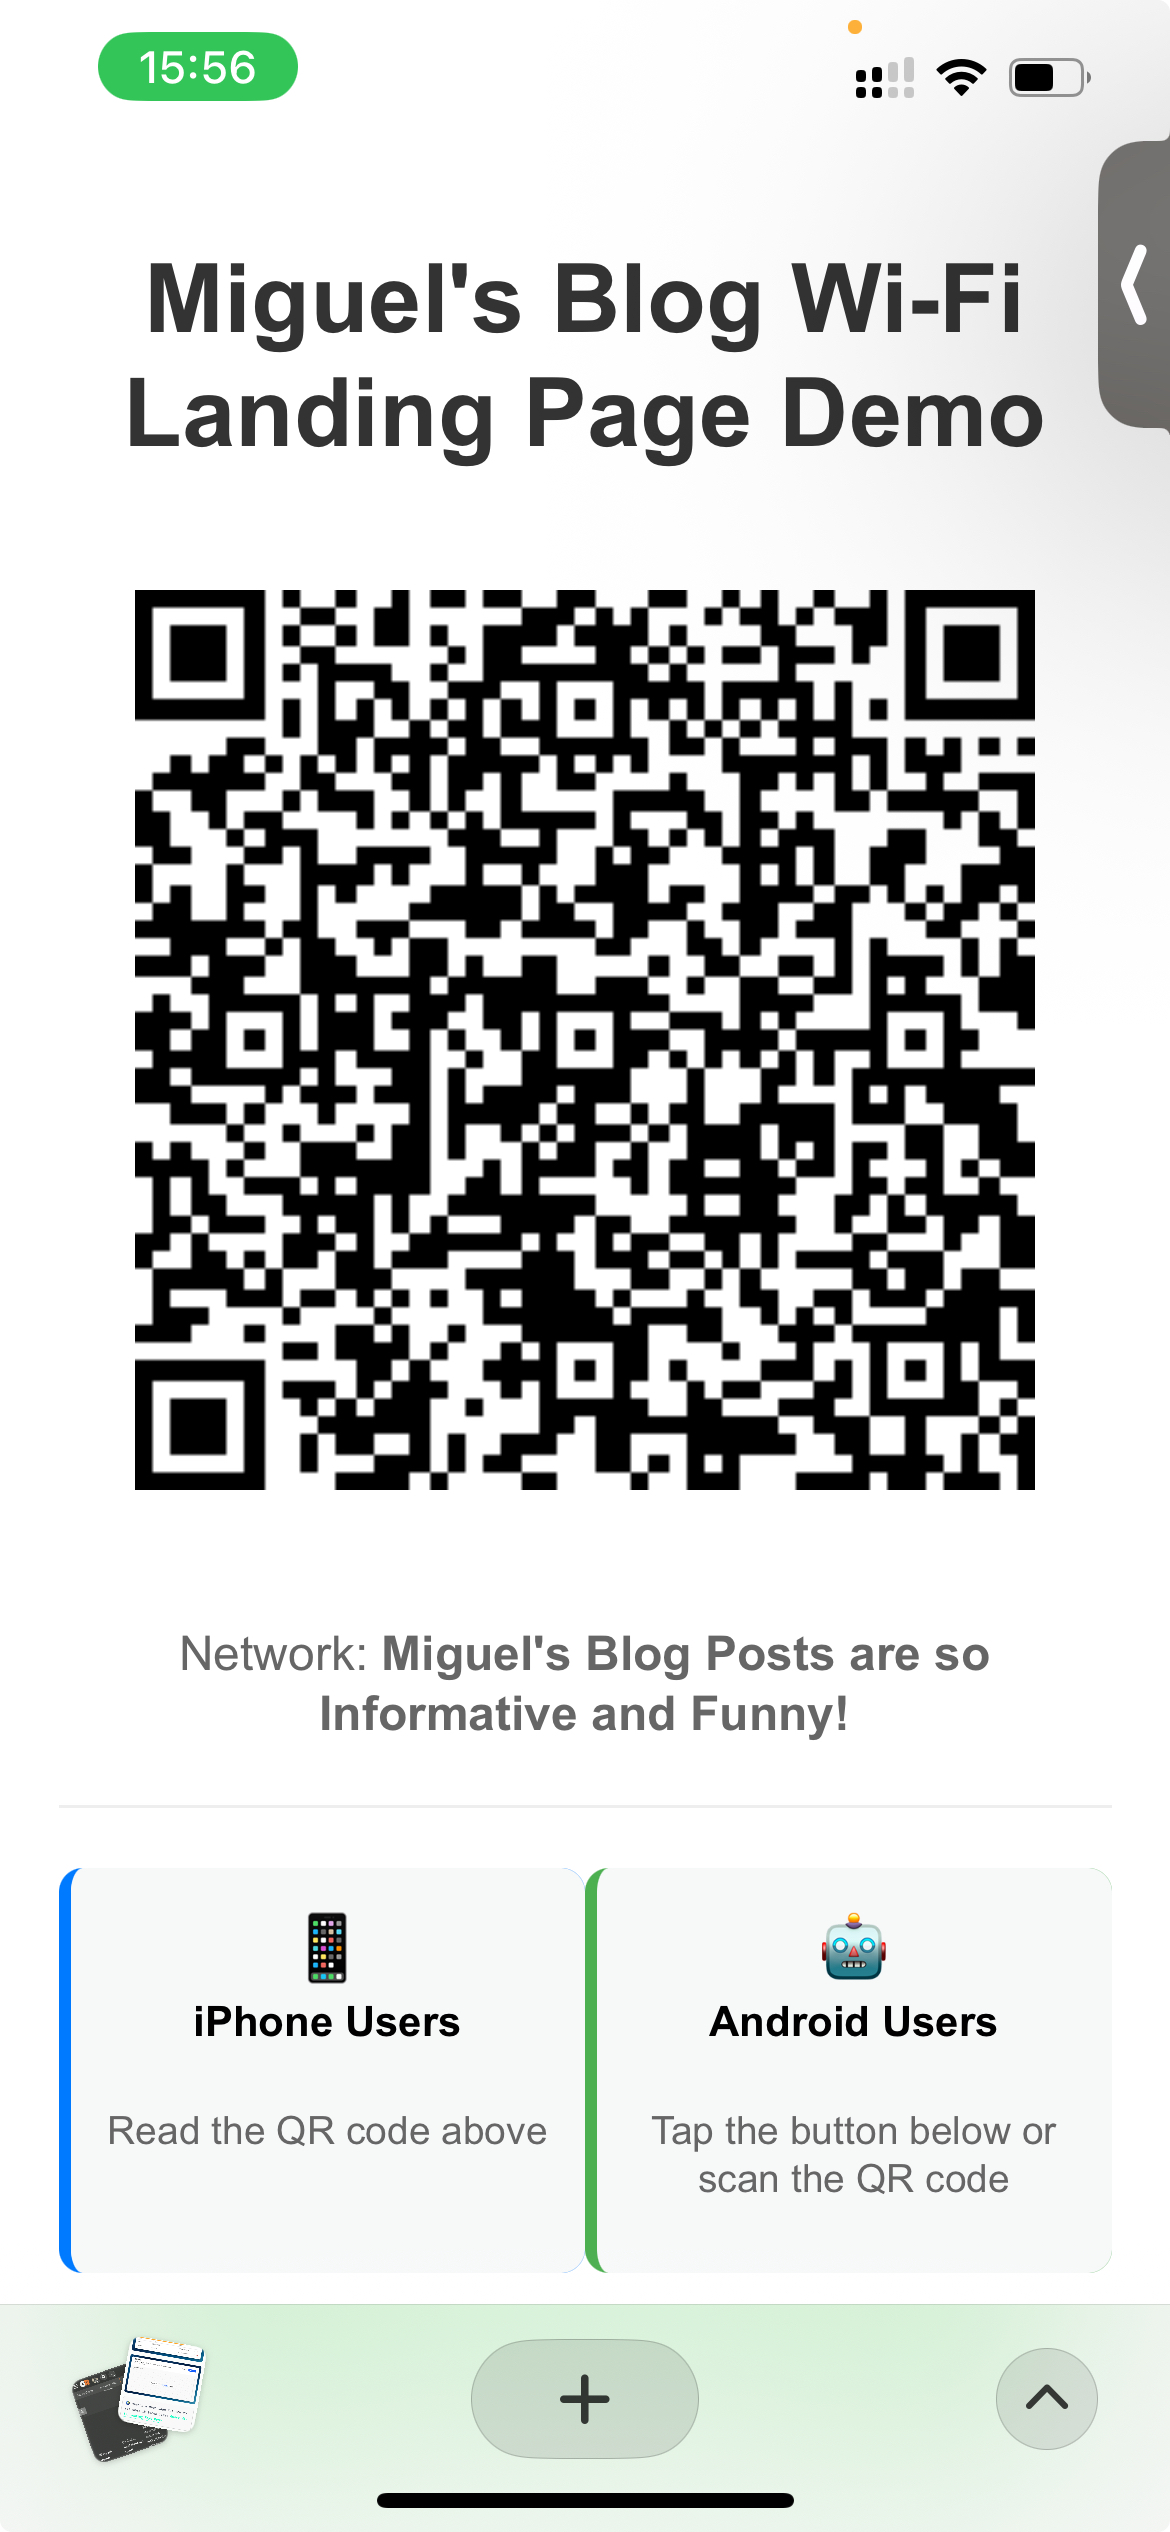
Here’s my Worker code. I used Claude to generate a simple and quick front-end for it:
// Cloudflare Worker that serves a page with WiFi QR code and direct connect button
addEventListener('fetch', event => {
  event.respondWith(handleRequest(event.request));
});

async function handleRequest(request) {
  const url = new URL(request.url);

  // Serve the HTML page for the root path
  if (url.pathname === '/') {
    return serveHTMLPage();
  }

  // Serve the QR code image (PNG format)
  if (url.pathname === '/wifi-qr.png') {
    return serveQRImage();
  }

  // Serve the direct connect page
  if (url.pathname === '/connect') {
    return serveConnectPage();
  }

  // 404 for any other path
  return new Response('Not Found', { status: 404 });
}

async function serveHTMLPage() {
  // Get WiFi SSID from environment variable
  const ssid = WIFI_SSID || "YourNetworkName";

  const html = `<!DOCTYPE html>
<html lang="en">
<head>
  <meta charset="UTF-8">
  <meta name="viewport" content="width=device-width, initial-scale=1.0">
  <title>WiFi Connection</title>
  <style>
    body {
      font-family: Arial, sans-serif;
      display: flex;
      flex-direction: column;
      justify-content: center;
      align-items: center;
      height: 100vh;
      margin: 0;
      background-color: #f5f5f5;
    }
    .container {
      text-align: center;
      padding: 20px;
      border-radius: 10px;
      background-color: white;
      box-shadow: 0 4px 8px rgba(0, 0, 0, 0.1);
      max-width: 90%;
      width: 400px;
    }
    h1 {
      color: #333;
      margin-bottom: 20px;
    }
    .qr-image {
      width: 300px;
      height: 300px;
      object-fit: contain;
      margin: 20px 0;
    }
    .connect-btn {
      background-color: #4CAF50;
      color: white;
      border: none;
      padding: 12px 24px;
      font-size: 16px;
      border-radius: 25px;
      cursor: pointer;
      transition: background-color 0.3s;
      margin-top: 15px;
      font-weight: bold;
      display: block;
      width: 80%;
      margin: 15px auto;
      text-decoration: none;
    }
    .connect-btn:hover {
      background-color: #45a049;
    }
    p {
      color: #666;
      margin-top: 20px;
    }
    .instructions {
      font-size: 14px;
      margin-top: 15px;
      text-align: left;
    }
    .divider {
      margin: 20px 0;
      border-top: 1px solid #eee;
      width: 100%;
    }
    .device-specific {
      display: flex;
      justify-content: space-between;
      margin-top: 20px;
    }
    .device-column {
      width: 48%;
      padding: 10px;
      border-radius: 8px;
    }
    .iphone {
      background-color: #f8f9fa;
      border-left: 4px solid #007AFF;
    }
    .android {
      background-color: #f8f9fa;
      border-left: 4px solid #4CAF50;
    }
    .device-title {
      font-weight: bold;
      margin-bottom: 8px;
      font-size: 14px;
    }
    .icon {
      font-size: 24px;
      margin-bottom: 5px;
    }
  </style>
</head>
<body>
  <div class="container">
    <h1>Connect to WiFi</h1>
    <img src="/wifi-qr.png" alt="WiFi QR Code" class="qr-image">
    <p>Network: <strong>${ssid}</strong></p>

    <div class="divider"></div>

    <div class="device-specific">
      <div class="device-column iphone">
        <div class="device-title">
          <span class="icon">📱</span>
          <div>iPhone Users</div>
        </div>
        <p style="font-size: 13px;">Read the QR code above</p>
      </div>

      <div class="device-column android">
        <div class="device-title">
          <span class="icon">🤖</span>
          <div>Android Users</div>
        </div>
        <p style="font-size: 13px;">Tap the button below or scan the QR code</p>
      </div>
    </div>

    <a href="/connect" class="connect-btn">Connect (Android)</a>
  </div>
</body>
</html>`;

  return new Response(html, {
    headers: {
      'Content-Type': 'text/html',
      'Cache-Control': 'max-age=3600'
    }
  });
}

async function serveQRImage() {
  try {
    // Initialize R2 client using the binding defined in wrangler.toml
    const qrImage = await R2_BUCKET.get('wifi-qr.png');

    if (qrImage === null) {
      return new Response('QR Code image not found', { status: 404 });
    }

    // Stream the image from R2
    return new Response(qrImage.body, {
      headers: {
        'Content-Type': 'image/png',
        'Cache-Control': 'max-age=86400', // Cache for 24 hours
        'Access-Control-Allow-Origin': '*'
      }
    });
  } catch (error) {
    return new Response(`Error retrieving image: ${error.message}`, { status: 500 });
  }
}

async function serveConnectPage() {
  // Get WiFi credentials from environment variables/secrets
  const ssid = WIFI_SSID || "YourNetworkName";
  const password = WIFI_PASSWORD || "YourPassword";

  // Create a special page with the WiFi connection URI scheme
  const connectHtml = `<!DOCTYPE html>
<html lang="en">
<head>
  <meta charset="UTF-8">
  <meta name="viewport" content="width=device-width, initial-scale=1.0">
  <title>Connecting to WiFi</title>
  <style>
    body {
      font-family: Arial, sans-serif;
      display: flex;
      flex-direction: column;
      justify-content: center;
      align-items: center;
      height: 100vh;
      margin: 0;
      background-color: #f5f5f5;
      text-align: center;
      padding: 20px;
    }
    .container {
      background-color: white;
      padding: 30px;
      border-radius: 10px;
      box-shadow: 0 4px 8px rgba(0, 0, 0, 0.1);
      max-width: 90%;
      width: 400px;
    }
    h1 {
      color: #333;
      margin-bottom: 20px;
    }
    .wifi-link {
      display: inline-block;
      background-color: #4CAF50;
      color: white;
      text-decoration: none;
      padding: 15px 30px;
      border-radius: 25px;
      font-weight: bold;
      margin: 20px 0;
      font-size: 16px;
    }
    .back-btn {
      margin-top: 20px;
      color: #4285F4;
      text-decoration: none;
    }
    .steps {
      text-align: left;
      margin: 20px 0;
    }
    .android-note {
      background-color: #e8f5e9;
      border-left: 4px solid #4CAF50;
      padding: 10px;
      margin: 20px 0;
      border-radius: 0 4px 4px 0;
    }
  </style>
</head>
<body>
  <div class="container">
    <h1>Connect to WiFi</h1>
    <p>Network: <strong>${ssid}</strong></p>

    <div class="android-note">
      <strong>Android Users:</strong> Click the button below to connect automatically.
    </div>

    <a href="WIFI:S:${ssid};T:WPA;P:${password};;" class="wifi-link">Connect to Network</a>

    <div class="steps">
      <p><strong>Instructions:</strong></p>
      <ol>
        <li>Tap the "Connect to Network" button above</li>
        <li>Your device should prompt you to join the network</li>
        <li>If prompted, confirm the connection</li>
      </ol>
    </div>

    <p>Having trouble? Try scanning the QR code from the main page.</p>
    <a href="/" class="back-btn">Back to QR Code</a>
  </div>
</body>
</html>`;

  return new Response(connectHtml, {
    headers: {
      'Content-Type': 'text/html',
      'Cache-Control': 'no-store' // Don't cache this page containing credentials
    }
  });
}
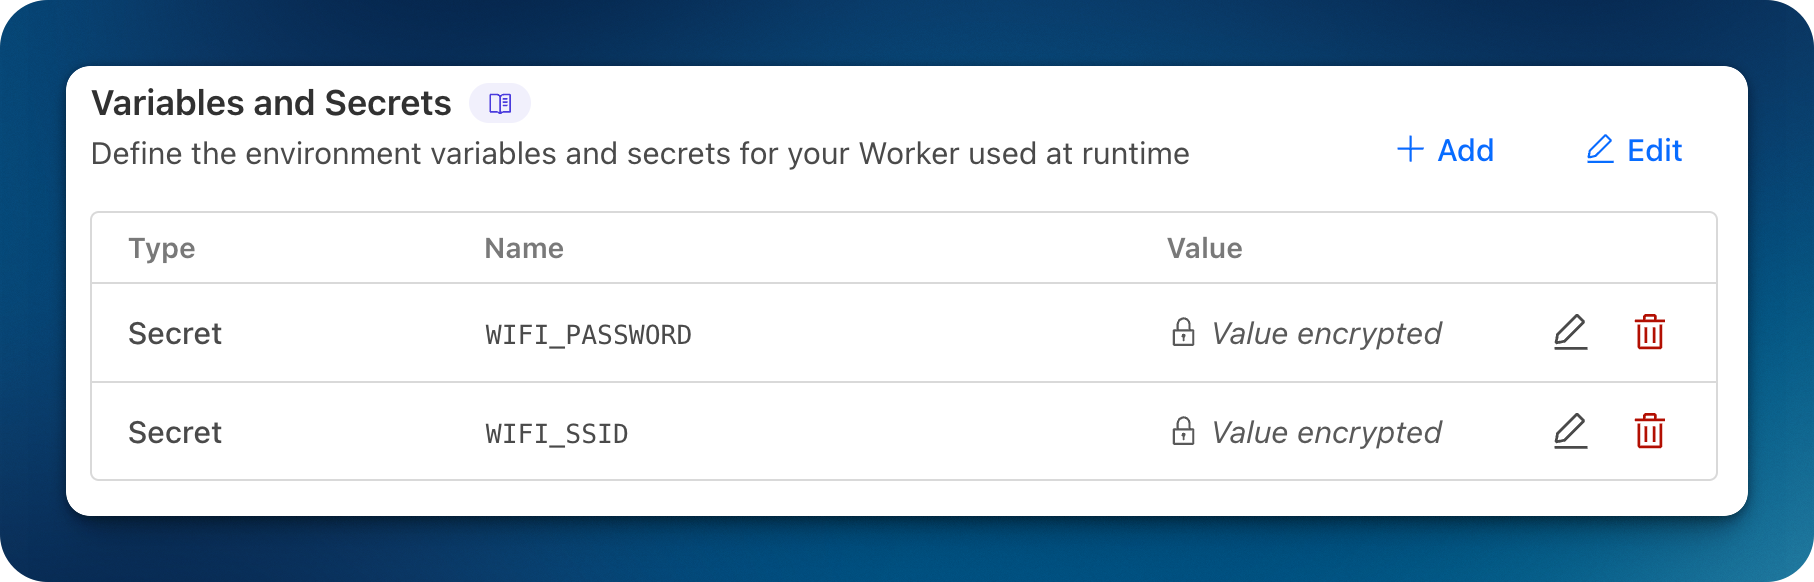
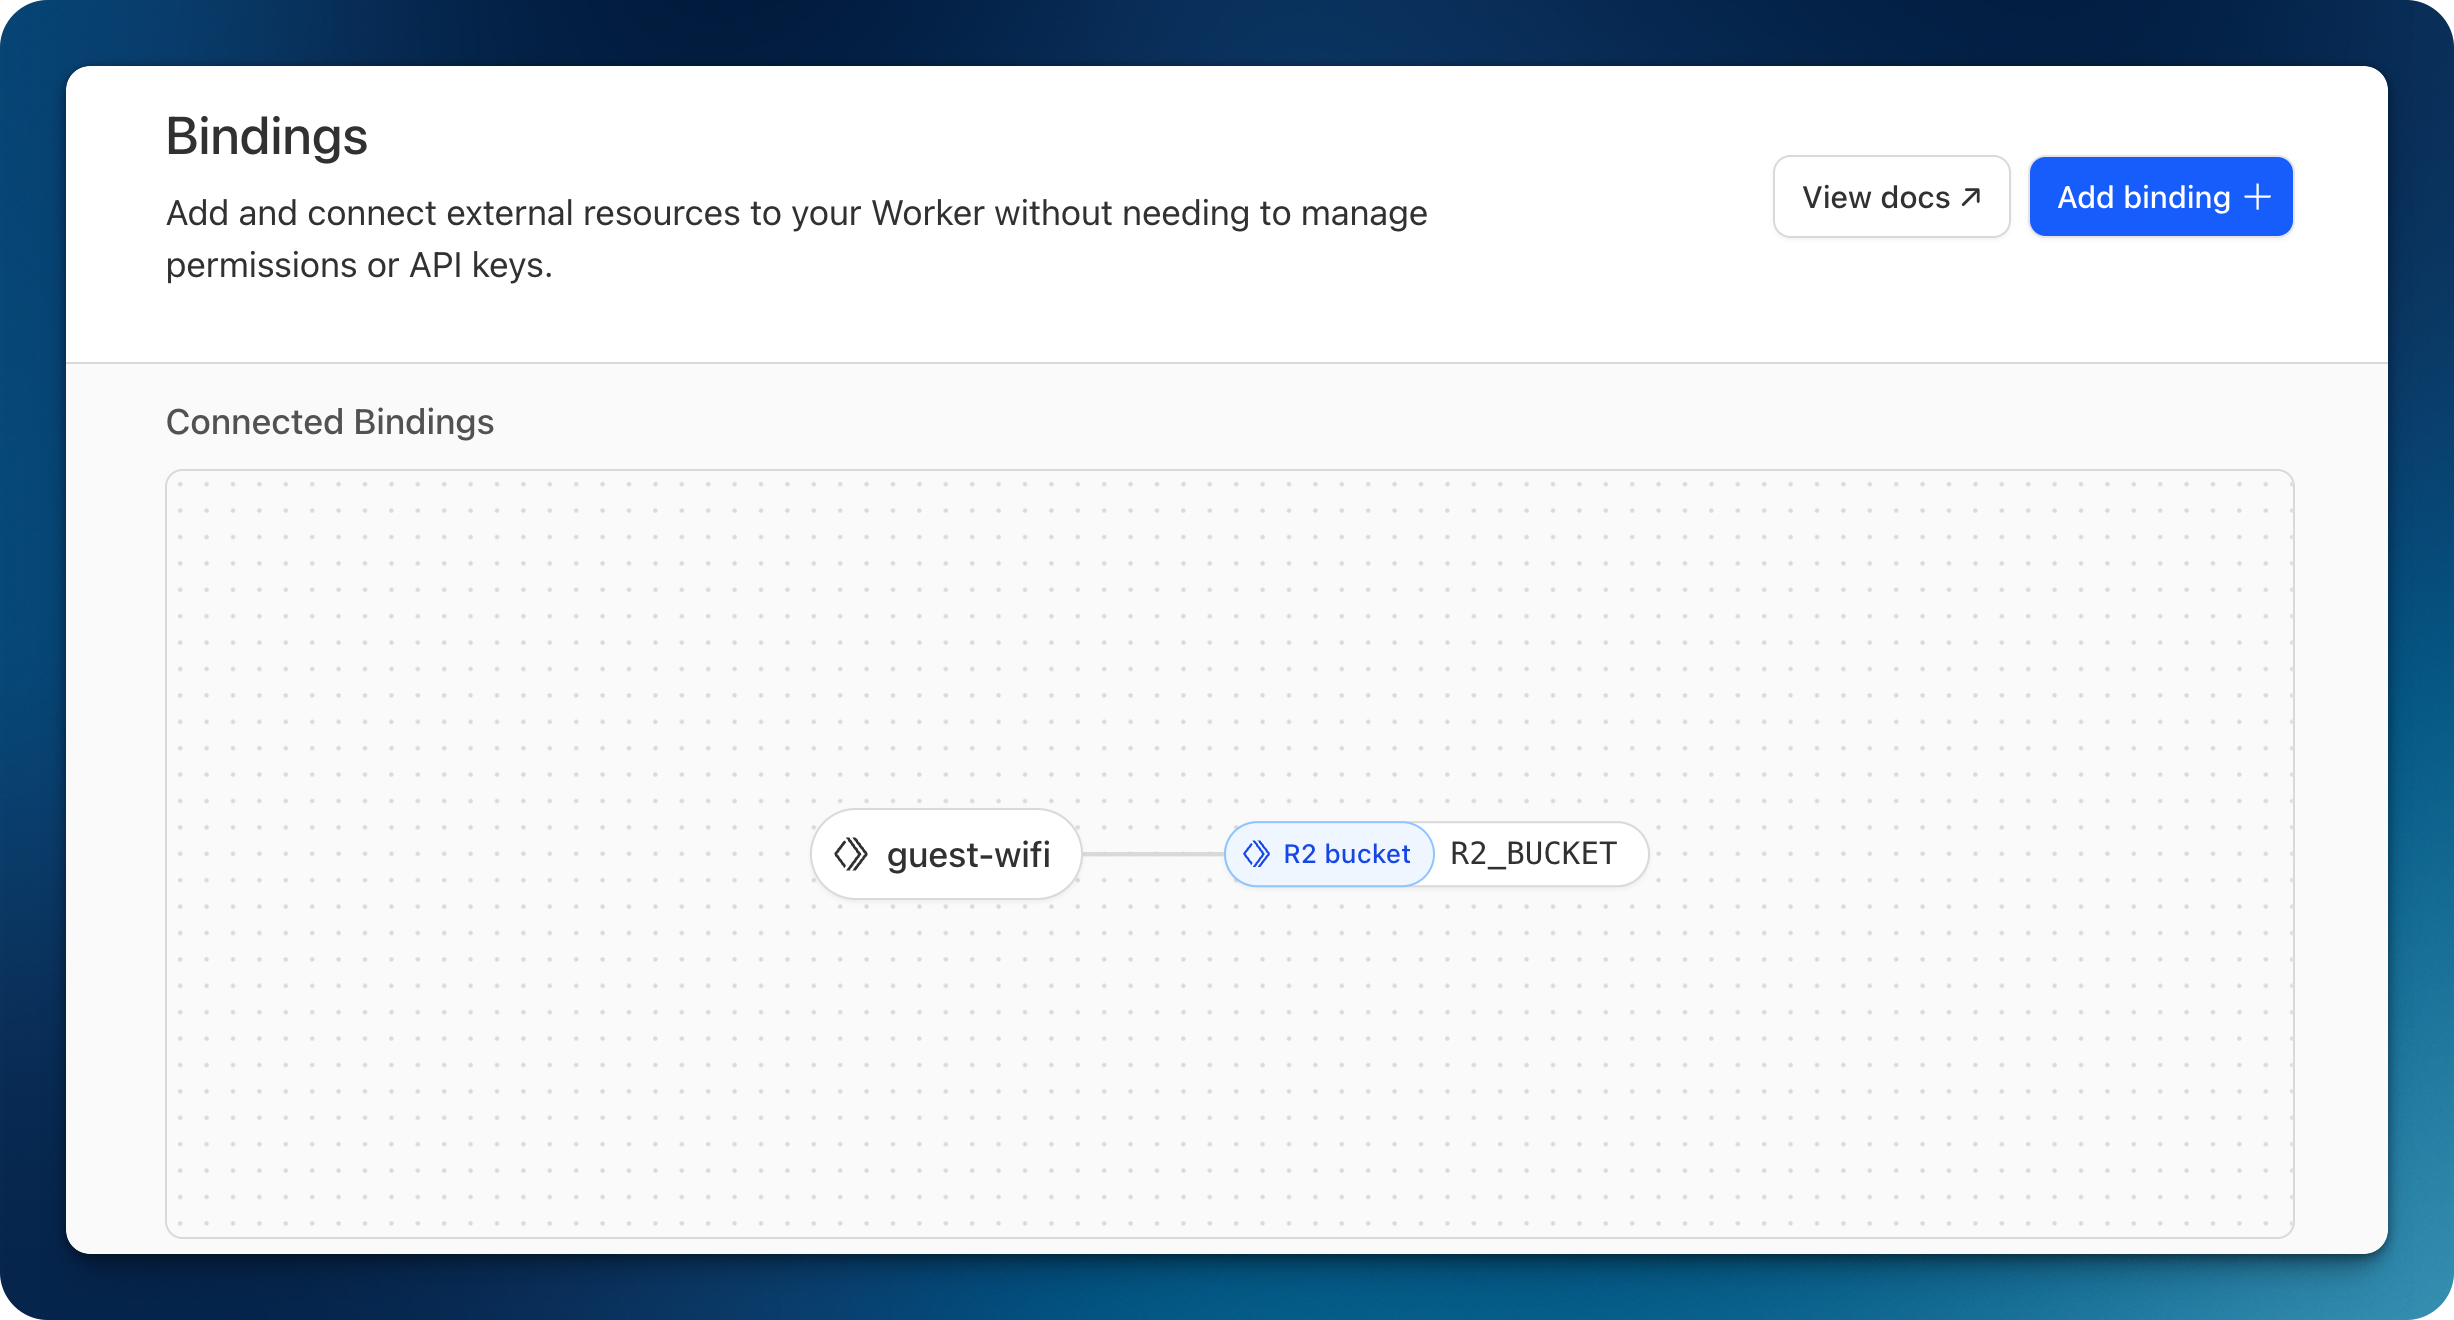
💡 Note: I added my WiFi SSID and Password as environment variables on Cloudflare Workers. The QR code is an image stored in a private R2 bucket.
I found this to be an elegant solution if you really want to go the NFC route and retain broad compatibility with multiple devices.
Protecting my guests
As any overly conscientious host, I naturally felt compelled to ensure my that guests were shielded from “the perils of predatory ads and the murky depths of malicious content on the internet”. Because, you know, who doesn’t obsess over securing their guest WiFi with a robust DNS?
It’s also beneficial for you to have your guest traffic as secure as possible, as it also helps protect your own internal network if you don’t have local firewall rules isolating your guest network. The last thing you want is for one of you guests to download malicious content that might infect your network.
I actually use a similar setup for my main network as well.
The easiest way to achieve this is via DNS, by pointing your guests’ DNS queries to a secure DNS resolver.
I used two layers of DNS filtering to achieve my objective:
- AdGuard Home - a DNS filtering solution that you can host locally, useful to filter ads
- Cloudflare Zero Trust - using the DNS Locations feature, I set up a remote and secure DNS resolver that I use to protect against known malicious destinations
For this to work, we need to set up a sequence of DNS resolvers, like so:
AdGuard Home
AdGuard Home is a free and open-source DNS server that you can run locally. It’s similar to other projects like Pi-hole, but I prefer AdGuard’s UI. It requires very little overhead and it can even be installed on a Raspberry Pi.
My AdGuard instance is running as a Docker container on an Ubuntu Server VM hosted on my Proxmox server.
Regardless of where you install AdGuard Home, the setup will always be the same. Just ensure that the IP of the host running AdGuard is set to static. You can typically configure static IP leases within your router’s DHCP settings.
Your AdGuard UI will be accessible via the browser by going to the local IP of the host.
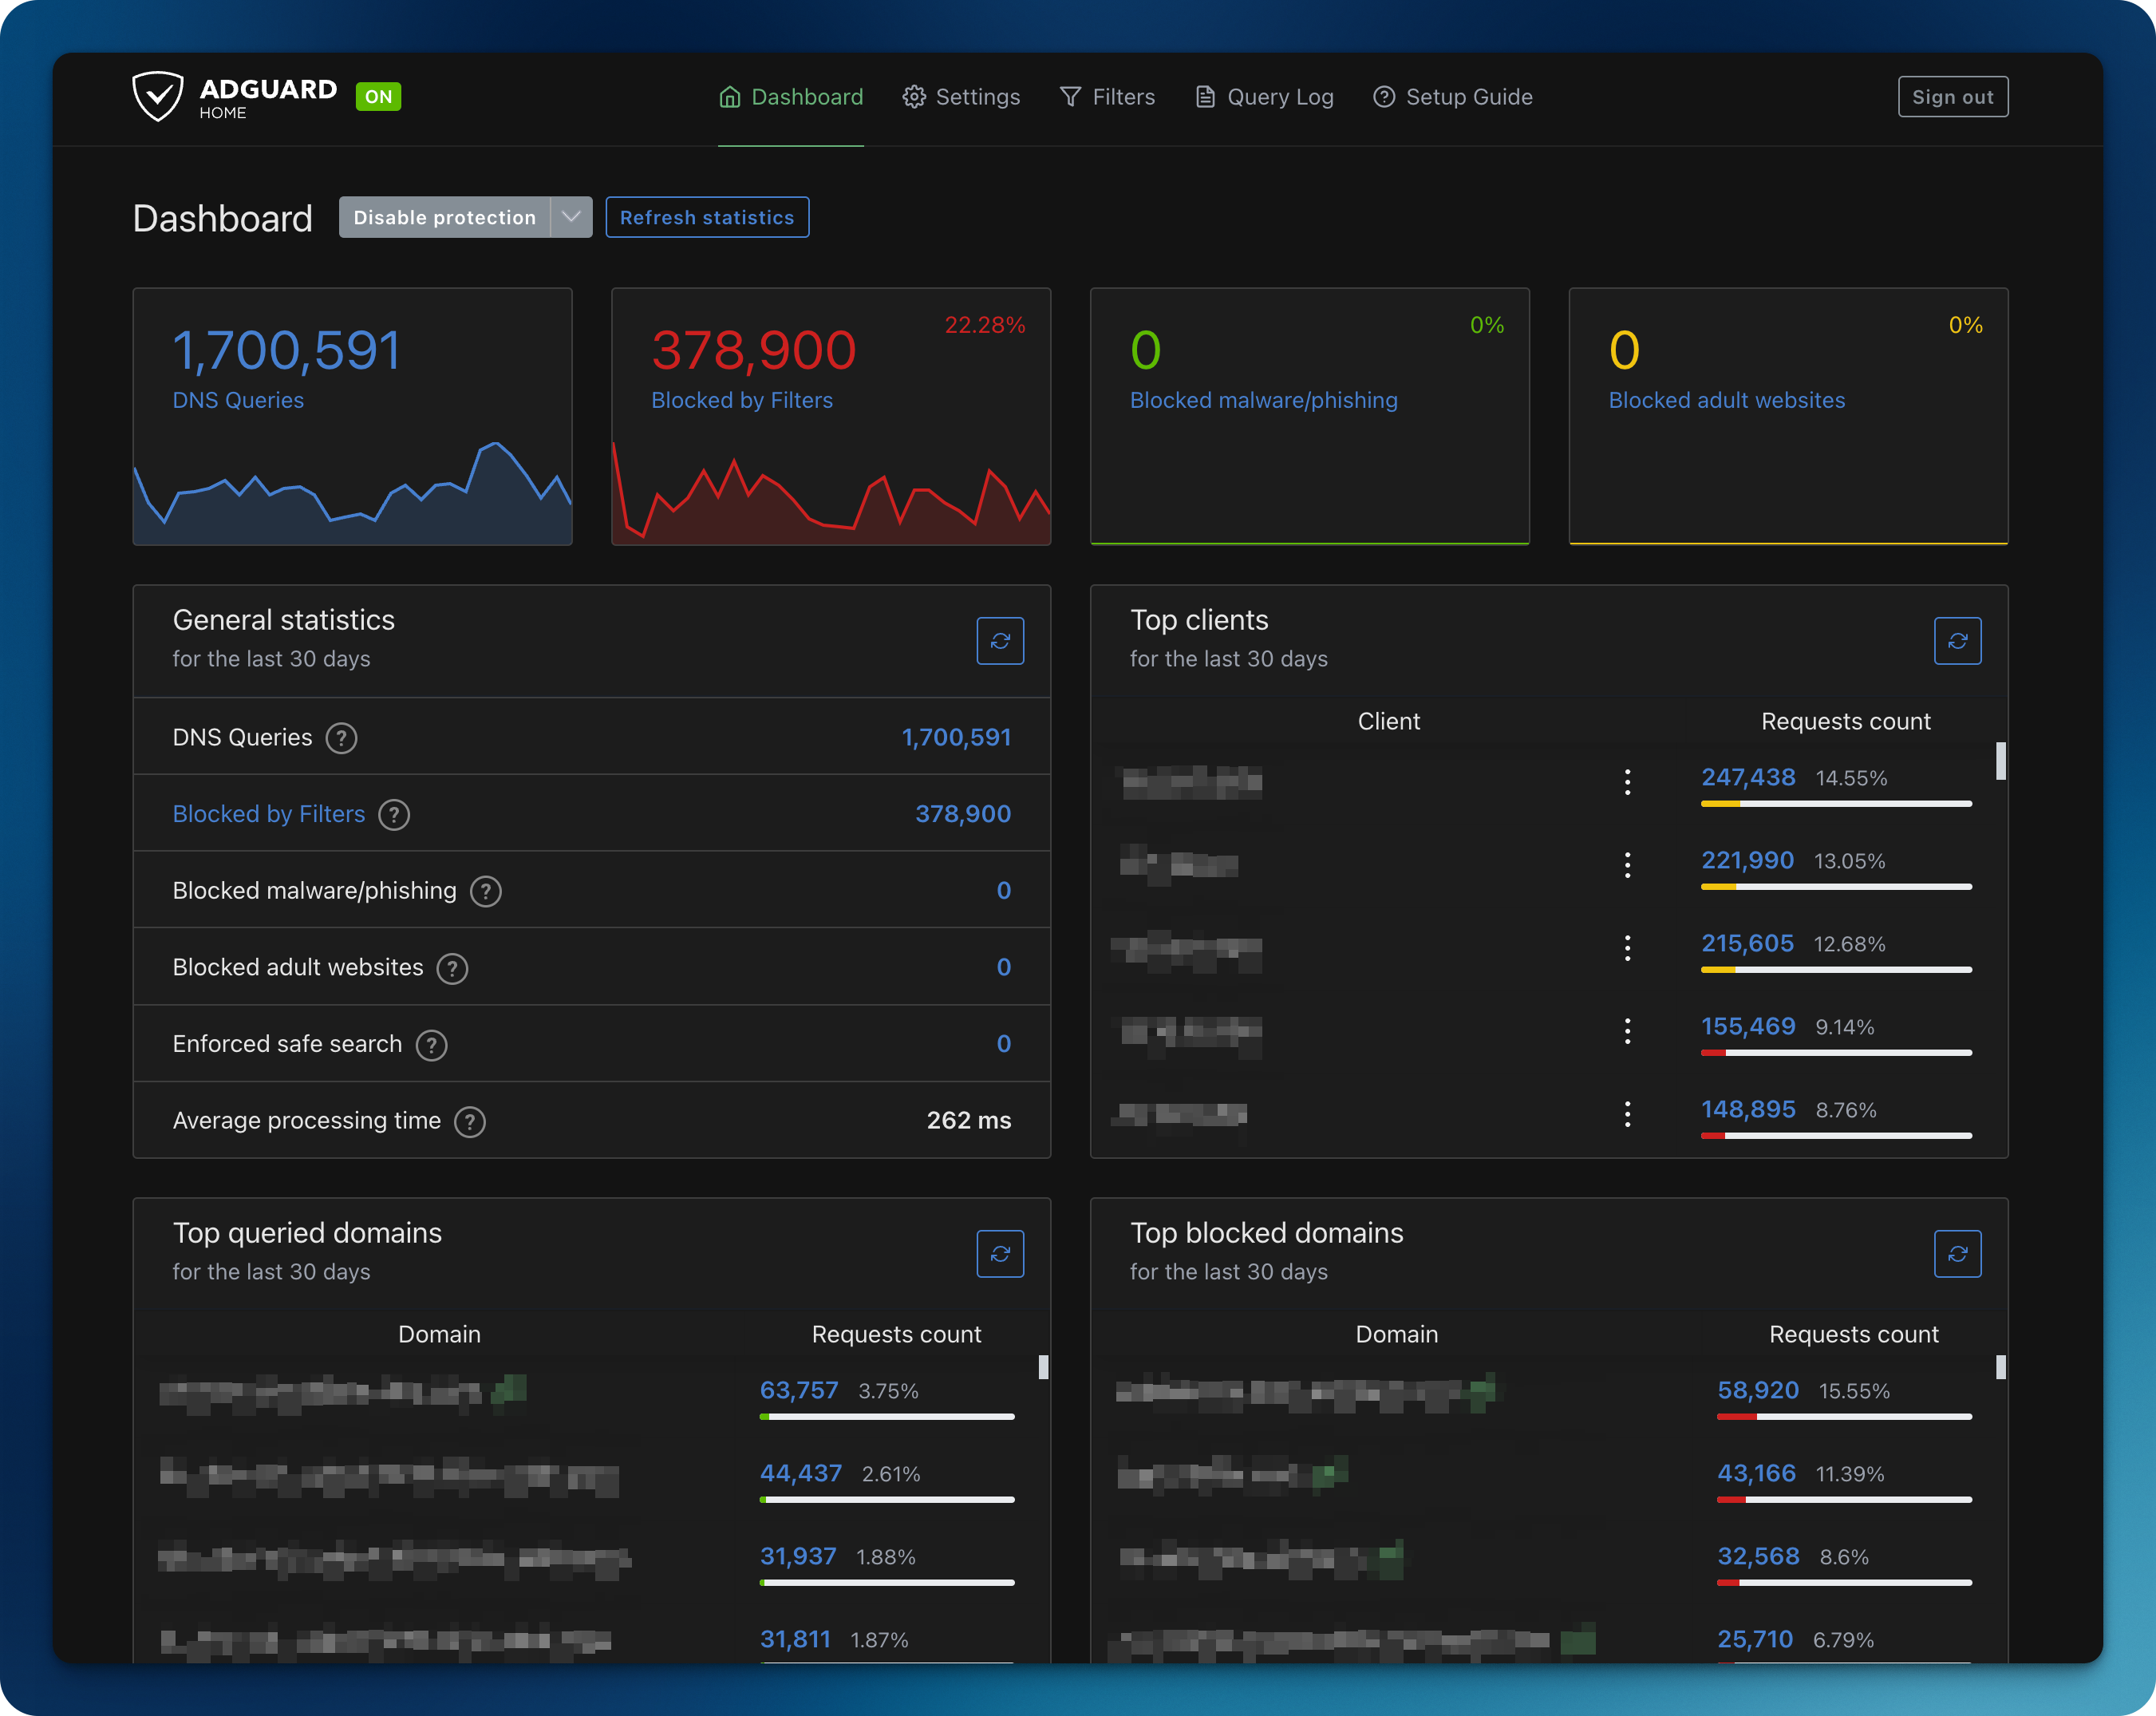
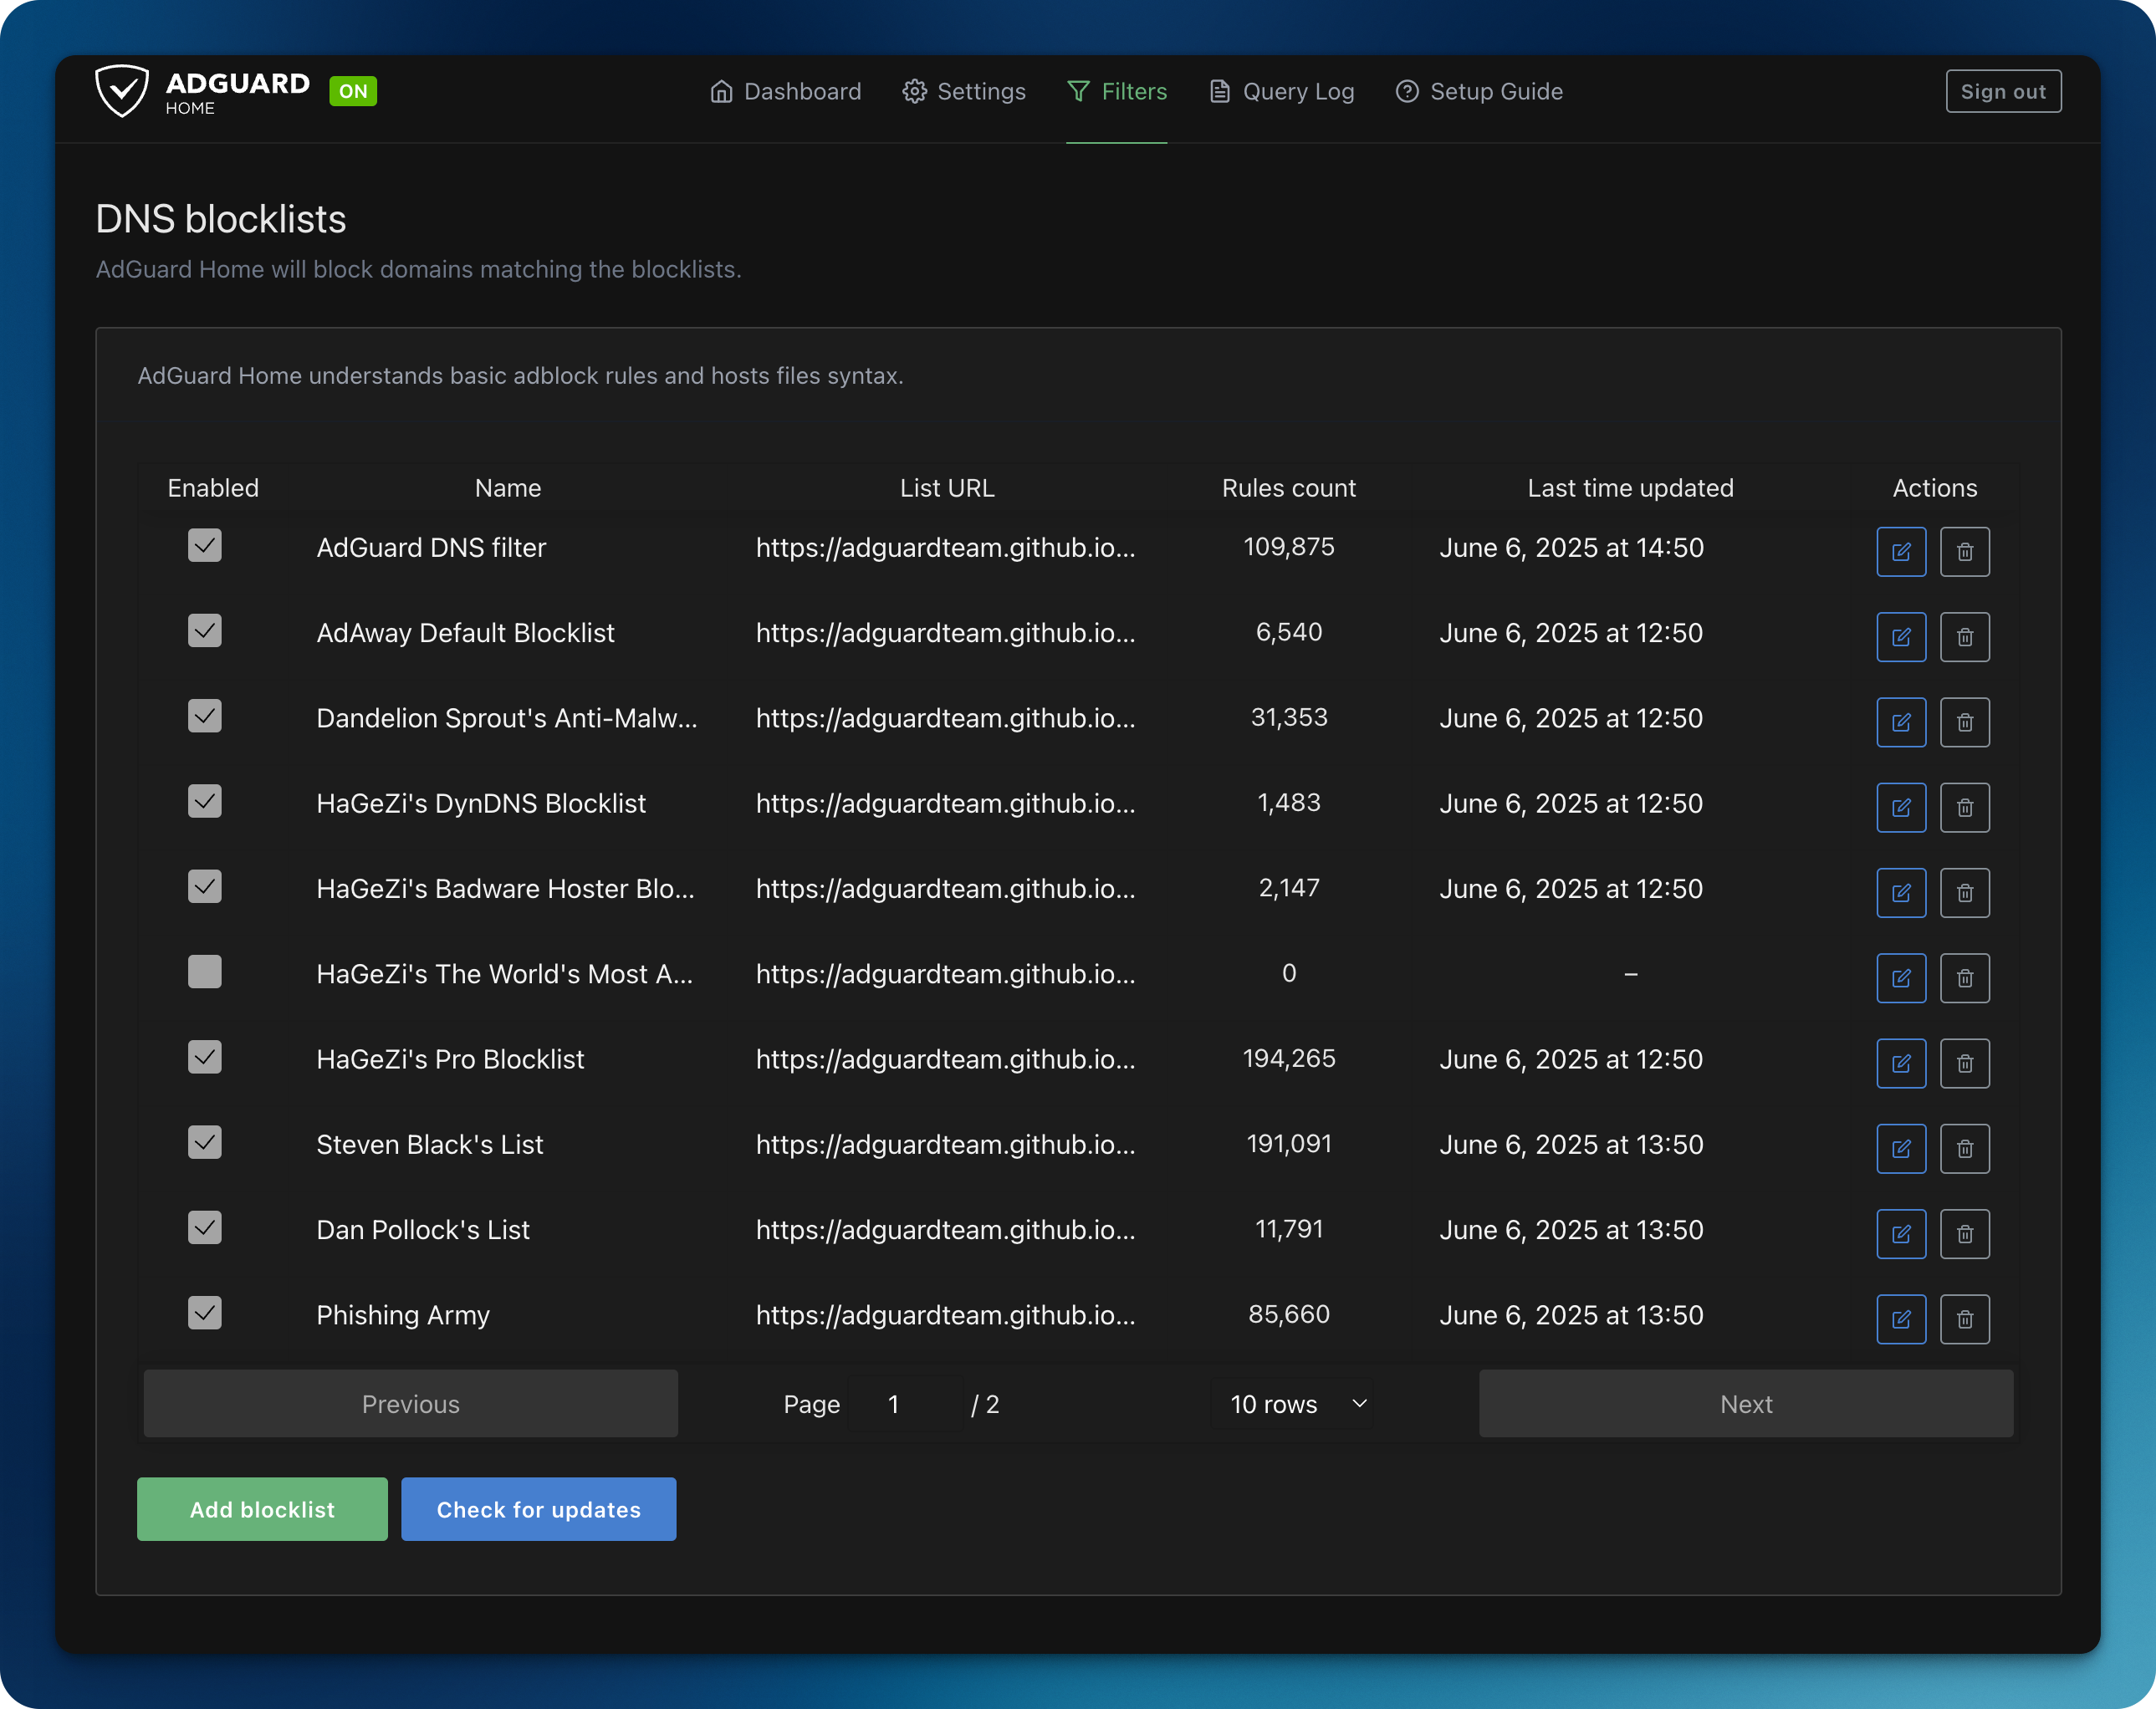
You can pull DNS blocklists created and maintained by the community, straight from AdGuard’s UI.
You can also tinker and personalize your AdGuard configuration to your heart’s content. I personally like to occasionally see Google Ads as they help me find cool gadgets I have absolutely no need for, so I set custom filtering rules to allow these through (shout out to Nuno Moura for the tip!):
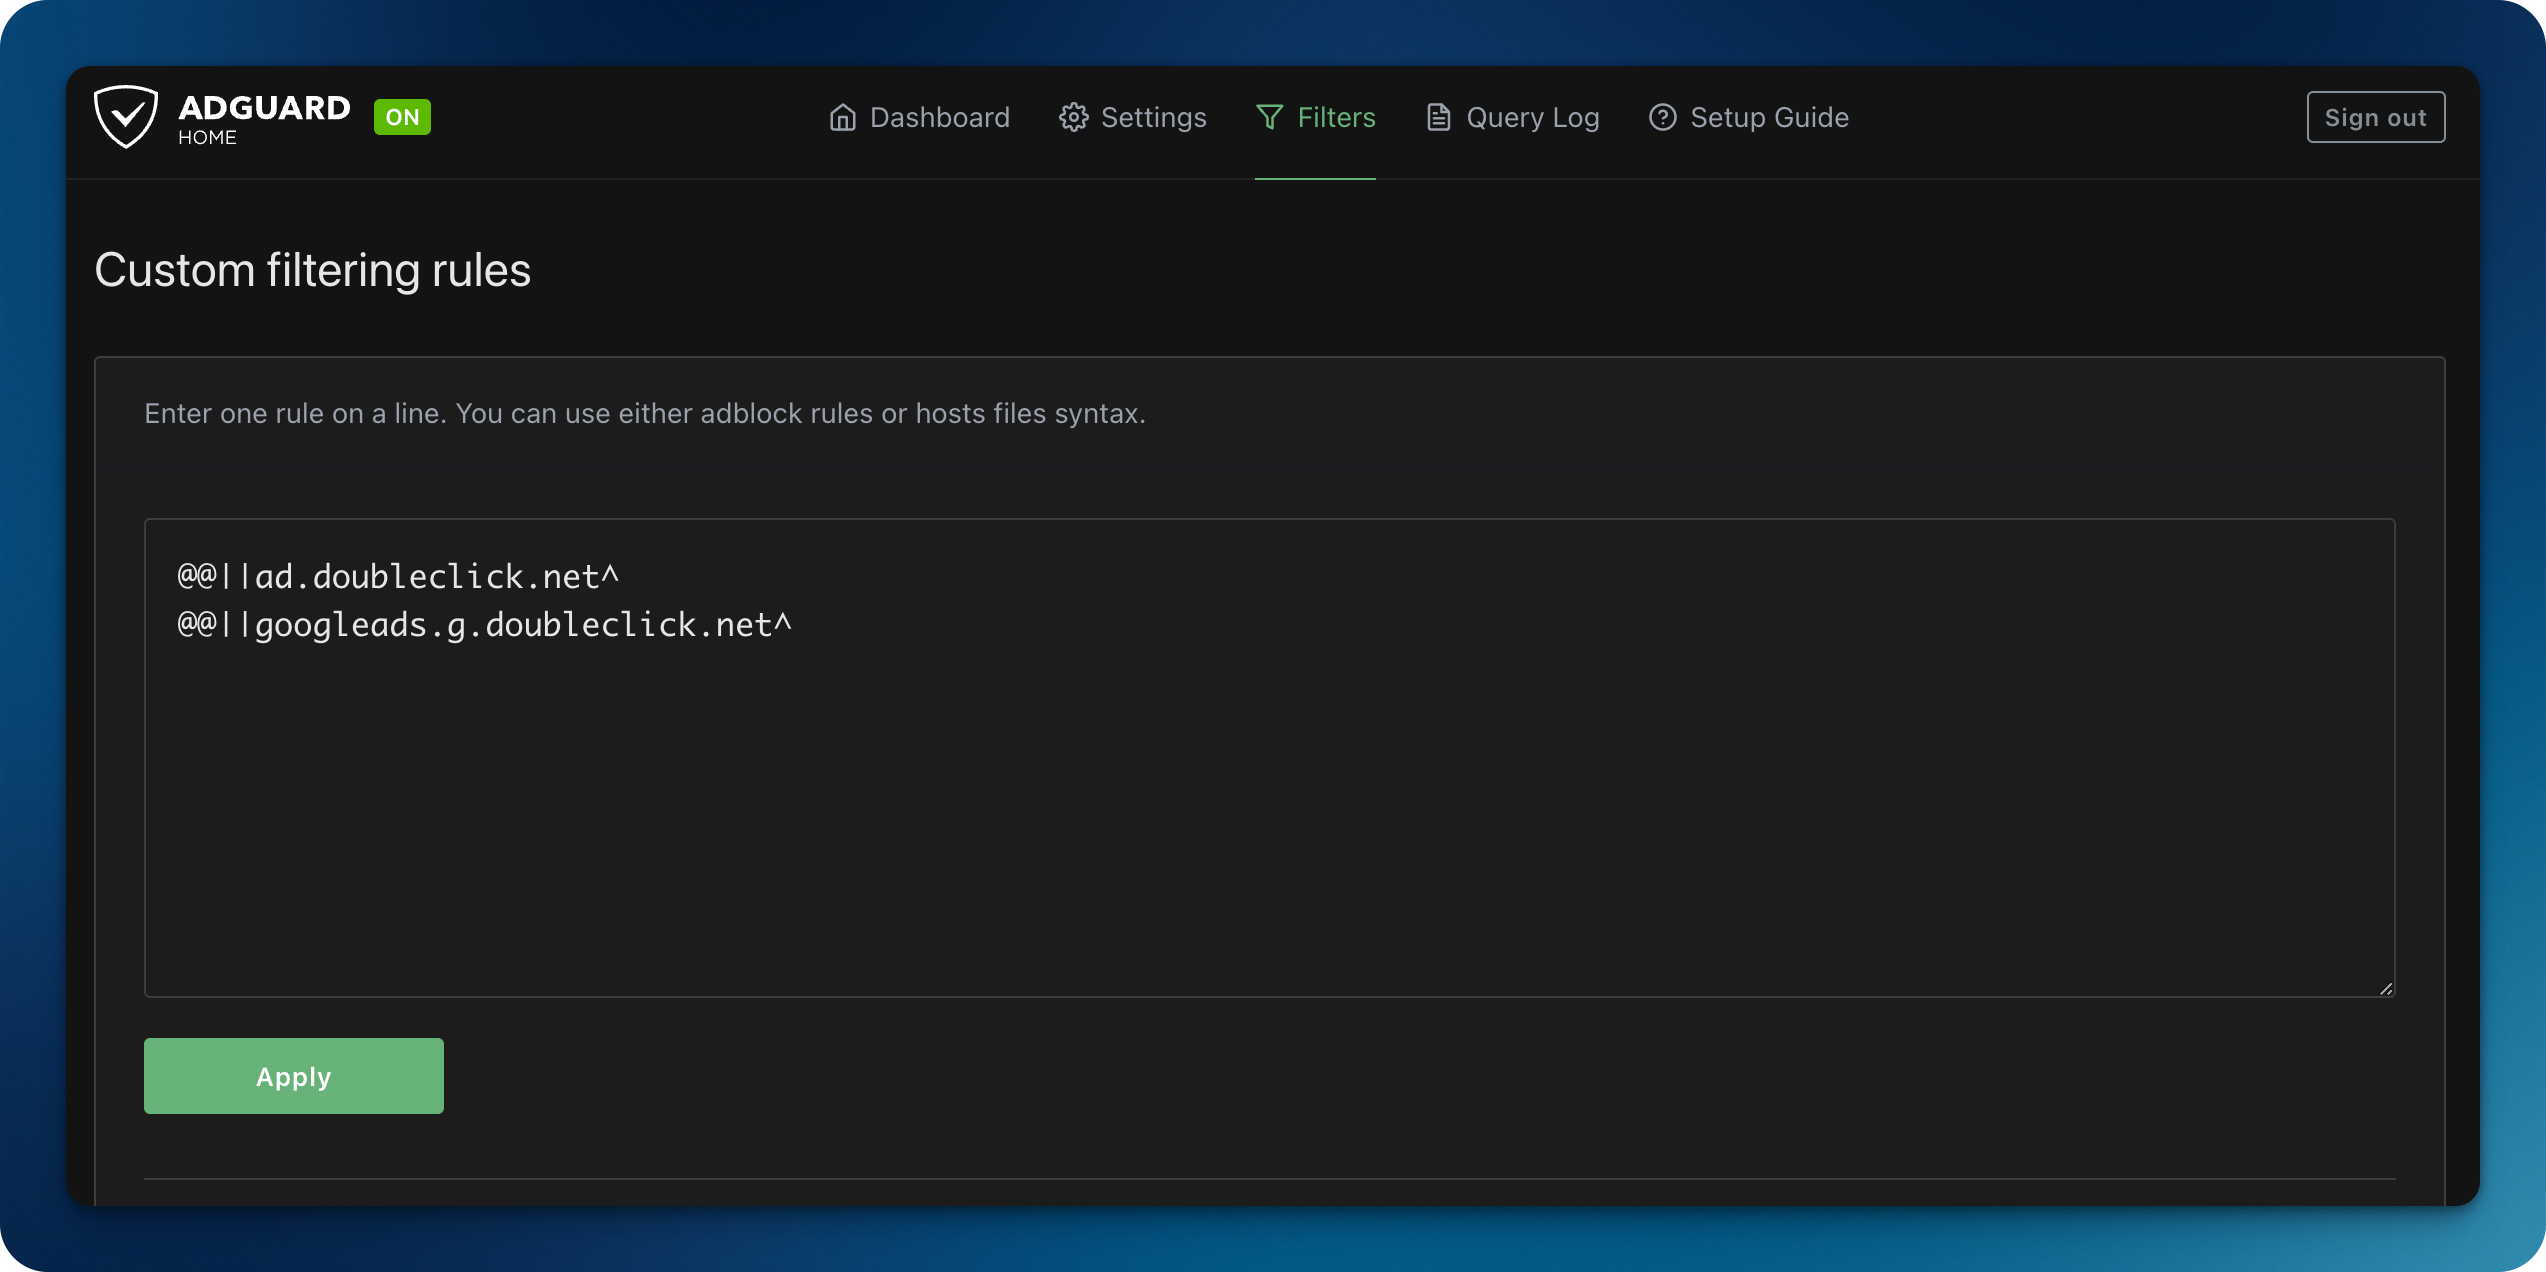
If, like me, you also like to occasionally part with non-trivial amounts your money, feel free to copy these to your AdGuard instance:
@@||ad.doubleclick.net^
@@||googleads.g.doubleclick.net^
In order to complete the AdGuard Home configuration, we need to first complete our Cloudflare Zero Trust configuration.
Cloudflare Zero Trust
In this section I will cover how I got secure and private DNS resolver endpoints from Cloudflare Zero Trust, that I then set as my AdGuard’s upstream DNS servers.
💡 Note: Before proceeding with this section, I should note that you can achieve a similar setup by just setting your AdGuard's upstream DNS servers to one of Cloudflare's publicly available pairs of DNS resolvers: 1.1.1.2 and 1.0.0.2 are configured to block malware. However, if you want to have full control over your policies, feel free to carry on.
I configured DNS Locations on Cloudflare Zero Trust. I decided to use both DNS over TLS (DoT) and DNS over HTTPS (DoH), giving me two separate private DNS endpoints.
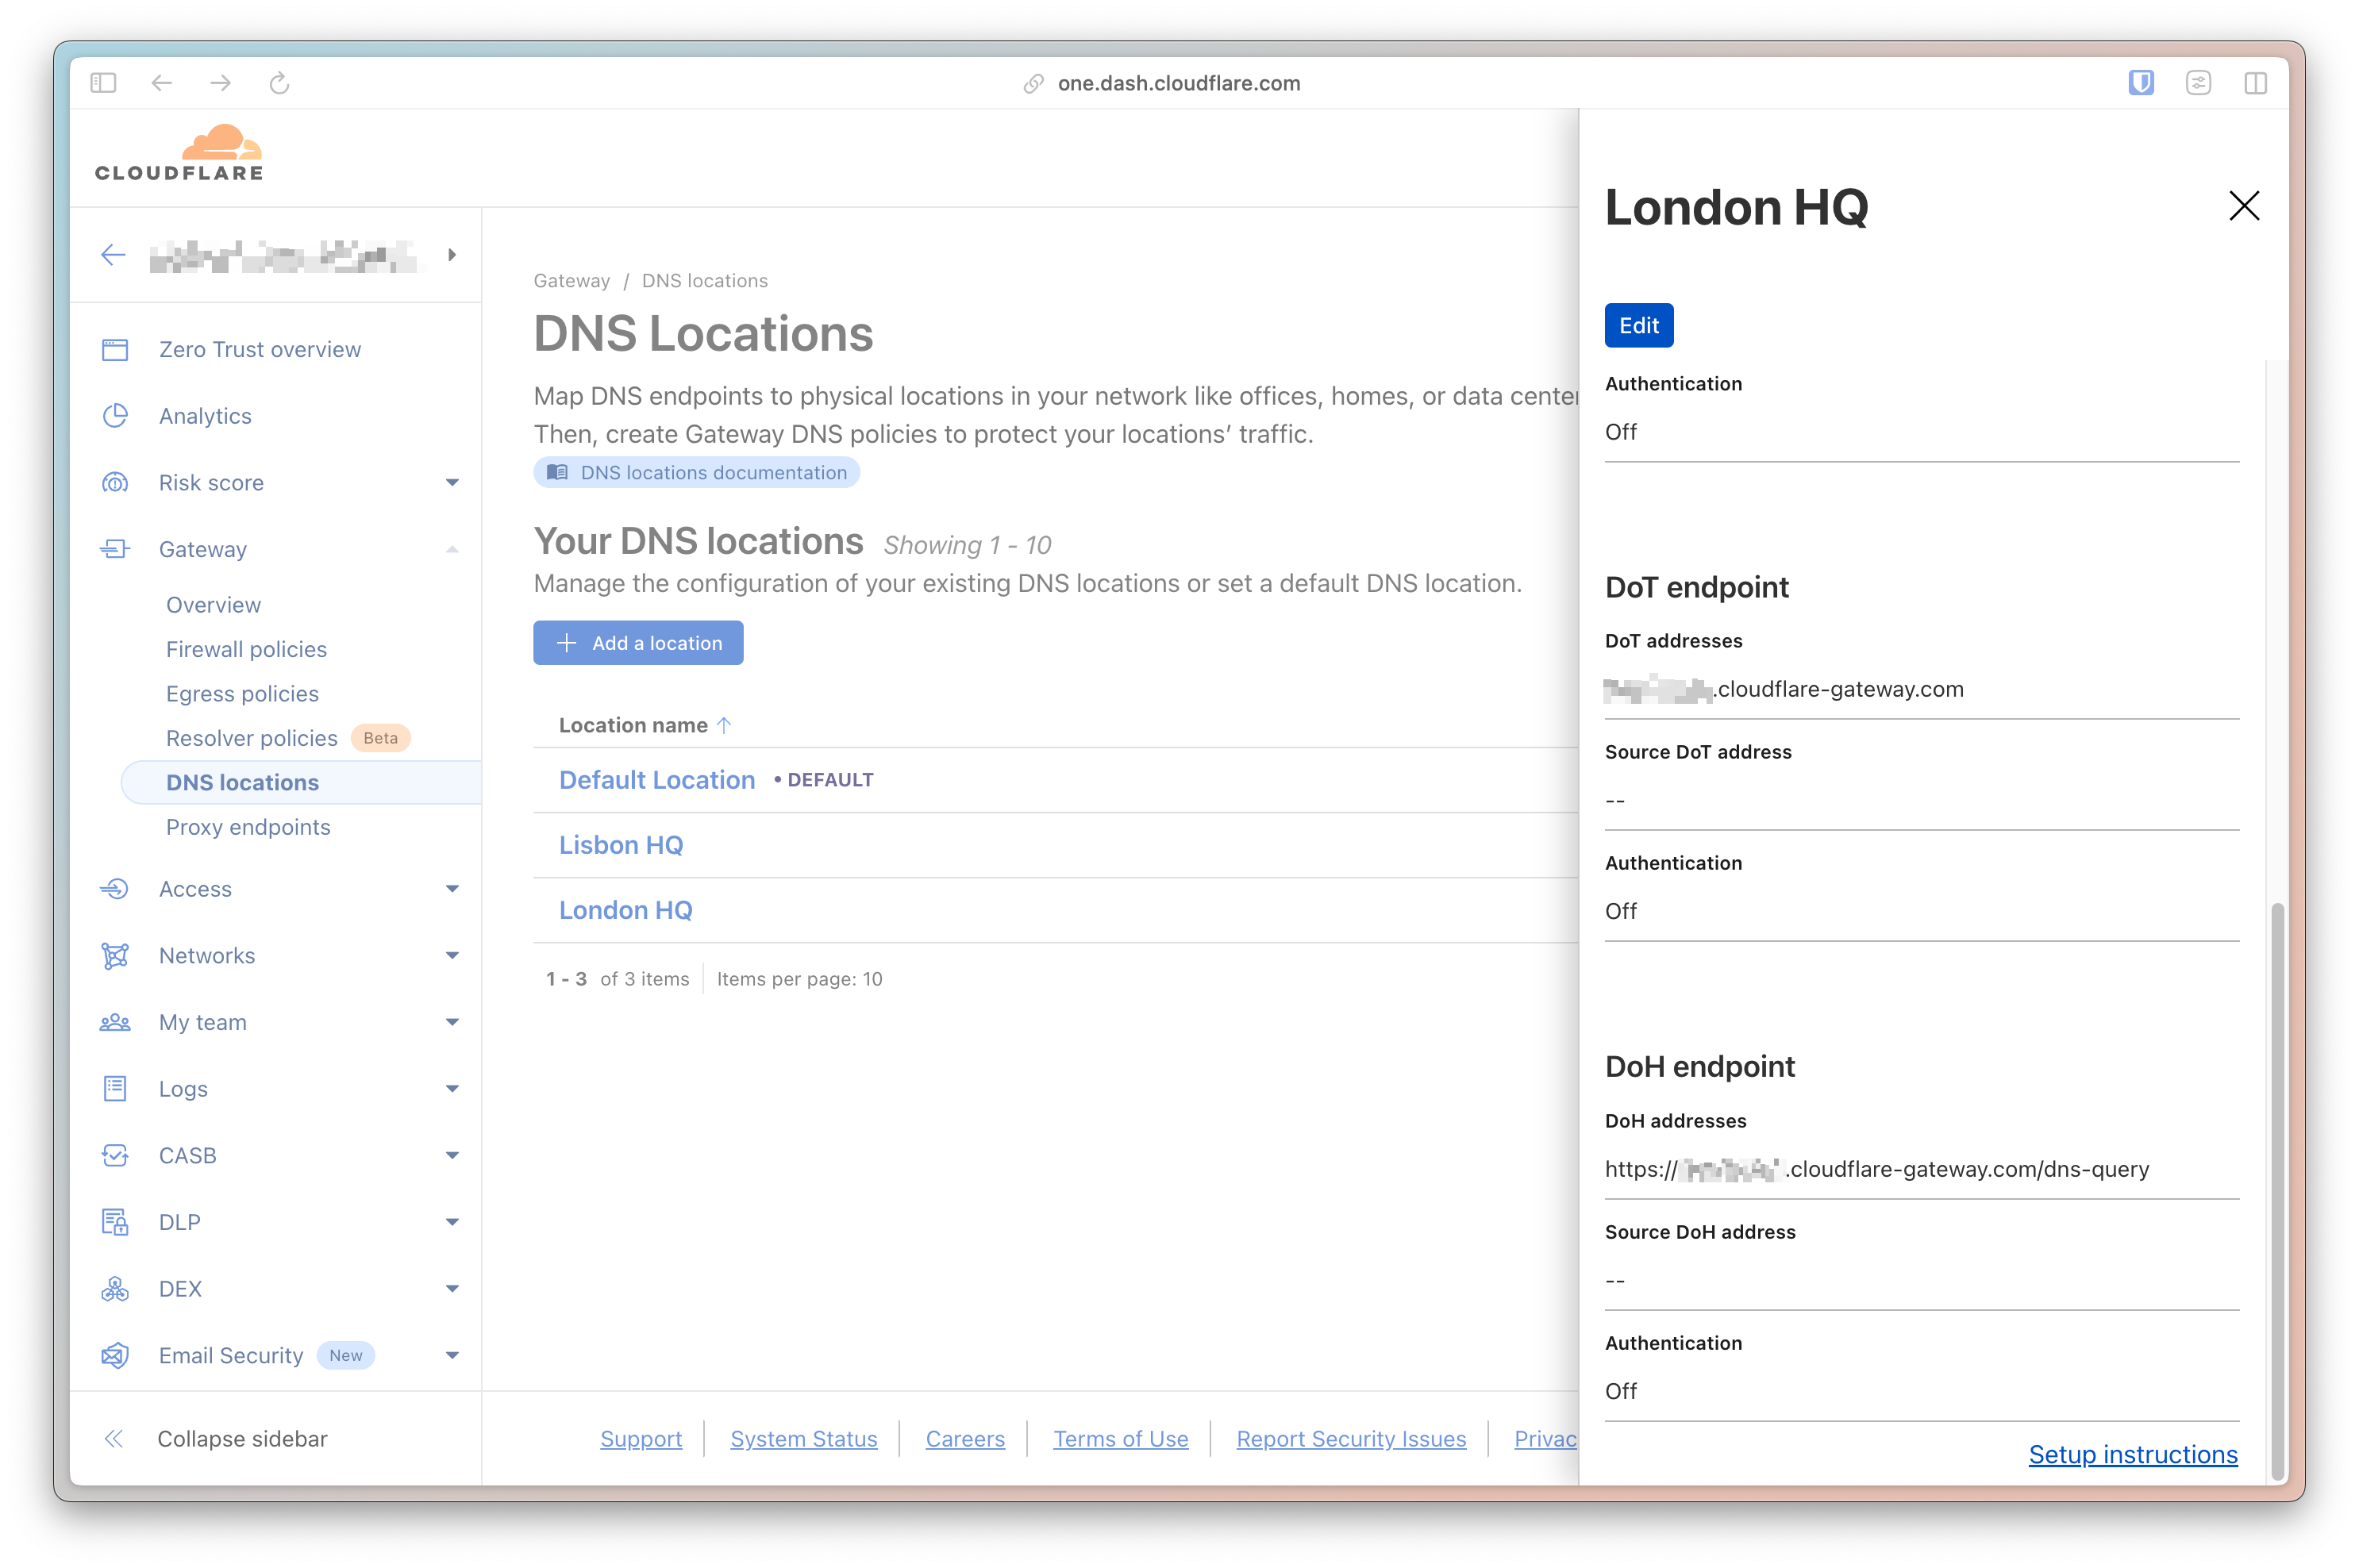
As you can see from the screen capture above, Cloudflare will provide you with the endpoints you need to forward DNS queries to.
The next step was to set up a few DNS Firewall Policies. This is done by going to the DNS tab of your Firewall policies within Gateway.
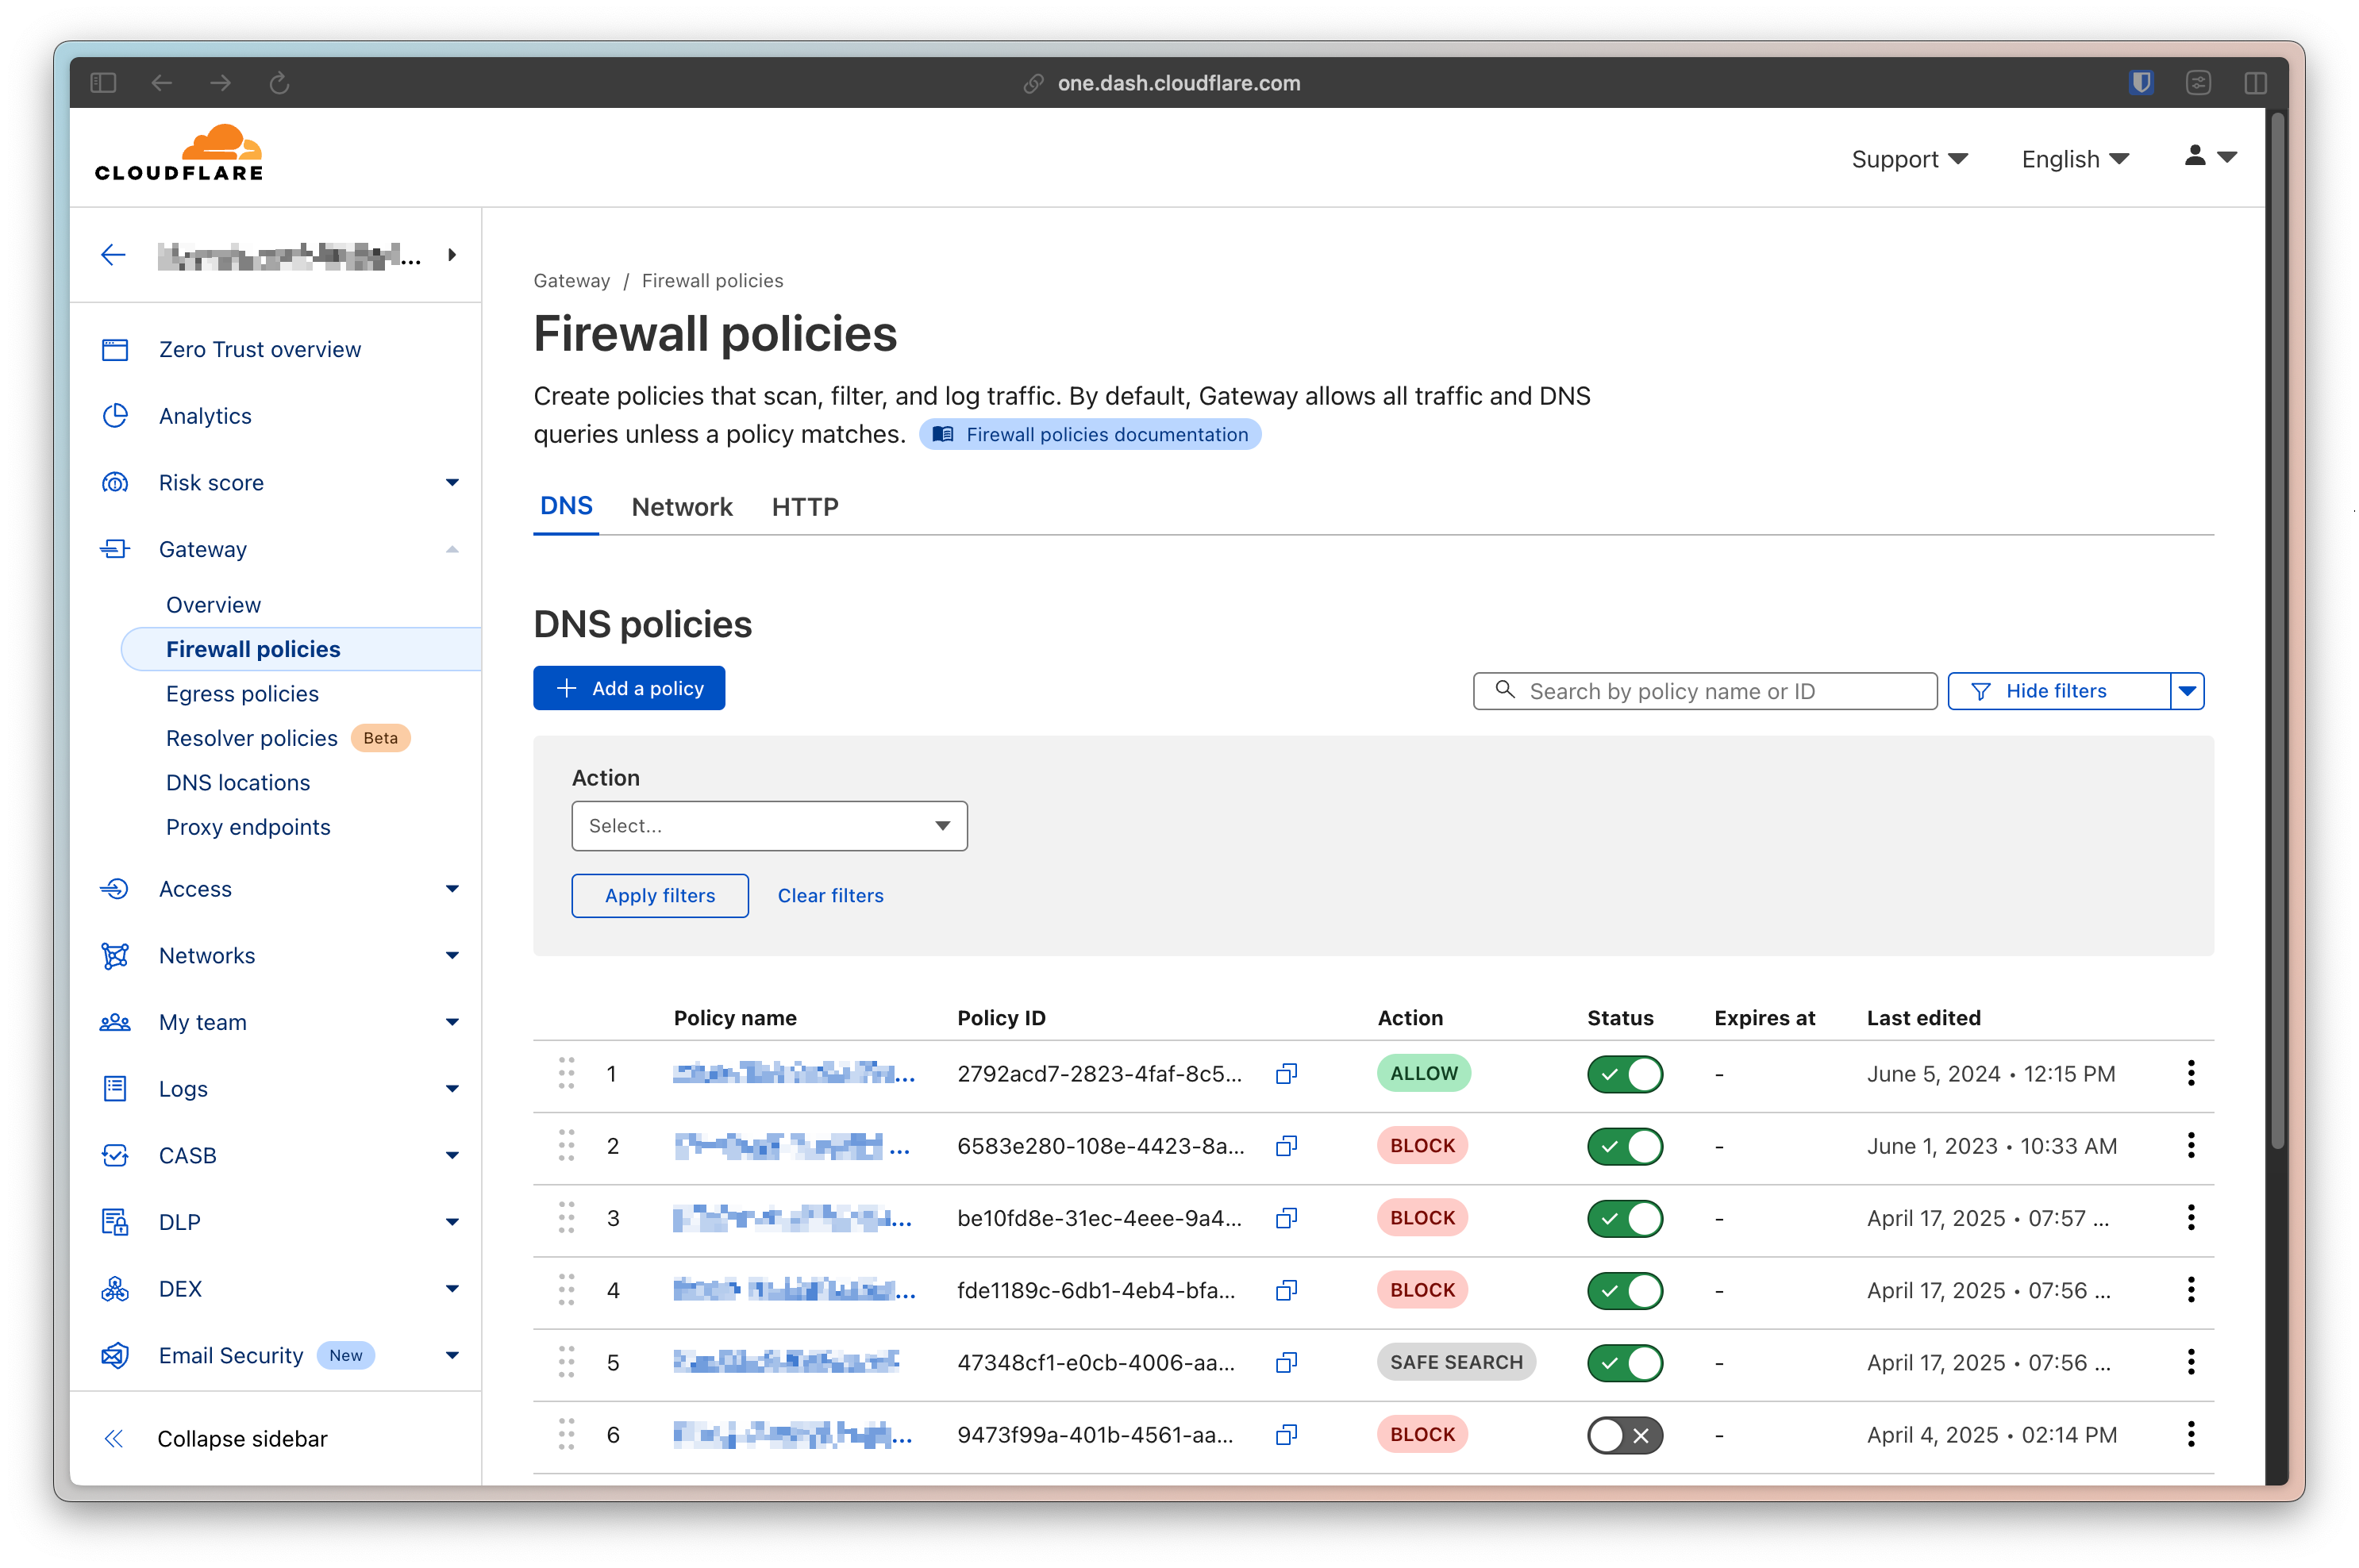
Creating a DNS policy is fairly simple, though Cloudflare provides you with a lot of flexibility to build as complex a policy as you want.
For this use-case, we really only need one policy, but you’re free to create the policies you want. We’re going to rely on Cloudflare’s managed lists of threat intelligence and create a policy that will protect our guests against “Security Risks”. Just pick the Security Categories selector and pick all the categories.
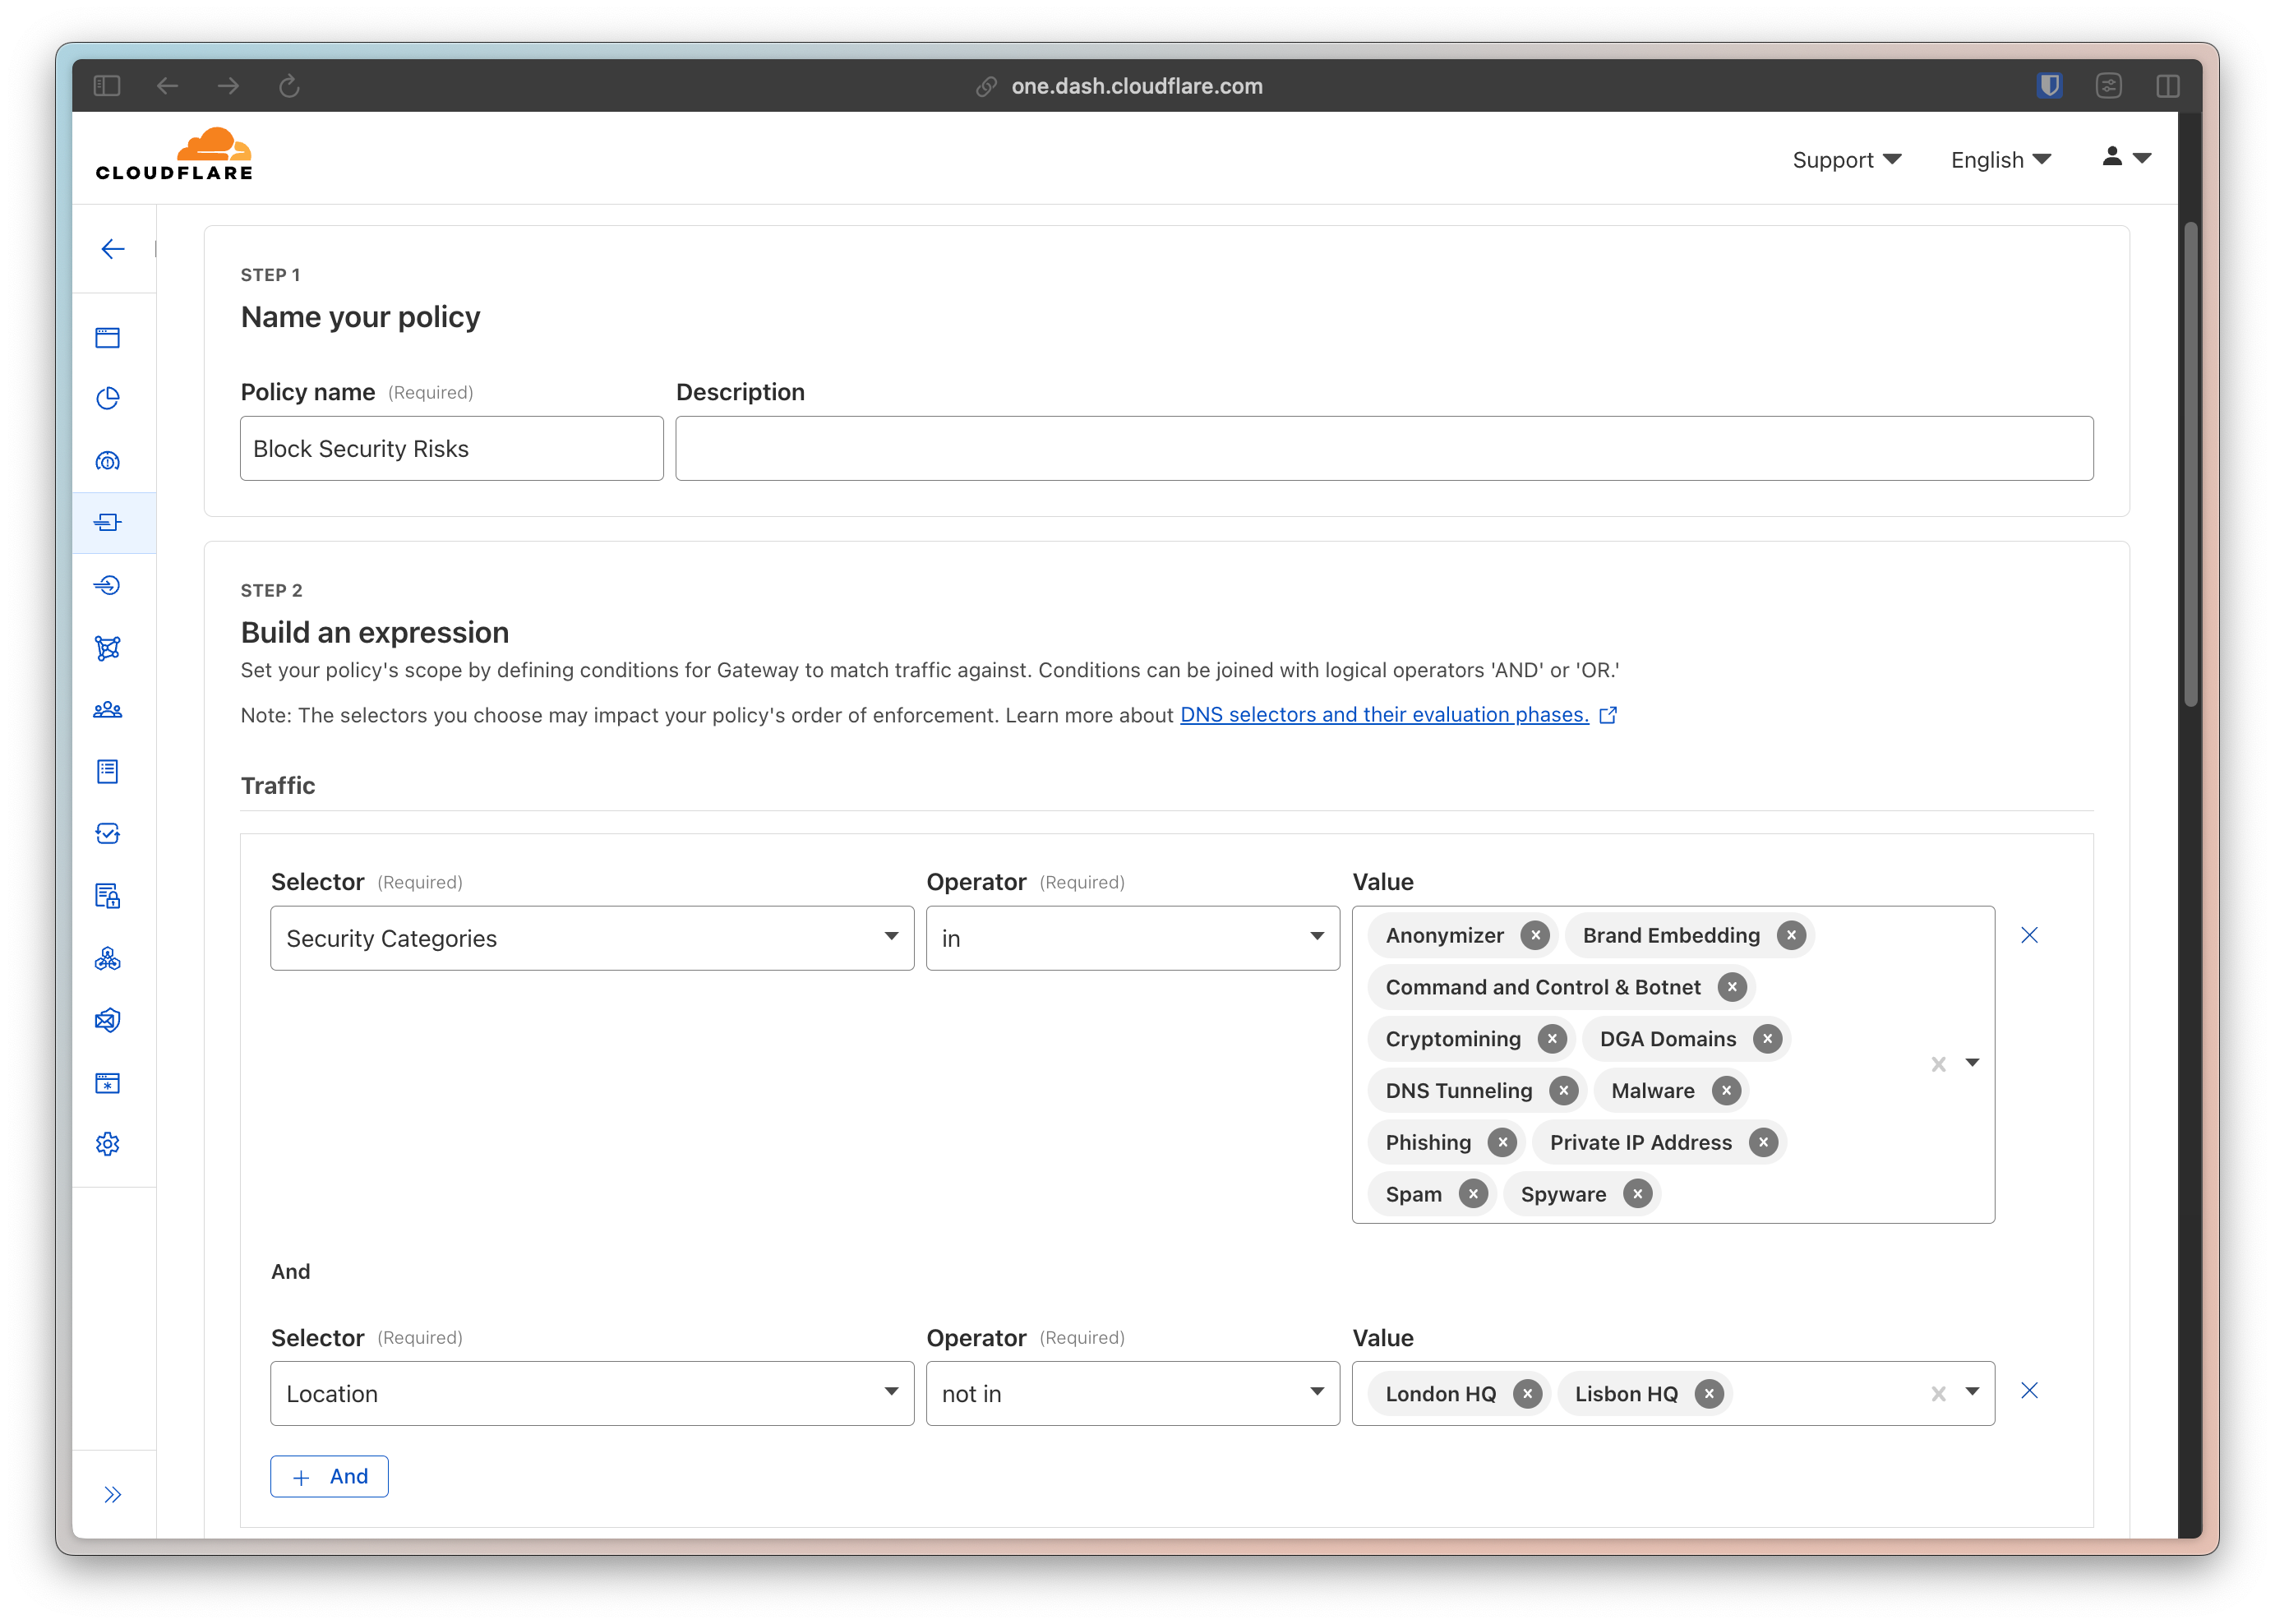
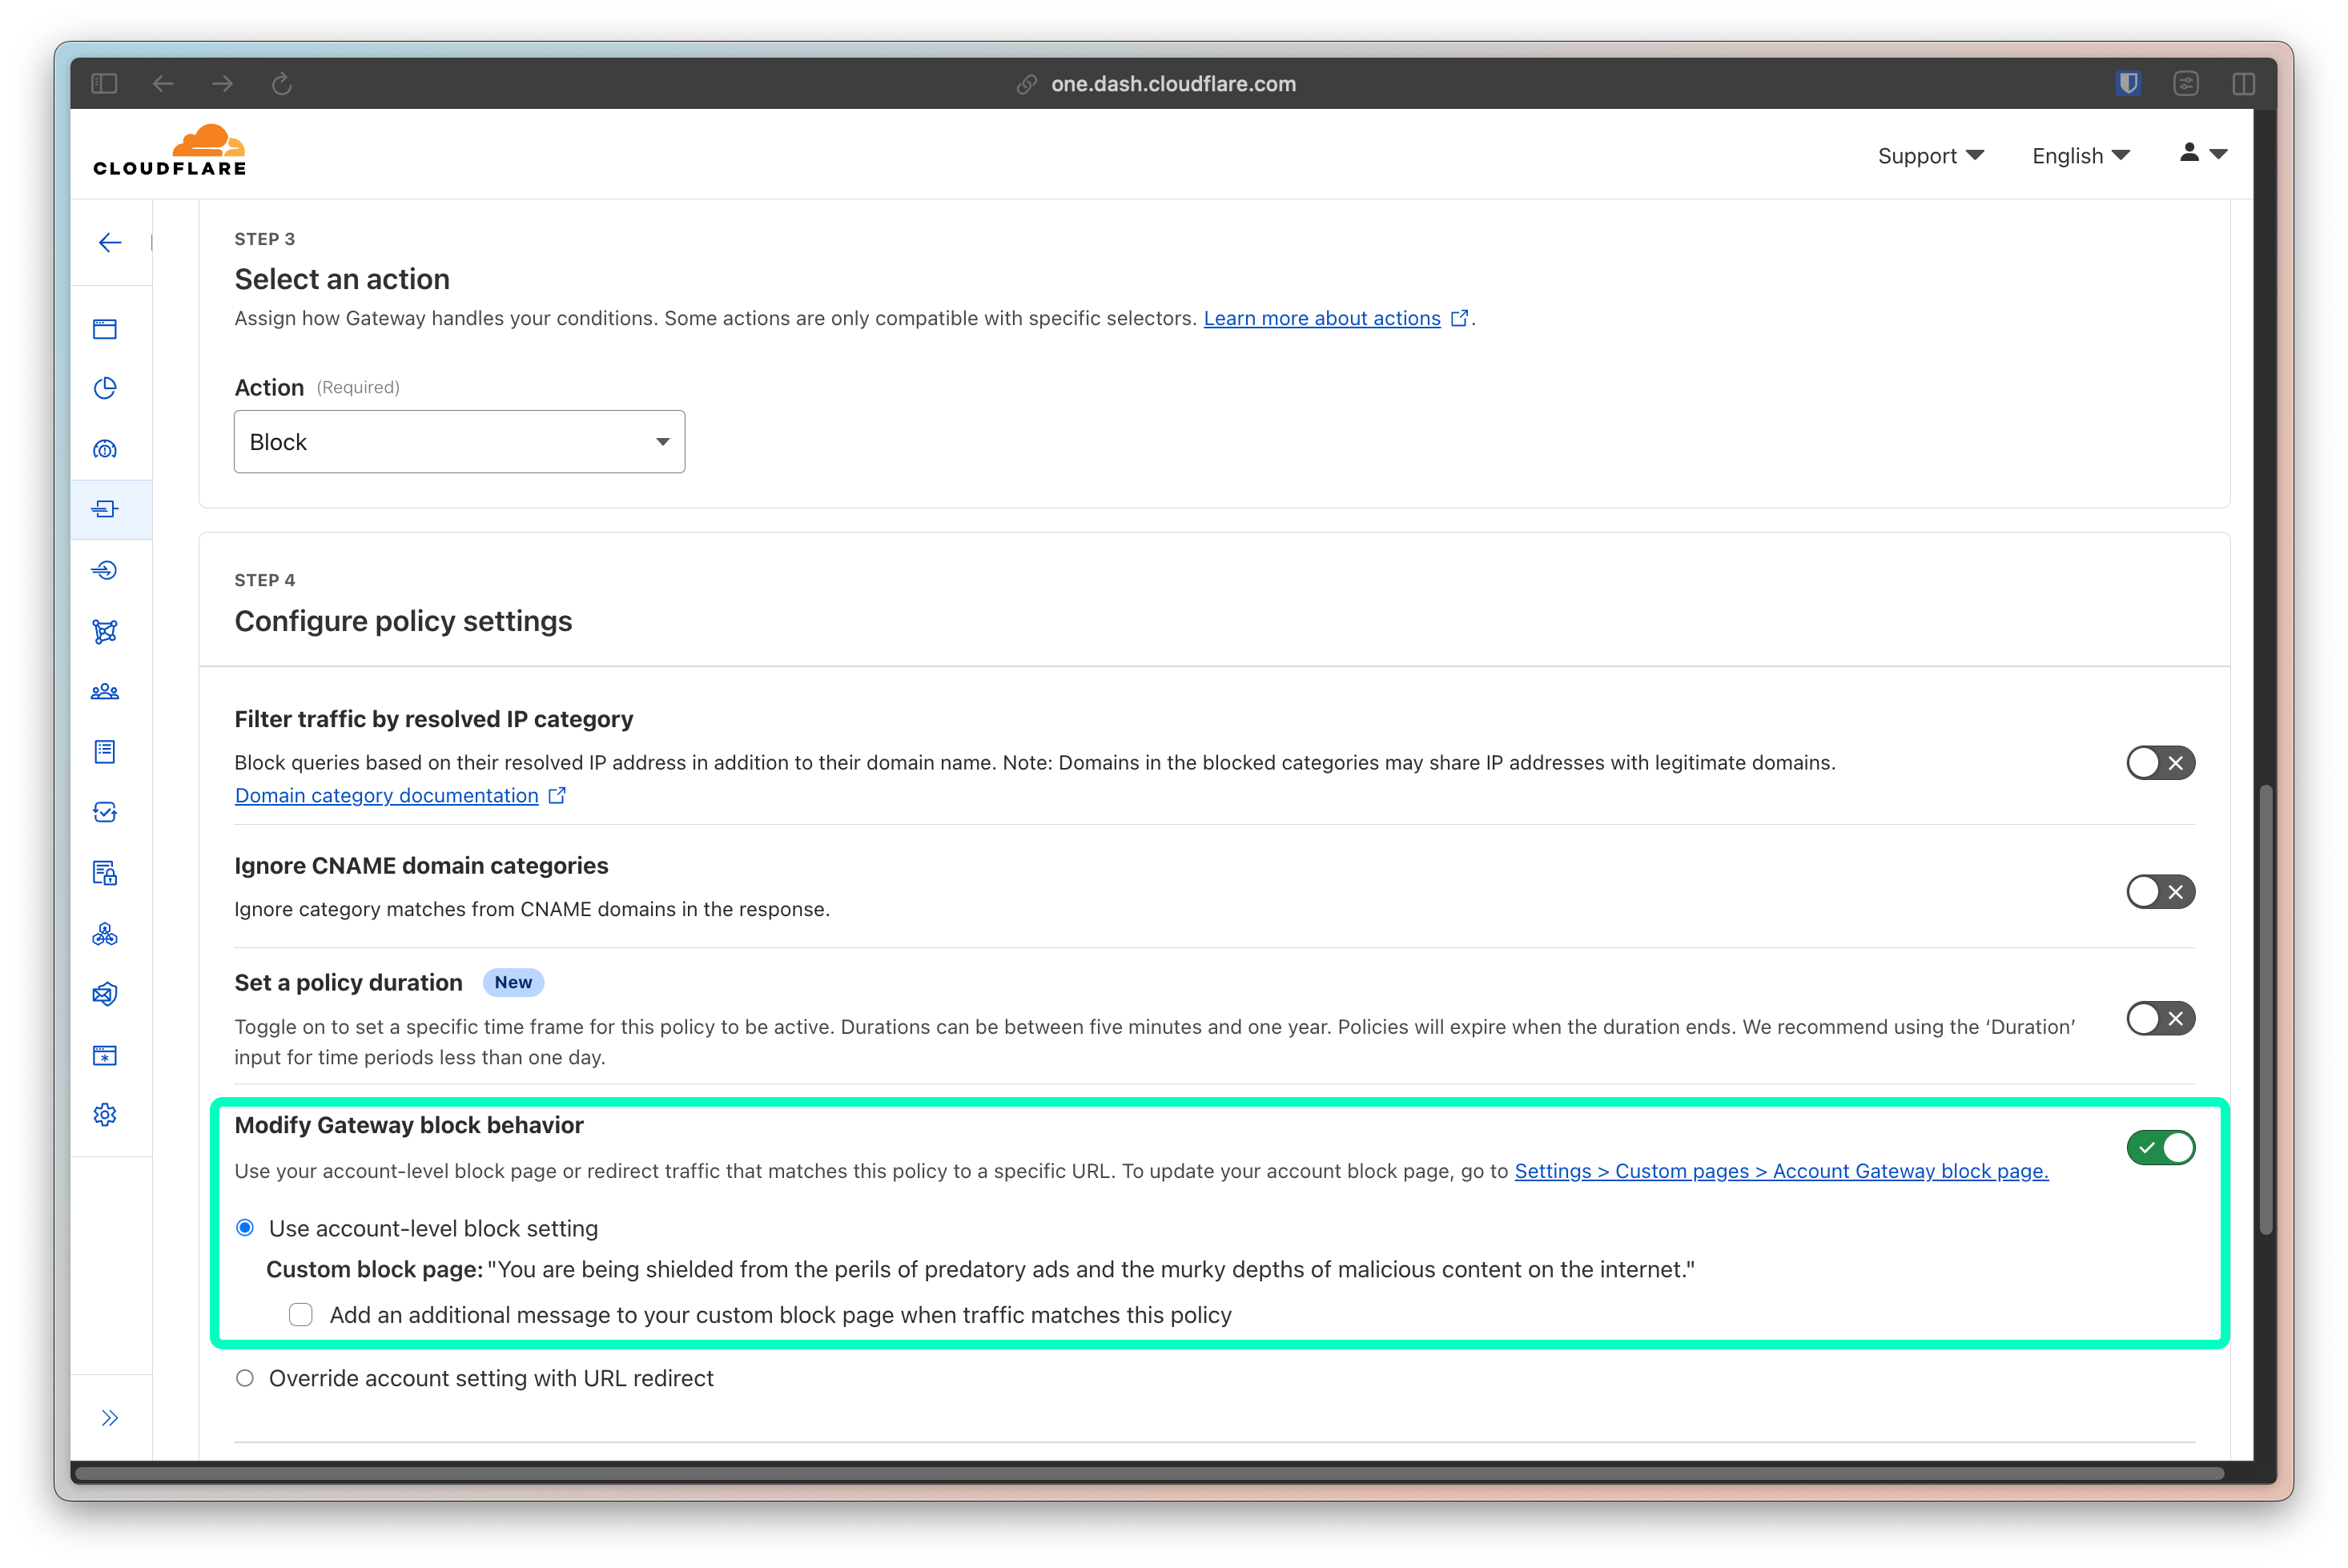
We then just need to set the the action to Block.
💡 Note: If you want to go a step further and create a more elegant blocking experience, you can set the policy to use a customized block page or even redirect the user to another page entirely.
In my case, when a guest gets blocked, they see this (minus the blur):
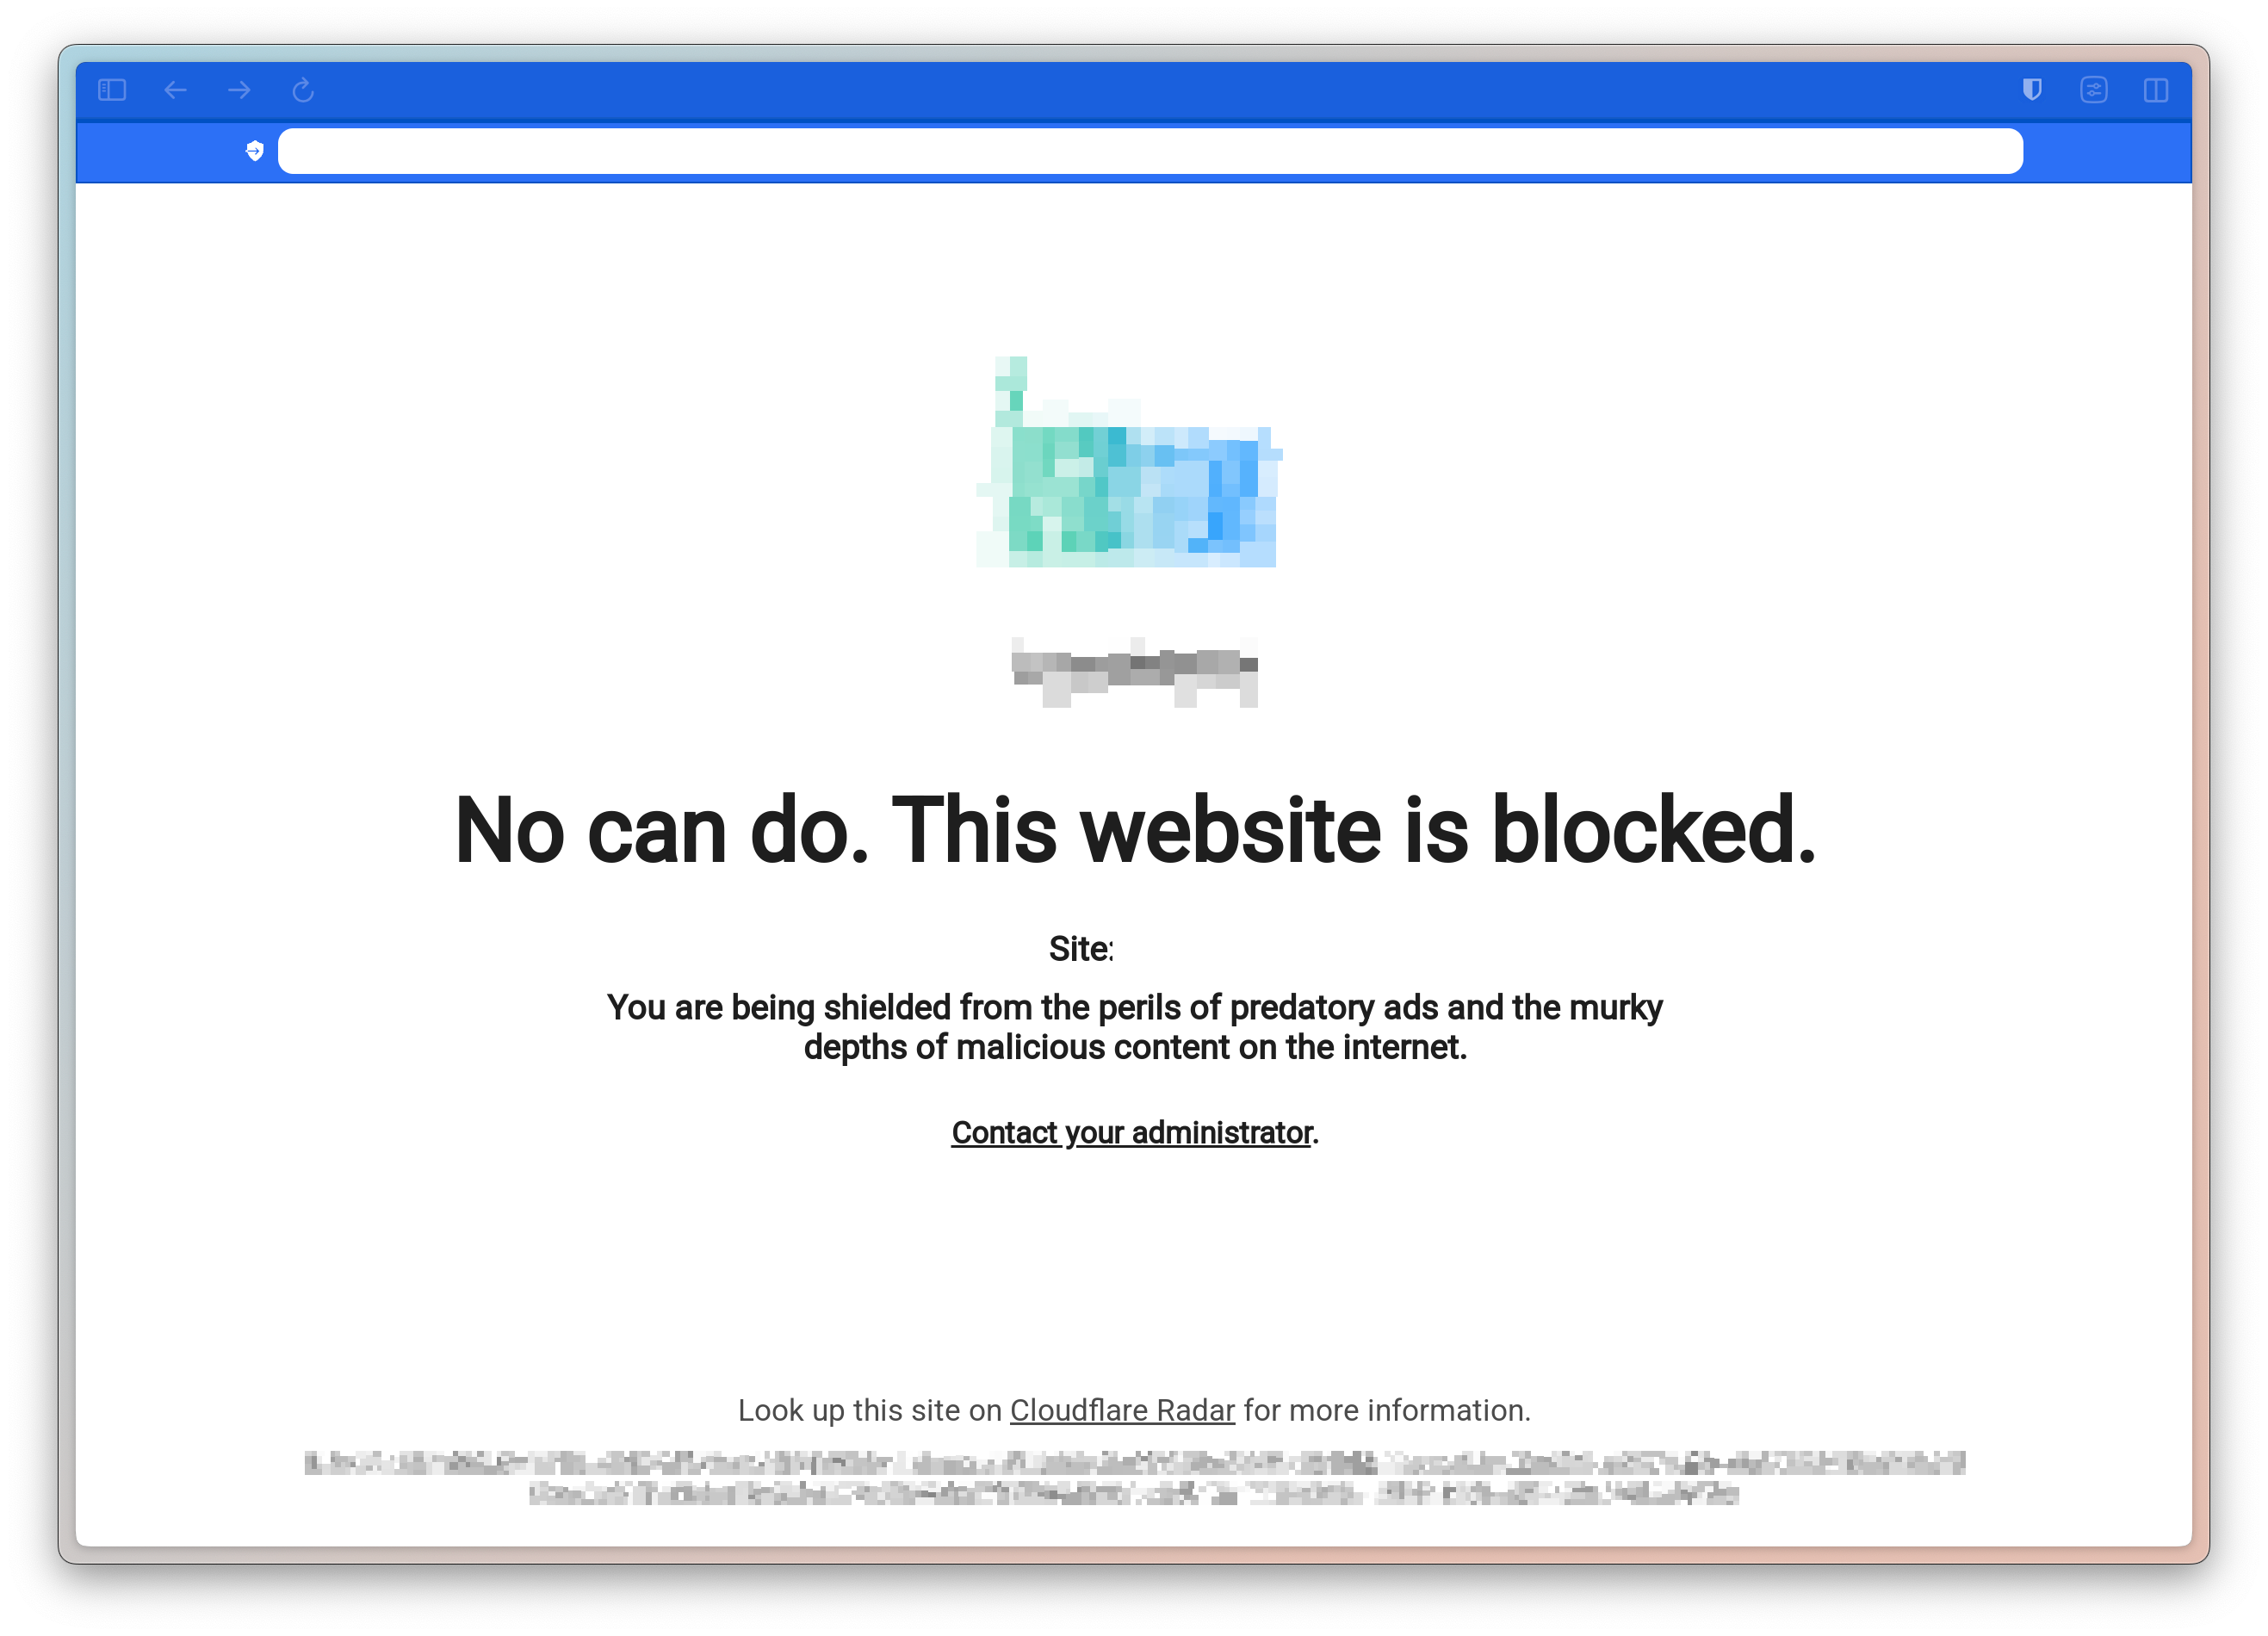
Now we can go back to AdGuard Home and complete the configuration.
We will set our new private Cloudflare Zero Trust DNS endpoints as the upstream DNS servers within AdGuard’s settings.
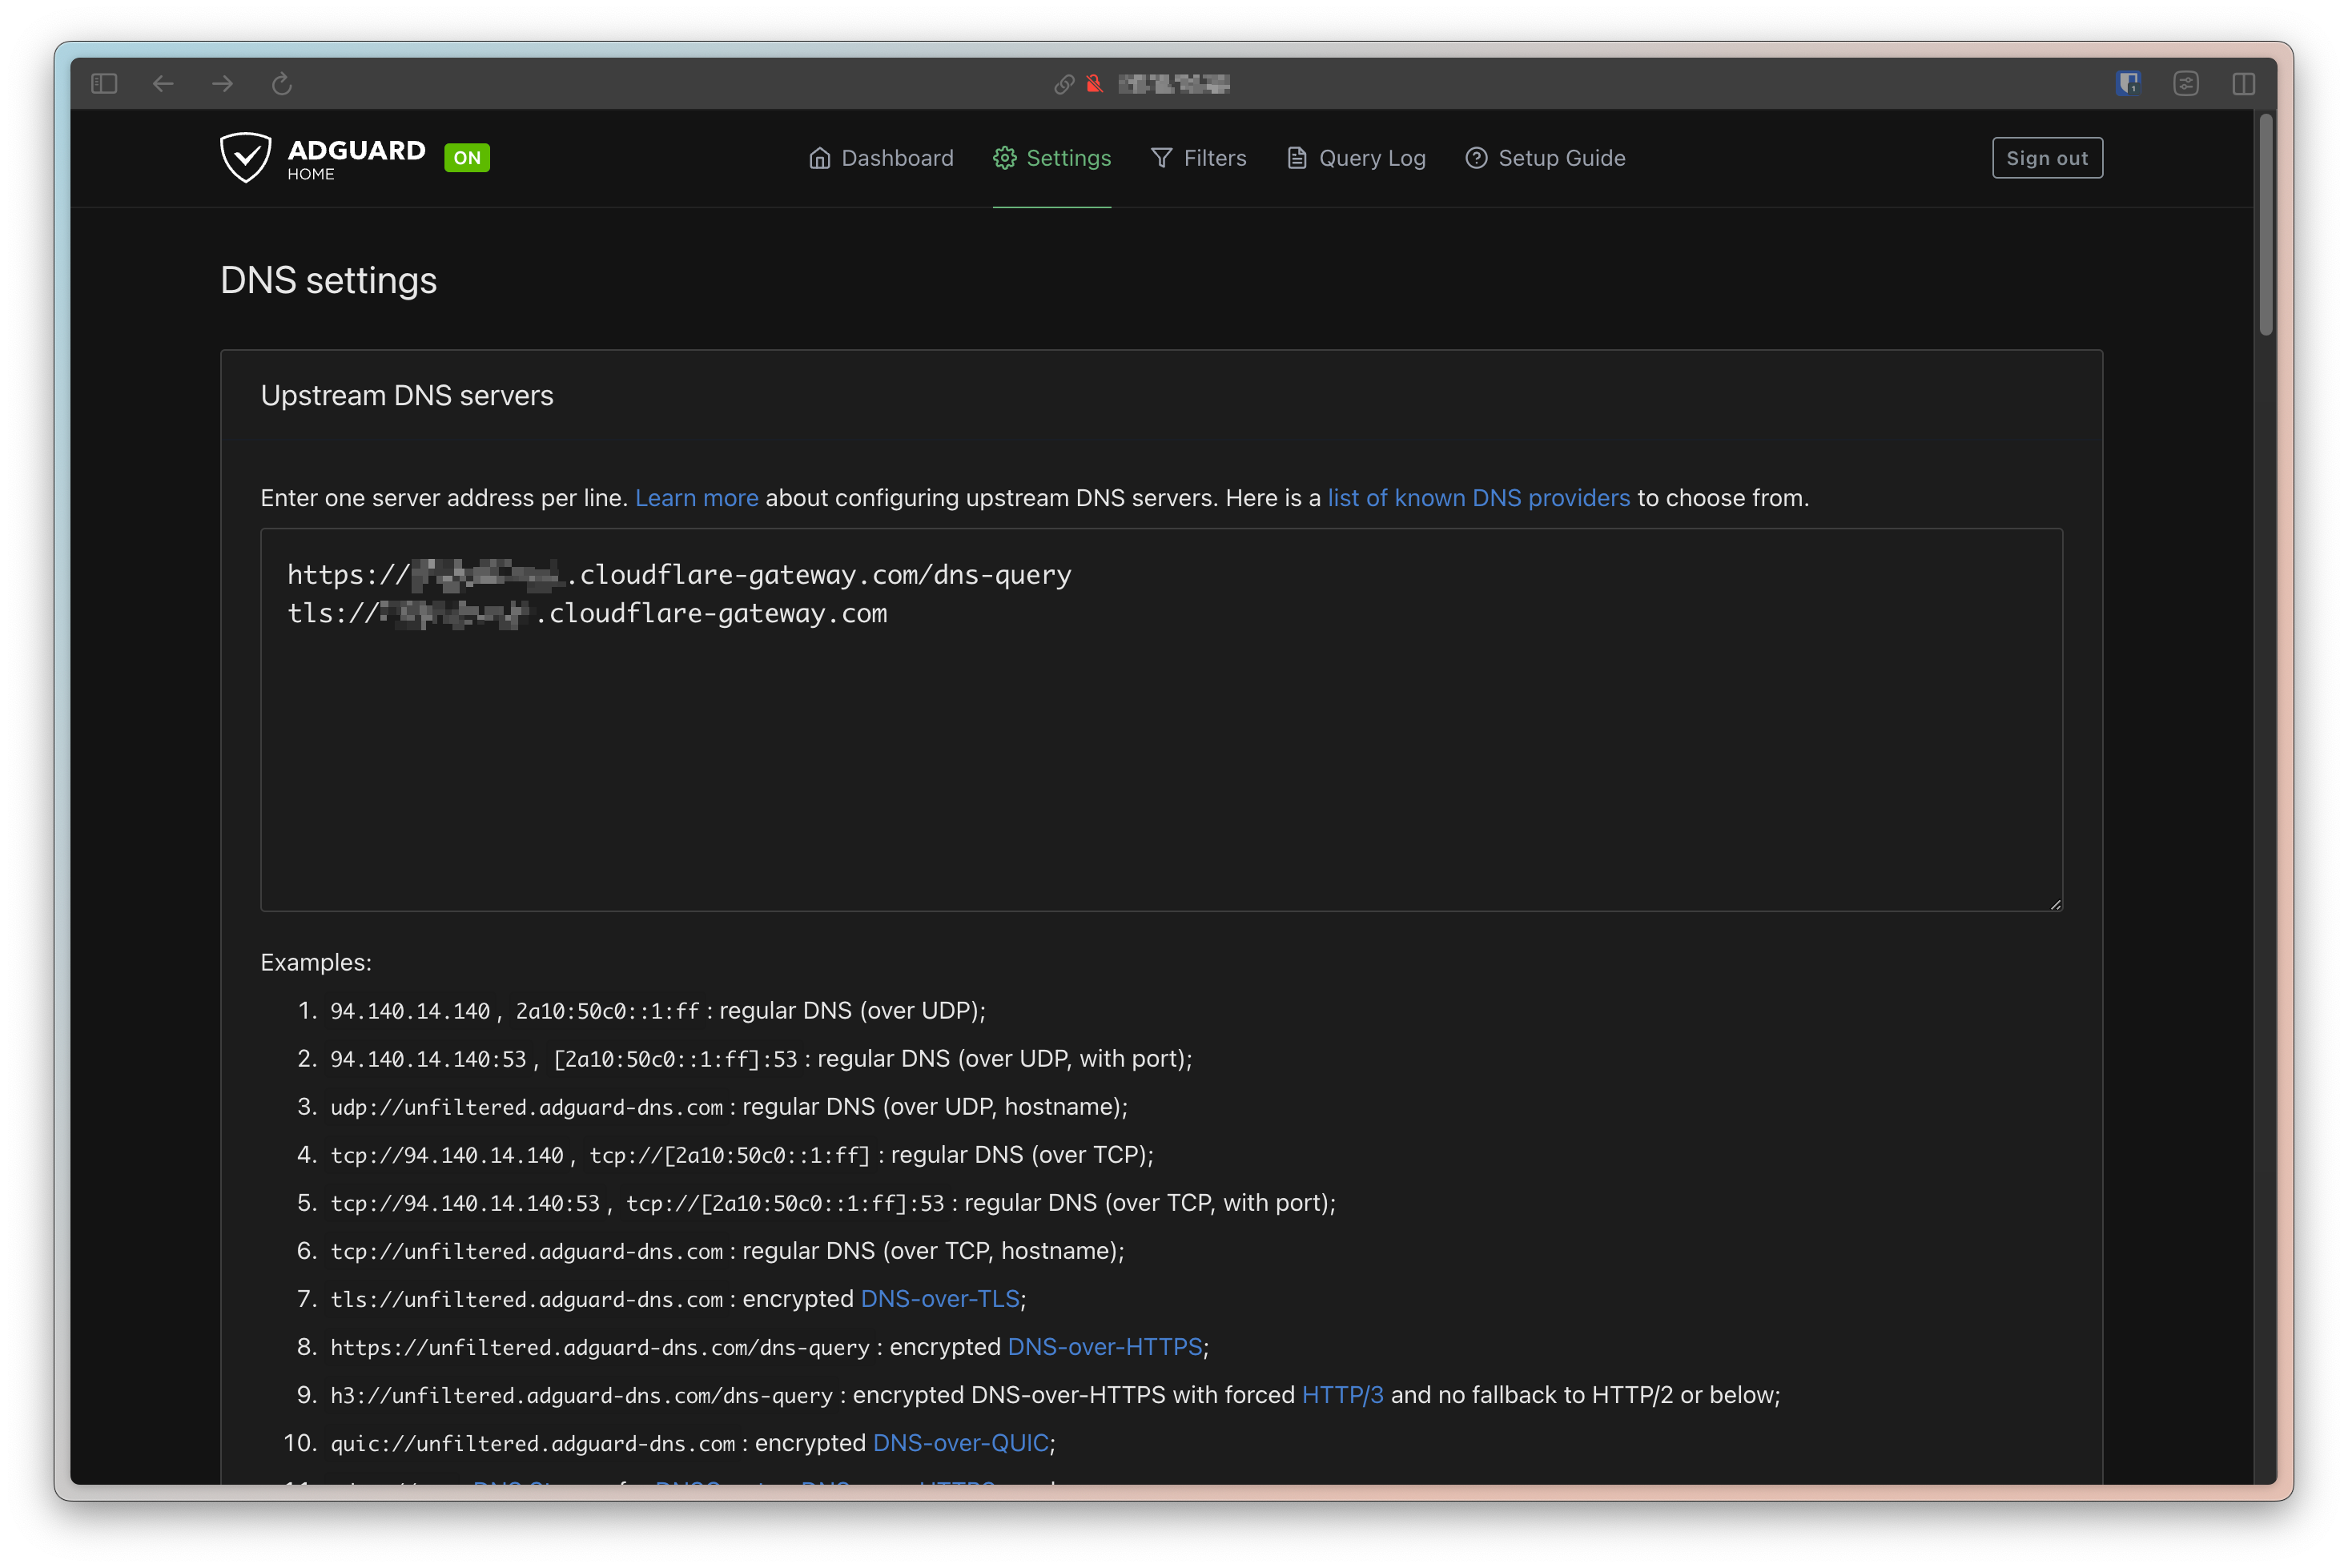
This will ensure that, after filtering for ads, AdGuard will route DNS queries over to Cloudflare Zero Trust, to be filtered by our DNS policies.
Configuring DHCP
The final step is to ensure that our guests’ DNS queries are automatically sent to our AdGuard instance.
DNS servers can be configured at the device level, but I wanted this to be a seamless experience for guests, so I had to configure my DHCP server to populate the DNS endpoints of its clients with my AdGuard’s instance IP address. The way this is configured will depend on the router you use, but even the hubs provided by ISPs usually allow you to configure DHCP.
I use UniFi, so I just went to my Network settings, and changed my DHCP configuration to set the DNS Server to my AdGuard instance.
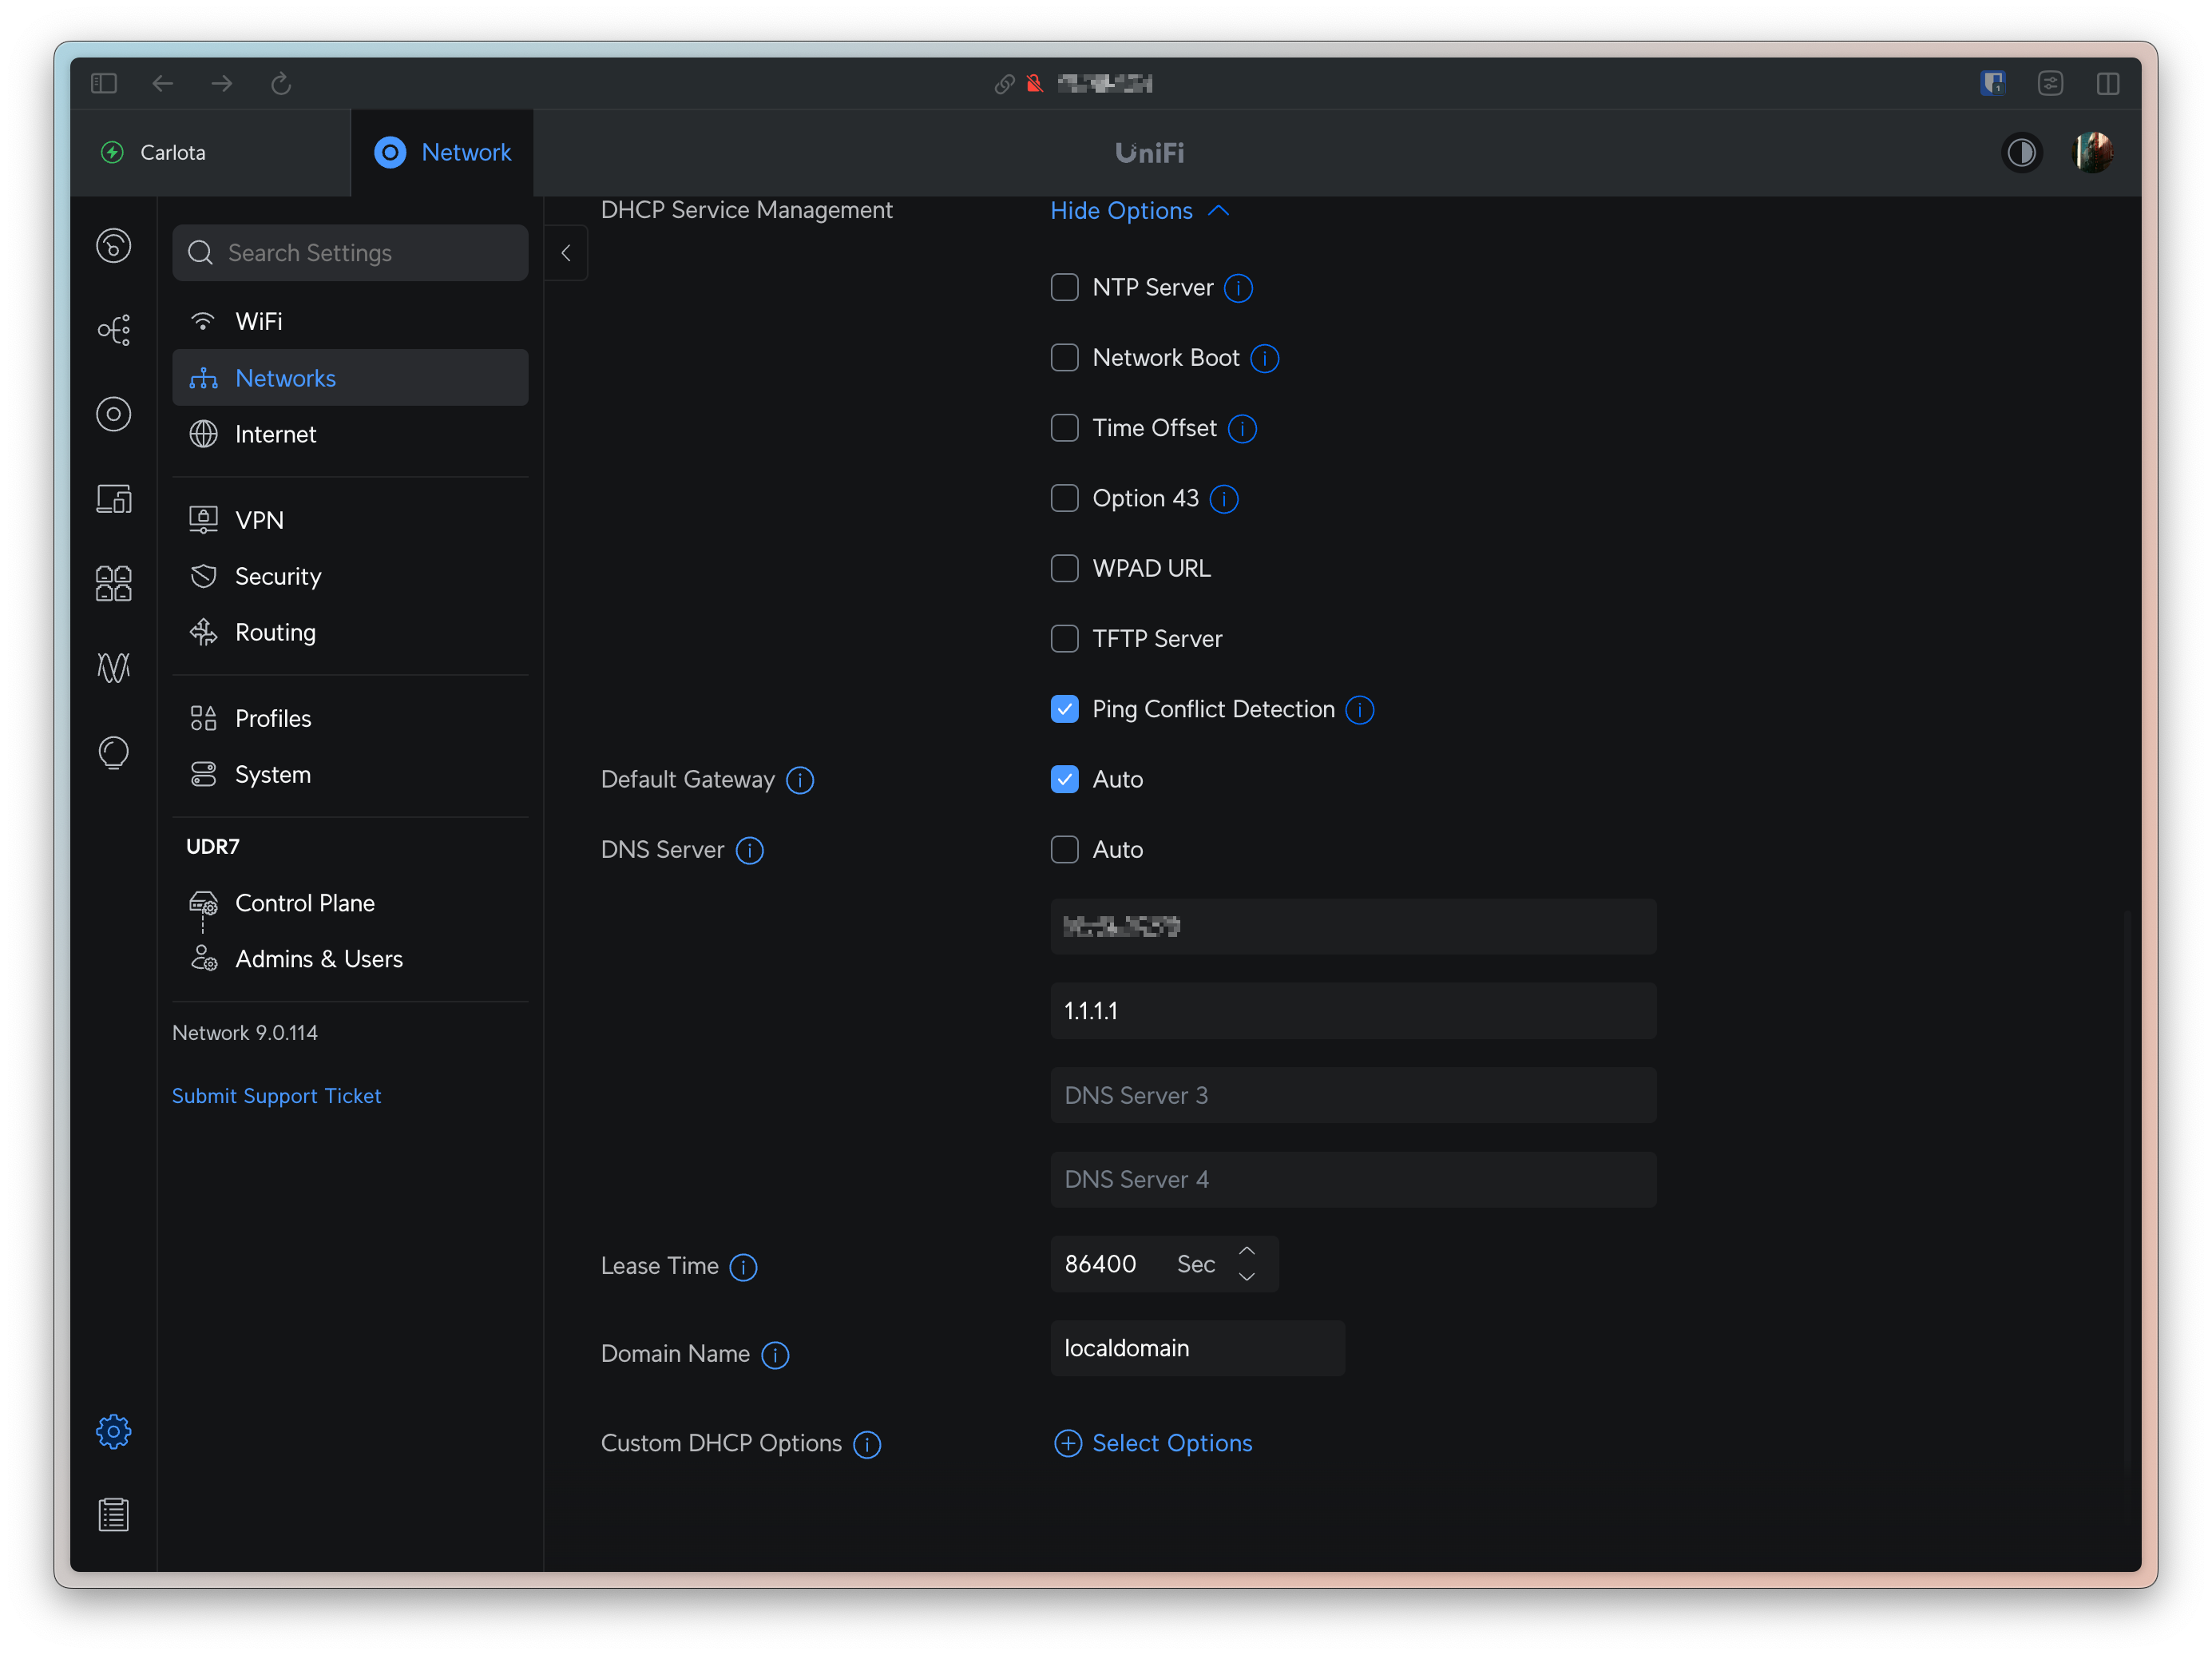
Note that I also added 1.1.1.1 as a secondary DNS server. This is there in the rare case I need to bring my Proxmox server down (and my AdGuard down with it). It will guarantee that my guests will always have a functional DNS resolver.
Conclusion
Feito! These are all the steps I took to setup a needlessly over-engineered Guest WiFi network, from streamlining the way my guests connect to it, to guarantee that they remain protected when doing so. It was a fun weekend project.
I emphasize that one of the main goals of this blog is to serve as a personal reference for my past configurations, enabling me to replicate them in the future if needed. By sharing this publicly, I aim to not only disseminate my learnings but also invite new ideas and feedback from you. Feel free to reach out to me on my social media!